7 min read
Setup and Install Yoast SEO Plugin

Hello everyone! Today I came up with a very interesting topic. How to Set up and Install Yoast SEO Plugin. You all must have heard about the Yoast SEO Plugin. It is one of the best Plugins when we talk about the SEO. WordPress SEO by Yoast plugin is one of the must-have plugins on any WordPress website. By installing the Yoast SEO Plugin you can easily secure a place on the first or second page in Google search results for your keywords.
Since this plugin offers many features, setting up the Yoast WordPress SEO plugin is not that easy. So to make your work easier I’m going to explain to you how to set up and install Yoast SEO Plugin. So, let’s get started-

How to Install Yoast SEO Plugin
Follow these simple steps to install Yoast SEO:
1. Go to WordPress Dashboard > Plugins > Add New.
2. In the plugin bar type Yoast SEO and hit enter.
3. In the search results see a plugin named Yoast SEO by Team Yoast.
4. Click Install Now, installing will start and take a while to complete.
5. Upon completion, you will see the Activate button. Hit Activate, it will take another few seconds and you’re ready to bang!
Also Read: Yoast SEO 6.3 Clean-up and Enhancements

Setup Yoast SEO Plugin with optimized settings
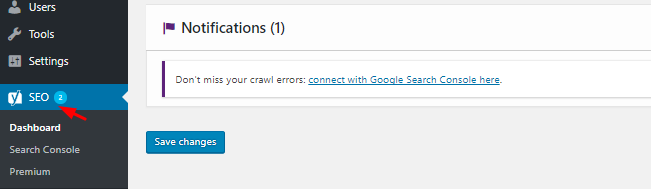
It was all about the installation process of the Yoast SEO Plugin. Now if you have installed the plugin you’ll get to see a new SEO menu item appear on the Dashboard.
Also Read: Good News Yoast SEO 5.7 is out now!
Now the first thing you will do after activation is Go to Dashboard > Features > Advances setting pages & enable this feature.
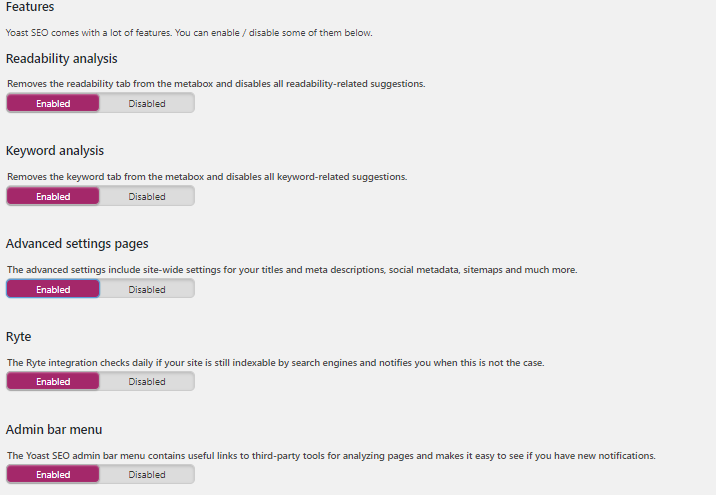
You will have to enable all the options. These features as necessary for your effective SEO ranking
Readability Analysis - Enable this. It adds a readability tab in the meta box. And also enables content readability-related suggestions.
Keyword Analysis - Enable this. It adds a keyword tab in the meta box. And also enables keyword-related suggestions for content.
Advanced Settings Pages - Enable this. These advanced settings include site-wide settings for titles, meta descriptions, social metadata, sitemaps, etc.
OnPage.org - This enables onpage.org integration. It checks daily whether your site is indexable by search engines. You will be notified when the site is not indexable.
Admin Bar Menu - The Admin bar menu is important for accessing useful links to third-party tools. It also indicates new notifications.
Cornerstone Content - This allows you to mark and filter corner content on your site. In a nutshell, Cornerstone Content is the content around which most of the content is created. In other words, the content which describes the niche of your website.
Also Read: Yoast Vs Rank Math Vs All In One SEO : Which Is Better?
Metabox Insights - Metabox insights appear below the Yoast SEO meta box in the WordPress text editor. These insights usually included prominent keywords in the content.
Link Suggestions - It suggests a list of posts on your blog with similar content. You might be interested in inter-link such similar posts.
Hope you get the idea of why these points are essential.
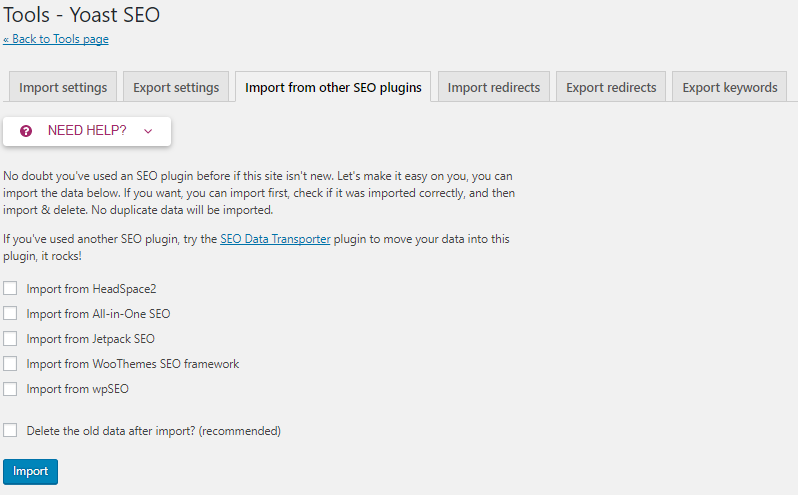
Now, when you are done with enabling all the features move on to the SEO Tools option. You need to go to SEO > Tools> Import & Export > Import from other SEO plugins in the left panel. Select the plugin from which you would like to import your settings.
Also Read: A Guide to WordPress SEO: 13 WordPress SEO Best Practices
Please Note that the above-mentioned settings can be done on the Premium Yoast Plugin.
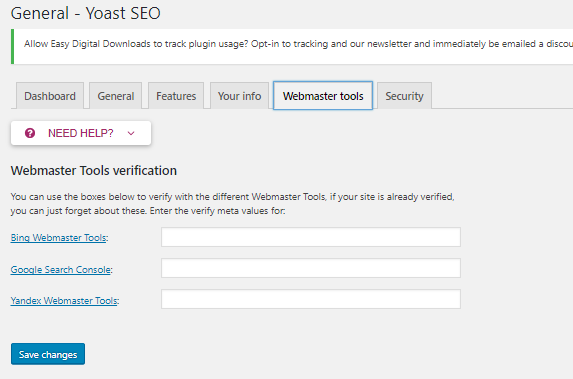
Now in Yoast SEO Dashboard, you’ll get to the webmaster tools option. You can use this webmaster tools verification feature to verify your site with different webmaster tools. If your site is already verified for these webmaster tools, you can ignore this.
But if it is not then, you need to create an account on different Webmaster Tools for your website. Enter the verification code of these webmaster services in their respective box in Yoast Webmaster Verification tools.
As for now, the WordPress SEO Yoast plugin supports webmaster tools verification for services like Bing, Google, Yandex, etc.
Also Read: Best SEO WordPress Themes 2023
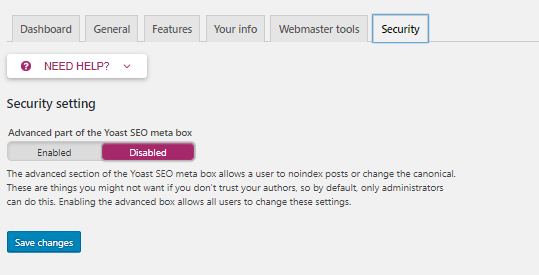
After that, you’ll see the next option besides webmaster tools is Security. As you all know security is one of the main concerns that everyone needs.
Don’t enable this security option, if you have multiple author WordPress sites and you don’t trust all the authors. By default, some options are accessible only to administrators. This option enables these features for all users.
Once you have done this, let’s move to the more advanced parts of this plugin.
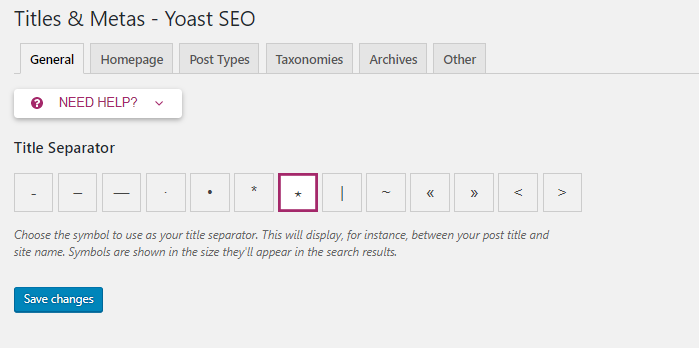
Titles & Metas
Titles and meta are the most important parts of this Plugin. Once you click on “Titles & Metas”, click on “General”. You’ll see the option of a Title separator.
Title Separator - Although there is a choice to have a separator from several available on the list. But I insist on choosing the one you think may ever be used by a user in search keywords. Hence, my favorite is a dash (-). Another angle of choosing a separator is, to have one which gives your title a unique look among other search results. From this standpoint (•), (*), or (⋆) are good.
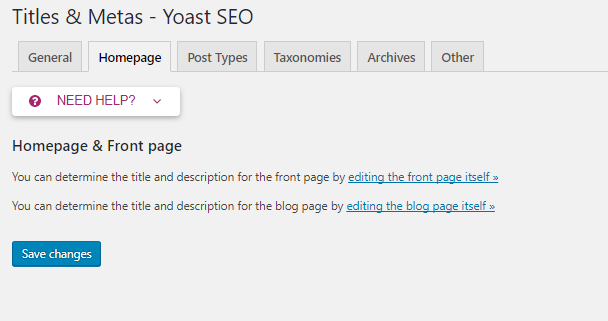
HomePage
After choosing what separator move on to the Homepage option where you’ll see two different options- Title template and Meta description template. This step is essential to bring your website to Google ranking. It depends on which title and meta description you choose for your site.
Title template: The home title that you want to show in Google search.
Meta description template: Your homepage meta description for search engines.
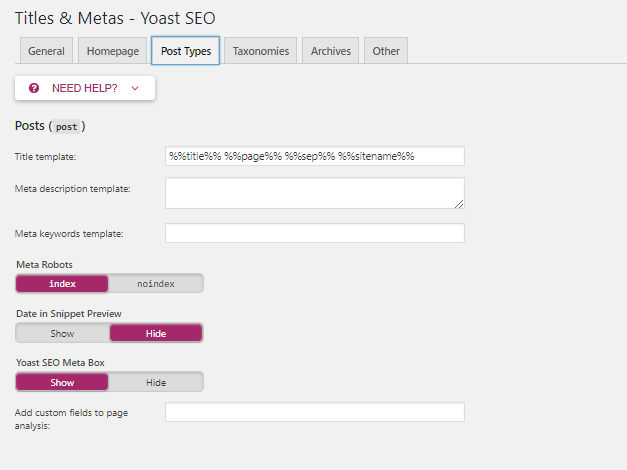
Post Types
Now another option you’ll see is the Post type. It helps you to tune SEO settings for different content formats (like Posts, Pages, Media, etc.) of your website.
If you are using more custom types in WordPress, you will see its section here. Here you can define the SEO for the post, page, and media sections of your WordPress blog.
As I mentioned above, be sure to check out the help section to understand what templates you can use. Also, by default, WordPress SEO by Yoast hides the date from search engine snippets, which is useful for blogs writing evergreen content. You can add Custom fields to page analysis.
Also Read: The Impact of Cloud Technologies on WordPress Security

Also Read: Top Plugins for WordPress Speed Optimization
Taxonomies
Now next option is Taxonomies it is yet another important point to discuss. In this section, you’ll find settings for the website’s internal links (like Categories, Tags, Format, Testimonial, etc.)
Title template - By default it looks like the below
” %%term_title%% Archives %%page%% %%sep%% %%sitename%% by default. If you want to change it then you can use %%title%% %%page%% ”
Meta description template - Leave it empty. Or in some cases, you can use as I explained above in the Meta description template for posts. Exert will come up as a meta.
Meta keywords template - Leave it empty for the same reason explained in posts Meta keywords template.
Meta Robots - If your site is quite new and doesn’t have sufficient content, then you may get indexed your internal links (categories, tags, etc.).
Yoast SEO Meta Box - Keep it to Show.
Format-based Archives - Keep it Enabled.
[one_third]

[/one_third] [one_third]
Also Read: How Can Community Gamification Badges Enhance Online Experience?
 [/one_third] [one_third]
Also Read: 10 Best Horizontal Text Slider WordPress Plugins
[/one_third]
Also Read: How Online Marketplaces Are Disrupting Traditional Retail Models?
Archives
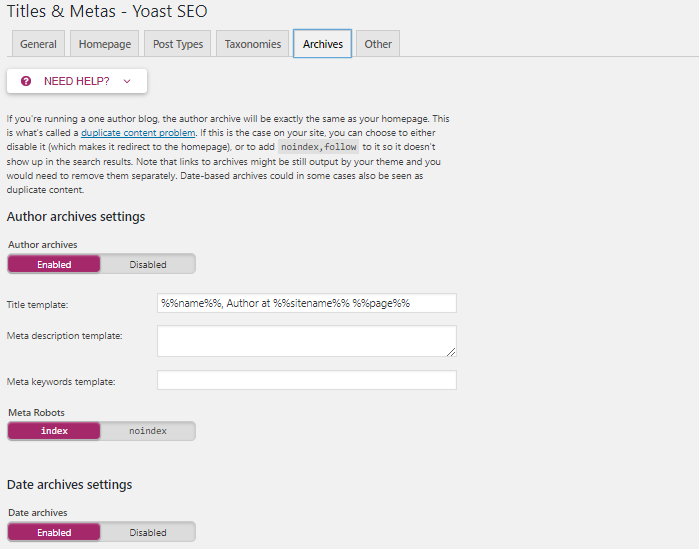
Last but not least in the archives section you can set indexing for your author and date-based archive. Also, you can disable or enable the date and author archive. I suggest that you check the “noindex” and “follow” boxes, and leave everything else as it is.
Please Note:- The above-mentioned features are of the Premium version of Yoast. You can Buy its premium version is just $89.

Final Verdict
Yoast is one of the best SEO plugins. I highly recommend you use this SEO plugin on your website. I’m already using this Plugin and am satisfied with it. Hope you find this post useful. I tried to cover most of the things to make it complete and simple. If I missed any point please feel free to comment below. Thanks for reading.
Like this post? Don’t forget to share it!
Interesting Reads:
Yoast SEO WordPress Plugin: The Best
Yoast SEO vs Premium SEO Pack vs Rank Math: Which WordPress SEO Plugin Is Best?
Related reading