6 min read
Create Sensei Online Course By WooCommerce

Are you planning to create Sensei online Course? As you all know like as LearnDash, Sensei is also a WordPress Learning Management System plugin brought to you by WooThemes. As part of the WooThemes offering of plugins and extensions, it integrates perfectly with WooCommerce to control the sale of courses.
Many sites select Sensei because they already have WooCommerce configured for their business, so adding Sensei to create, deliver, and manage online training courses is a logical extension of their platform.
Today in this article, I will explain how you can create Sensei online Course. This is a very simple process. Just follow the steps one by one-
So, let’s get started-
Create Sensei Online course
First, install the Sensei Plugin, for that, you need to first go to WooCommerce store and buy this plugin. Regular pricing for Sensei is listed from $149.00 - $299 per year although sales occur during the year that allows for purchasing at a lower rate.
Go to Plugins > Add New > Install Sensei > Activate the Plugin
After installing the plugin. Let us move on to its content Hierarchy of Sensei.
Content Hierarchy of Sensei
As you installed this Plugin you’ll get to see 4 categories of Sensei on Dashboard-
 Courses - Displays a listing of current courses, allows you to edit or delete courses, and add a new course. It also allows you to add modules within the course, and assign categories to courses.
Lessons - Displays a listing of current lessons, allows you to edit or delete lessons and add new lessons.
Module - The module is used only to organize lessons within a course, similar to a category. It doesn’t contain any content, other than an optional description.
Quizzes - This option creates a quiz on every lesson, allows you to edit or delete the quiz.
Questions - Displays a listing of all questions that have been created, allows you to edit delete and add lessons and allows you to create and manage categories assigned to questions.
I hope you got all the options clear. Now how to use each one of them I’ll make you learn.
Let’s Know How to Create Sensei Online Course
In Sensei creating a course is as simple as creating a new blog post.

To create course follow the steps-
- Select Course option from the Dashboard and click on Add New.
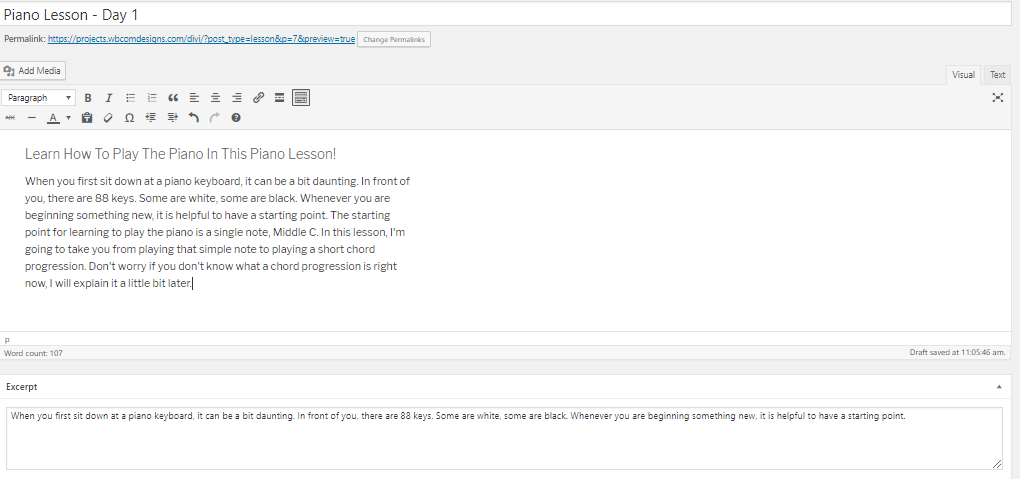
- Now Enter the content for your course page in the main content area.
- After that, Enter the description of the course.
- If there is a course video, you may enter the embed code in the video entry box. This video will display to everyone on the course page. If you want the video to only appear when people are signed up for the course, add it to the main editor with the course description and set the course pages to only display excerpts instead of the full content.
- If you want you can add The image displays on the Course Archive page and Single Course page, depending on your settings in Sensei > Settings > Course Settings.
- Now enter an Excerpt for the course. Depending on the settings, either the full course description or excerpt will be displayed on the course page.
- You may select to disable notifications for this course. If you make this selection, all email notifications will be disabled for the course. This overrides the global settings for course notifications for this course only.
- You may, optionally, select a Category for the course.
- Now Publish the Course.
In this way, you can easily create your own course on Sensei. After creating a course it is necessary for you to add Lessons to your course.
Creating a lesson in Sensei
Creating a lesson for your course is as easy as creating of course. Let us check out the steps on how to create lessons -
- Go to your Dashboard Click on lesson option> Select Add New To create a lesson.
- now after that enter the content for your lesson. Note that content can be anything you could add to a post or page including text, video, and images.
- After adding content enter an Excerpt for the lesson under Excerpt. This will be displayed under the lesson title on the Single Course Page. If you leave this blank, only the title will display.
- Under lesson information, you can set the Time a lesson should take and the Difficulty level of the lesson.
- You can also enter a video embed code to embed a video in your lesson.
- Now assign the lesson to your course, In the lesson course panel you’ll find the “Lesson Course” option from there you can choose which course your lesson will belong to.
- Lesson Settings - If you want learners to complete each lesson before they progress to the next, you can select a Lesson Prerequisite option.
- You may select to allow people to view the lesson without paying or registering under Lesson Preview. This is a way to provide free, sample content to someone considering a purchase of the course.
- After all this process. Click Publish to Publish the lesson.
Creating Module in Sensei
Modules provide containers for organizing lesson content within the course. A module is used only to organize lessons within a course, similar to a category. It doesn’t contain any content, other than an optional description.
To create Module let us follow the steps-
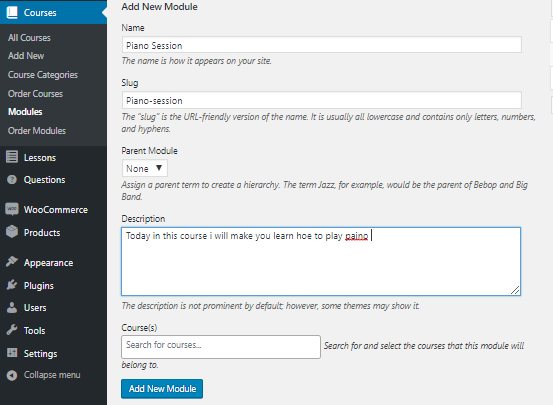
- First, select Courses in your Dashboard> then select Modules option.
- After that enter the Name of the module.
- Enter the slug. This is the URL friendly version which should consist only of lowercase letters, numbers, and hyphens.
- If there is a Parent module, you may select it.
- Now you may enter a description although the display of this description depends on your theme. I leave it blank.
- To assign the module to a course, enter the course name under Courses. A drop-down list of similar courses will appear. Select the course assigned to this module.
- Click the Add New Module button to add the module.
Create Quiz in Sensei
Creating a quiz is also necessary so to gain the engagement of the users. Lets us check out step by step-
2. To add quiz go to Dashboard> click on quiz > Select the add new option.
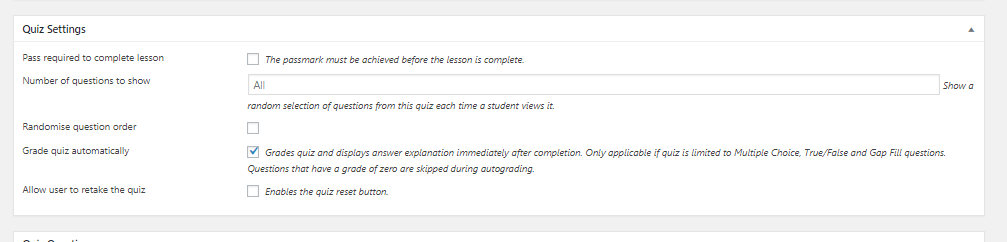
2. Each lesson can only have one quiz, and a quiz can only belong to a single lesson.
3. Now after that enter the title for your Quiz.
4. Scroll down the page you will see the settings of the quiz. There set the quiz timer how much you want to keep your quiz. Set the quiz settings according to you.
5. Then, click on publish button.
Create Question in Sensei
When you creating quiz so, adding question is another step in a quiz. To add question let us follow the step by step-
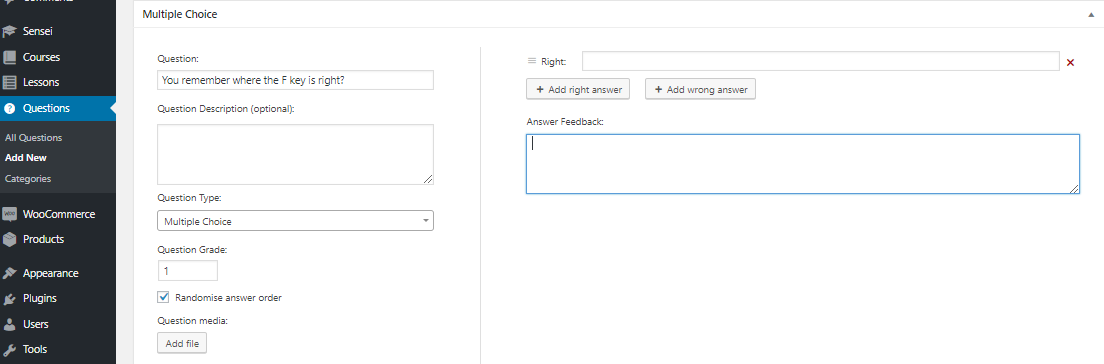
- To add a question to the question bank, go to Questions in your Dashboard>Select Add New.
- Enter your question in the Question field.
- After that select the question type from the drop-down.
- Enter the relevant answer - exact options depend on the question type you selected.
- Enter the total grade for the question - this can be a numerical value greater than or equal to zero.
- Select Add Question to complete that question and add another if you like
- Now go to Questions settings - choose what type of questions form you want, whether it can it multiple choice, true/False or many more. It’s all up to you.
- You can also assign your question to a question category to make it easier to add relevant questions to each quiz.
- You can also add images, videos to your question. For that, you need to go to settigns> media add an image from there.
- Similarly, you can add all questions to this process.
- You can also add Auto answer feedback- This feedback is shown to learners after they submit a quiz that is set to automatic grading.
[divider height=”30″ style=”default” line=”default” themecolor=”1″]
Congratulations! you are now all set to sell your online course with a bang…
The Sensei Learning Management plugin offers a robust set of features designed to help you build and manage online courses. Whether you are looking to create an online school with multiple instructors, a marketplace of courses, or a single course, Sensei has options that can help make your course a success.
[divider height=”30″ style=”default” line=”default” themecolor=”1″]
Related reading