5 min read
Create Virtual Classrooms With LearnDash

As we all know, LearnDash is an amazing plugin to create a complete Learning Management System with WordPress. This plugin lets you create virtual classrooms with the capability of selling online courses, lessons and a lot more.
If you wish to create a WordPress website and educate your students via online mode then LearnDash is a perfect fit for you. You can as well sell these courses, create quizzes, provide assignments to your students, create polls, certificates etc. Also, LearnDash is considered the topmost plugin in WordPress that provides you with a ton of fantastic features. It also comes with many free and paid add-ons to help you extend the functionality of your website. So if you are thinking to create an LMS website with all the required features and are stuck as to what theme and plugin you should choose for yourself then you are in the right article. In this article, we will tell you about the basic requirements of creating virtual classrooms of your own and what all do you need.
Steps for creating virtual classrooms
Step 1: Have an idea

To develop an online learning site first and foremost step you need to go through is “idea”. You spend hours researching the online market. Before everything knowing your topic is a must. Many people face this problem they don’t know about the topic and start reaching this leads to a waste of time. Now if you selected your topic you need to be very clear. Is it for newbies, advanced learners?
Now if you have well- organized or defined course idea, now its time to check your topic in the market and see if anyone else is doing the same thing or not.
Step 2: Start Researching About Competition

It doesn’t matter how original or unique your idea is if your competitor is already using the same idea and they have already been using it or launched it. Then you cant use it. But don’t feel sad or discouraged. This can be a great sign.
This helps to learn a lot form your competitor. Perhaps they offer a module you hadn’t thought of! Also, if you spot things that don’t work so well, you can keep away from them in your particular course.
Step 3: Get Your Target Audience

Now you have the concept, its time to search for your learners. No course is generally engaging everybody, and regardless of whether a huge gathering of people may potentially be occupied with your course, you’ll have more success if you convey a tailored message to a specific audience instead of making a “one size fits all” course.
As a result, you have to narrow down your audience, though that you can get your ideal leaner. Once you are done with searching for audiences now, you have found out how to address their needs and interests.
You’re probably not going to pull adult students by offering piano lessons in the afternoon on a weekday. However, that might be ideal for kids simply getting out of school.
Step 4: Get An eMail & Website Ready For Your Course
If you are in need of selling your course, all you need is to get a website. Luckily, setting up a site on a platform, for example, WordPress is effective and quick, way to establish a robust website. As it offers number free and paid plugins for creating the course. This saves your lot of time.
WordPress offers you a wide range of both plugins and theme with the help of them you can quickly set up your WordPress website.
LearnDash is one of the best WordPress LMS Plugin. Explore Here
Are you are in a search of LearnDash theme? Have a look at “LearnMate“.
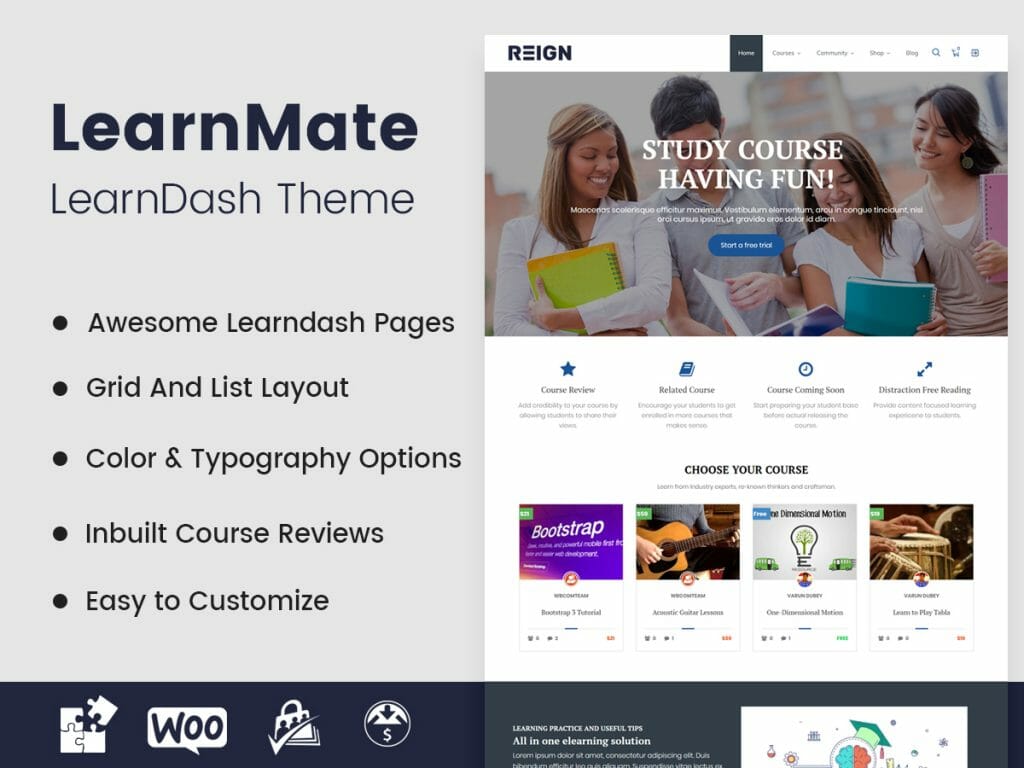
This amazing theme is made for the educational web, LMS, Training Center, Courses Hub, College, Academy, University, School, Kindergarten. Based on our experience of the building client site using Learndash,
When you sign up for your WordPress site, there you’ll find an URL like “Yourcoursename.WordPress.com.” If you are using a professional online course, it is necessary for you to purchase a URL for your site.
Now its time to get the email address so that you can increase mailing list.
Step 5: Start Your Marketing

Now its high time you know to start marketing for your course. Either you can begin to video series, blogs or podcast it’s up to you. Let your audience get some knowledge through your course.
You don’t have to put money behind advertising yet, however, do make an email sign up form on your site so you can keep engaging future students refreshed on your course progress. You can poll a from there you get to know who would like to see your course.
Step 6: Choose the right plugin
After marketing all the way its time to choose the correct delivery method through which, you can easily deliver your course and lesson to your audiences.
Choose the LMS system for your WordPress site, and select what you need for your learning site. There are loads of WordPress Plugins that offer you creating courser, lesson. My favorite is LearnDash. As it is the most recommended and best plugin to go with. Learndash helps you sell your course, It comes with the Drip-feed content that automatically delivers content according to the scheduling. There are many more amazing features for that you need to instaL this plugin and enjoy the benefits of features.
Also Read: An Ultimate Guide To Creating Learning Management System With WordPress
Step 7: Starting Creating Content

This step is really important when it comes to engaging the audiences. If your content is engaging and attractive then you can expect a number of viewers in your course. But if it is not up to the mark then you do not find the viewers up to the mark. So it is necessary for you of having an effective content for your course and lessons and yeah, it should be clear to understand by anyone. Avoid using the tough words in your content which makes difficult for the users to understand.
Also Read: Create and Sell Online Courses with Best WordPress LMS Plugins
Step 8: Set Pricing To Launch Your Course
Now finally you are all set to go with your launch. To check out, the pricing you need to search for what best pricing did your competitors are offering.
LearnDash plugin(Get this Plugin) helps to set pricing for your course. It helps to simply set the price, choose the pricing module and publish.
When your full course is all set. Get ready to run some paid advertisement which helps you to gain some money making the engagement.
Final Thoughts On Virtual Classrooms
So, Guys hope you all liked all the steps for creating the course. Trust me these 8 steps will never take you in the wrong way. Try out each step and let us know in the comment section. Thanks for reading.
Related reading