8 min read
Set MemberPress And Create Membership Community With BuddyPress & BuddyX

A membership site is an excellent alternative if you want to expand your existing business or start a new MemberPress. You may monetize your website in a variety of ways, but selling memberships is very efficient. Create a membership website with WordPress, and you’ll have a steady stream of income. However, there are a few important actions you’ll need to take to ensure the success of your new online business.
The correct WordPress membership plugin, fortunately, can make a tremendous difference. This crucial tool should allow you to easily build tiered plans, restrict content, and devise a pricing strategy for your memberships.
This article will discuss the membership websites, the benefits of having a membership website, how to create one, the steps to follow, and the milestones that can be faced while creating a membership website.
An Introduction to the membership website
The creation of a membership website is the best way to develop or expand your online business. Let’s suppose you have a website of instructional blogs, entertainment videos, articles, exclusive interviews, shows, podcasts, and so on. And you won’t be paid for it. You’ll need a solution for customers to pay for content before they can access it, whether they’re using it or recreating it to create revenue.
To achieve this, you can restrict your website content to a specific type of subscriber. These subscribers can be your site users(free members) or paid members that have subscribed to any membership. This is dependent upon the rules you have set for your membership site.
Top Benefits of having a membership website for your online business
A membership-based online business model has proven to be a tremendous force for expanding your existing setup or a brand-new business. Here are some top benefits
- It increases the profit by charging the members to access your website’s content, courses, accounting services, etc.
- Predictable monthly or annual revenue is extremely beneficial to businesses, as it allows them to manage cash flow better and prepare for the future.
- With the same product or service, you may easily target a wide range of markets. You efficiently segment your target market and deliver value based on the client’s desire by creating membership tiers, each with a separate pricing plan.
- A membership website helps you to engage your customers.
- It helps you to build a consistent income source.
Also Read: Top 7 Online Reputation Management Tools
A professional membership site can lead to the development of consumer trust, resulting in a continuous stream of subscribers and a residual income stream. If you think a membership site will assist your online firm, you’ll be relieved to learn that it’s not difficult to set one up with Memberpress and BuddyX.
Steps to build a WordPress-based online membership website with BuddyX and Memberpress. As we previously discussed the benefits of using a membership website, let’s look at creating one. At this moment, I am going to assume that you are already associated with a hosting plan, have a domain name, and have WordPress CMS installed on your website.
After you’ve accomplished all of those stages, you may move on to the next phase, which will turn your WordPress site into a fully functional membership platform.
1. Set Up a Membership Plugin
As we know, several plugins are available to set up the membership feature, But in our blog, we will use MemberPress.
This plugin makes it easy to create a membership site by providing easy-to-use features, easily navigatable backend settings, and automatically generated pages. It also integrates with popular payment gateways like PayPal and Stripe too. Once the plugin has been activated on your site, It can be configured by navigating to MemberPress >> Settings. Click on the Payment tab and choose at least one payment gateway to monetize your membership site.
2. Configure the membership Levels
Now, the next step that comes is to create a membership for your site visitors to purchase. Before creating the memberships, You should have a proper plan ready. For example, how many types of memberships your site will have?
If you think about your first membership type, Head towards the MemberPress >> Memberships >> Add New.
Fill up the title and description of the membership.
At this point, You can also decide whether the membership will be free or it will need payment to work.
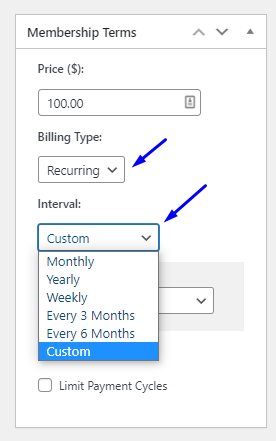
You can also set the billing method. Memeberpress provides two types of billing methods:
- One time
- Recurring
One Time -: It has further three types, That can be used according to requirement.
Recurring-: recurring payment method is a type of subscription that will be renewed after a chosen time span.
Now update the permission of created membership.
Go to the membership option -> permission-> choose who can purchase the membership
You can also set a custom message for the users who are not allowed to purchase this membership
Set a custom Thank you message for the members who have purchased the membership. It will create a positive impression.
Once you’ve entered all the required info and are satisfied with them accordingly, It’s time to publish the membership. MemberPress automatically creates the page from where the users can purchase the membership.
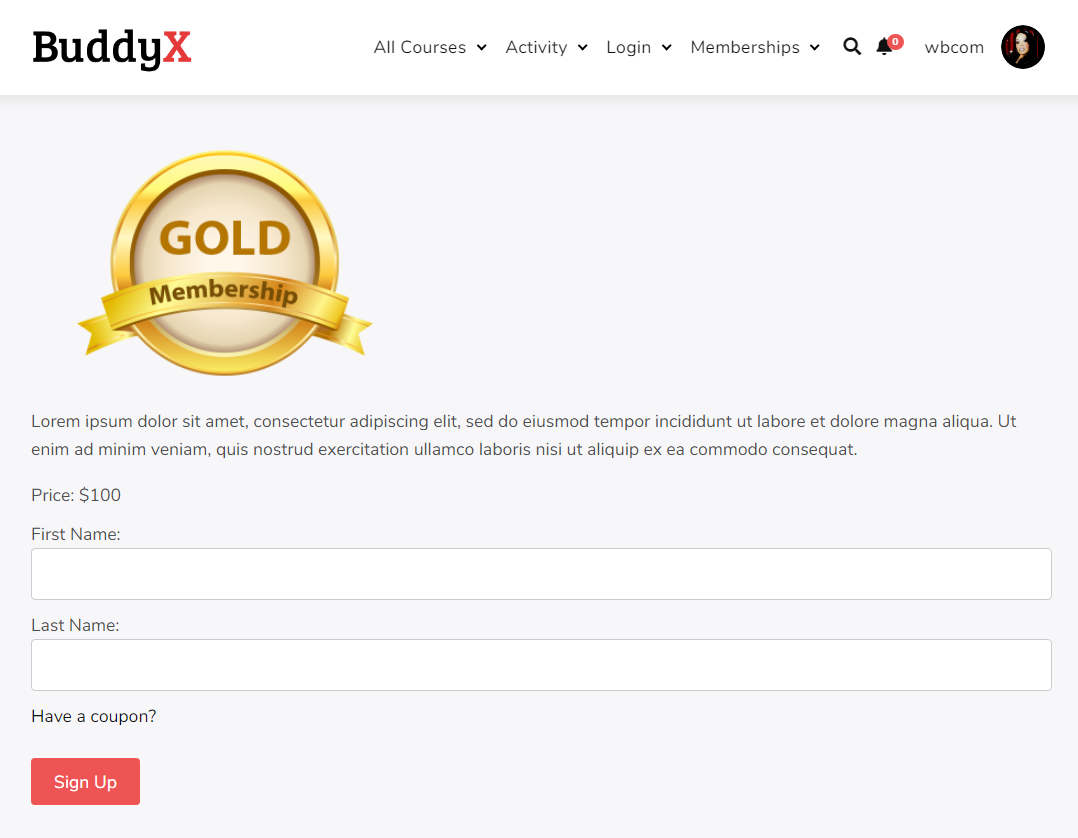
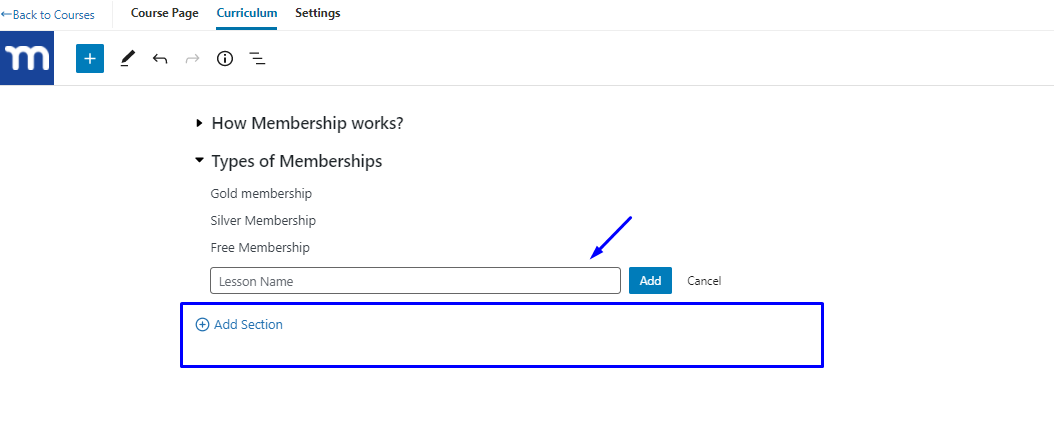
If you have to create multiple membership levels like other websites, do, such as gold membership, silver membership, free Membership, etc. Repeat the above-mentioned steps.
3. Choose Members -only content
Offering visitors something of value is the key to converting them into paying members. Creating intriguing, members-only content is a common part of this process. It could take the form of blog articles, limited-edition items, online courses, and other forms of content.
You can restrict your website’s premium content using MemberPress access rules and conditions. for example, I have an e-learning website where courses are being sold. I have to provide specific course access to gold membership users only.
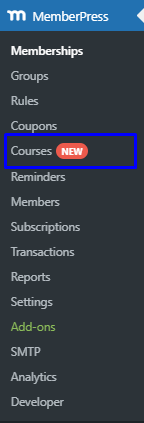
Note: To sell courses through members “member press Courses” should be installed and activated on your setup.
Install member press-courses plugin, then the courses tab will appear in the member press
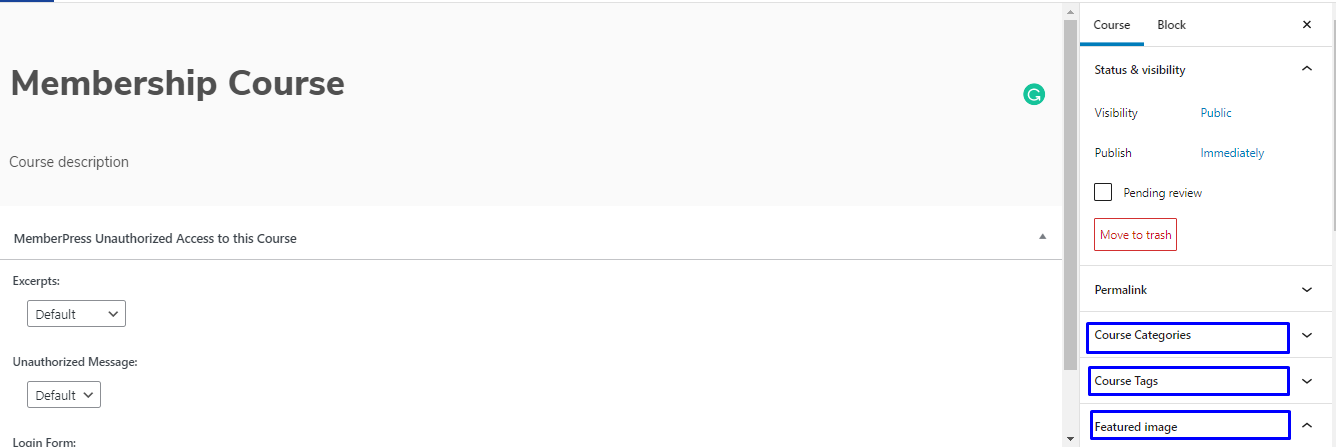
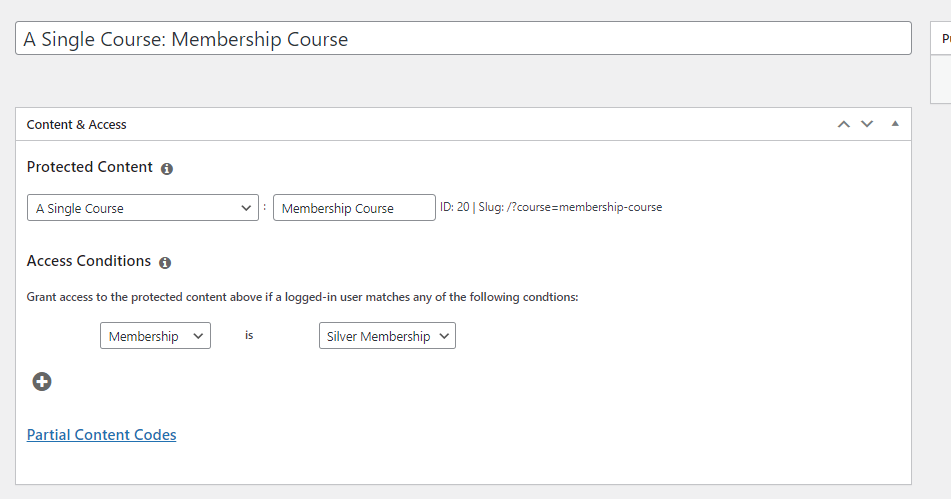
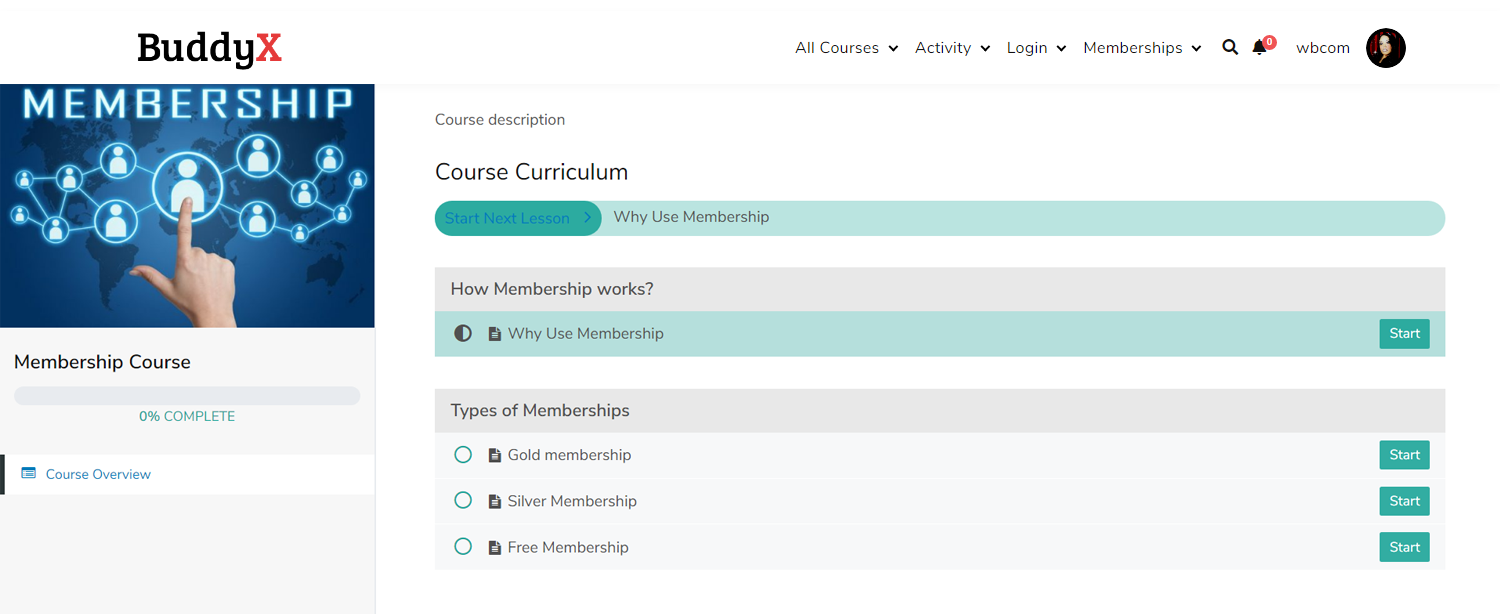
Click on the courses tab and also click on the add new button. Add a Title and description, of course, as I have Created a Membership Course.
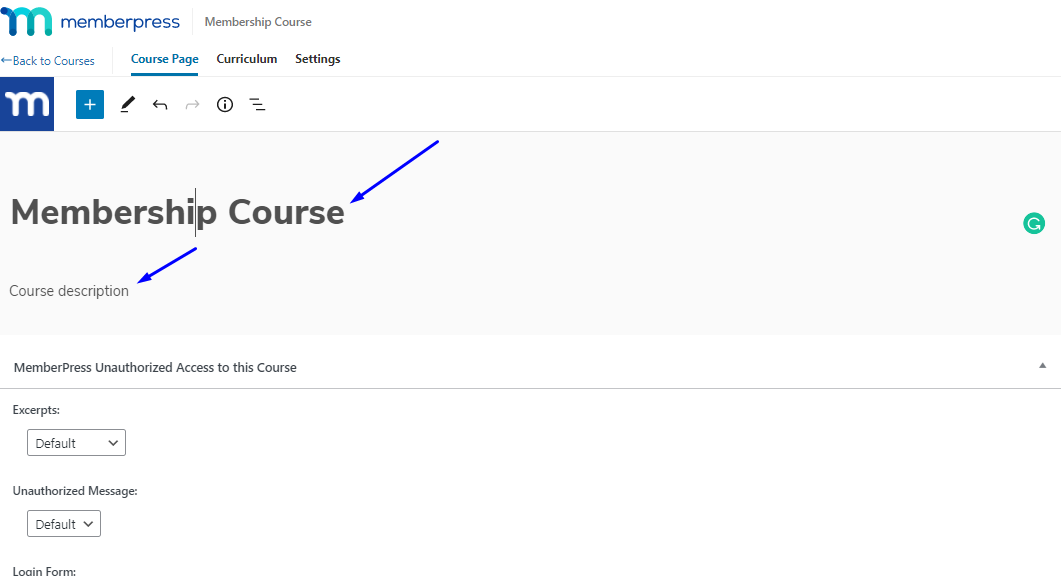
You can also create course set course categories, Tags, and featured images also.
Now click the Curriculum tab and add the course content.
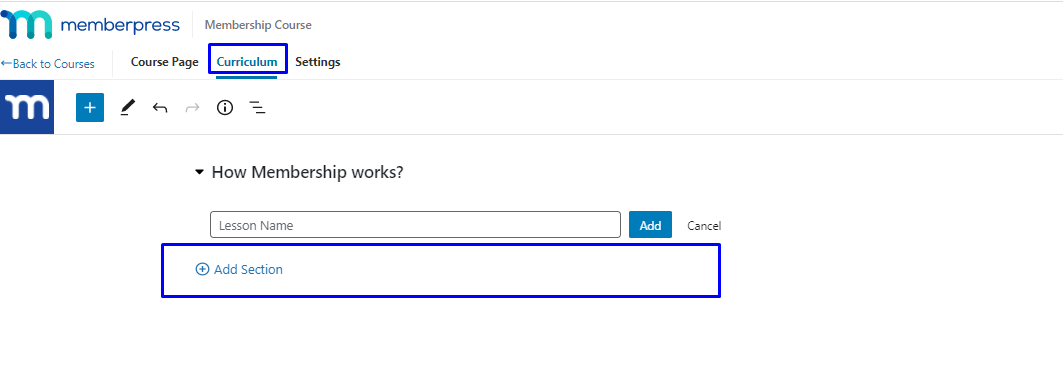
you can add as much content as you want by clicking on Add Section link.
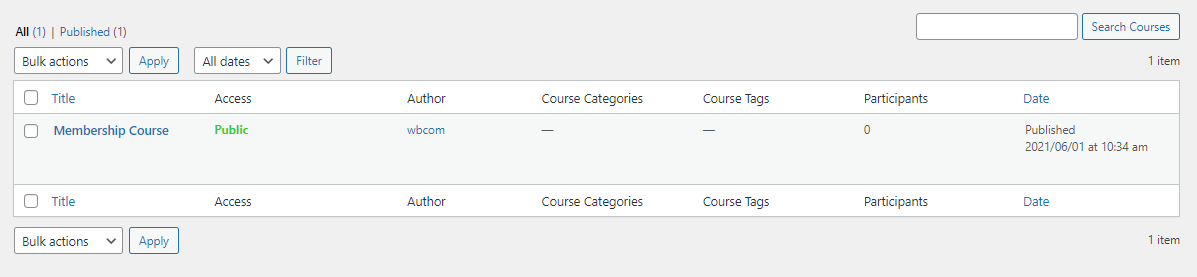
Once the content is ready, click the publish button to post the course. Once the course is published, click on the courses tab, and you’ll see that one new row is now created in the courses.
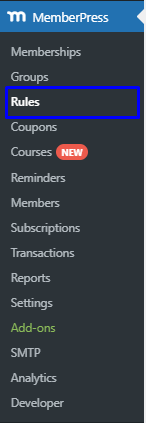
This Course will access by everyone; if u want to access this course by a limited user, add access permission to this course. Now we’ll set the accessibility rules for this course by setting some permissions. Click on the MemberPress -> rules -> add new button
As you can see in the below image, I already have set the rule that silver membership is required to access the membership course.
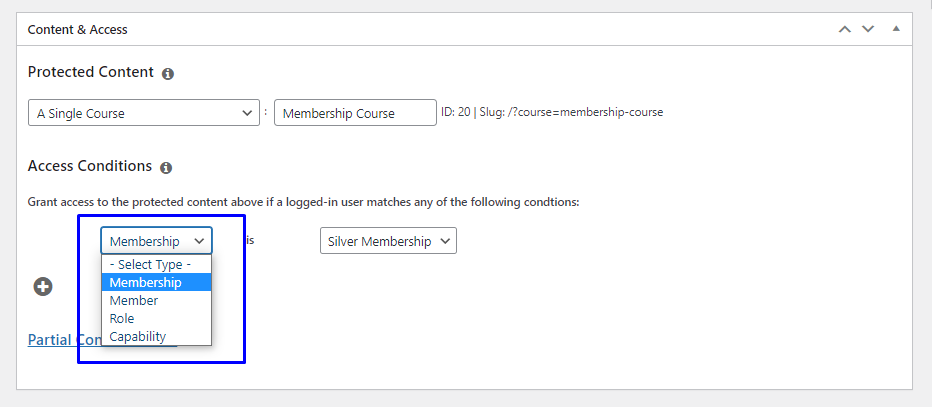
Here, you’ll find a range of dropdown menus you can use to create your rules:
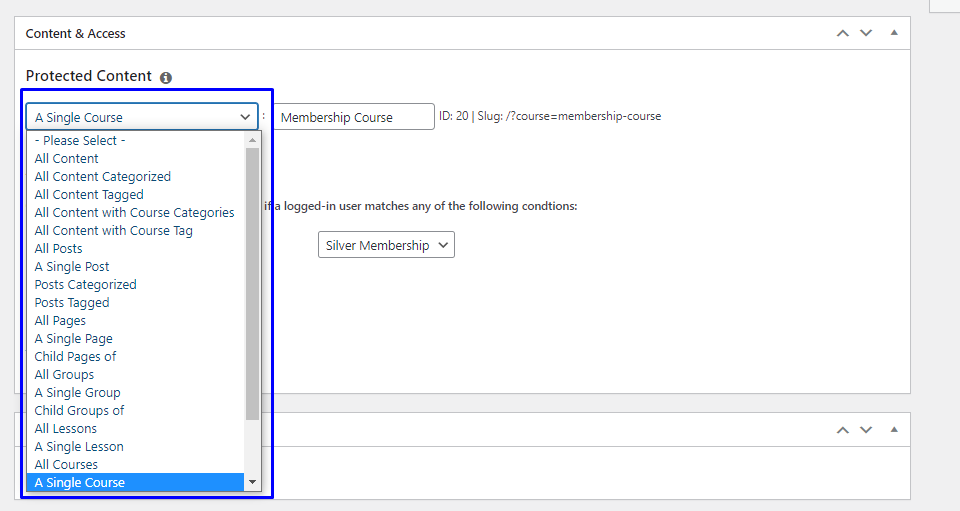
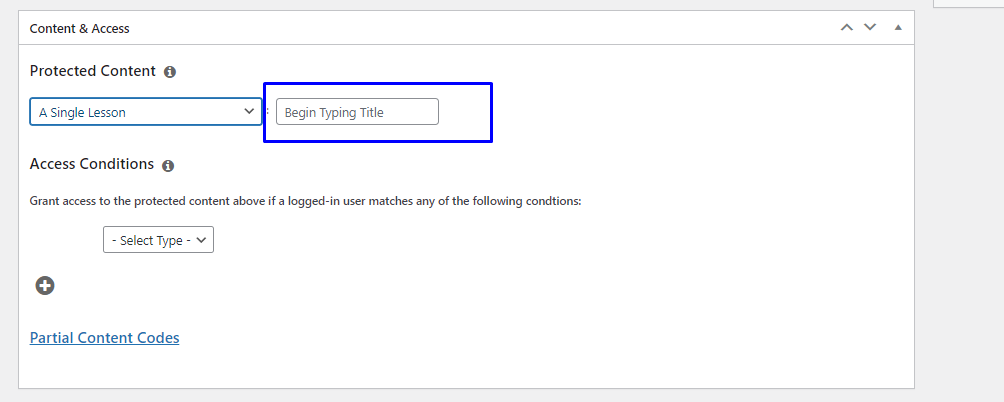
If u want to protect a single course, then click on a single course option and type your course name in the Being Typing Title, and Type the course name after that
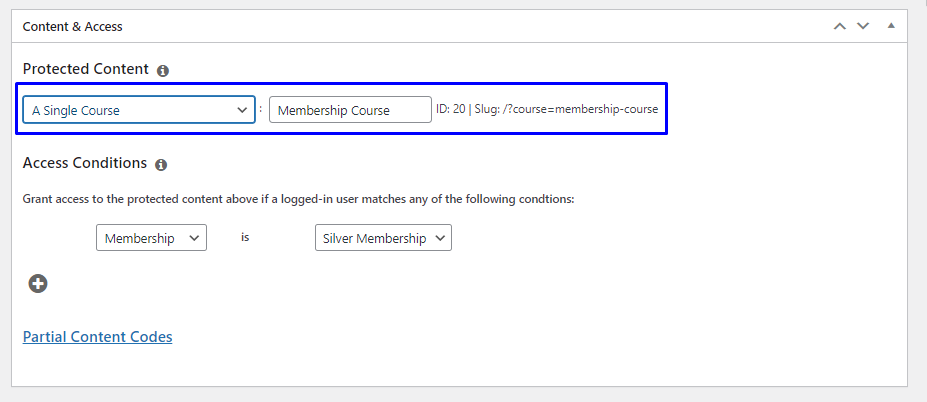
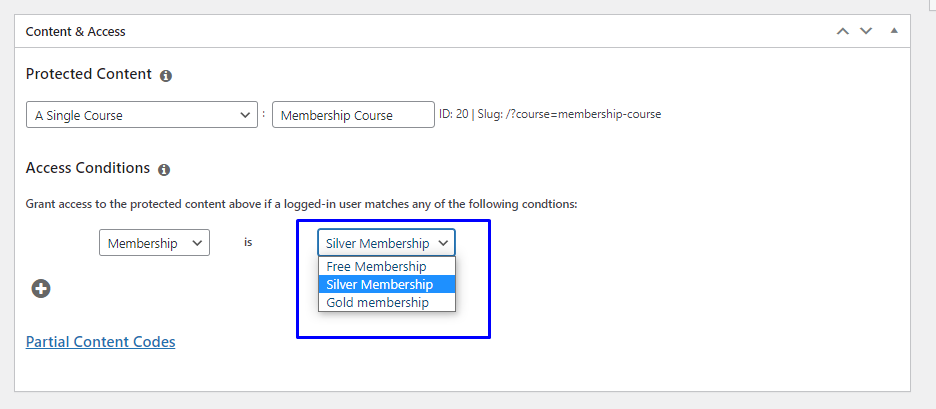
Now Click On Access Conditions. And select a condition to access this course. I have selected silver membership.
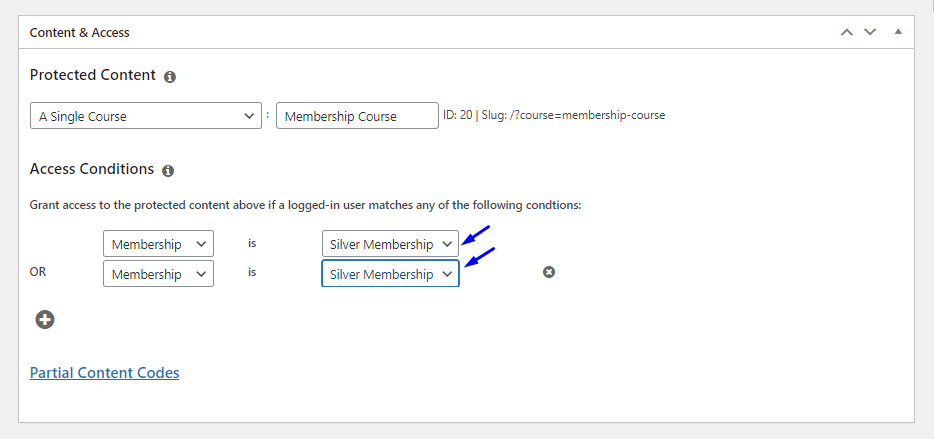
If you want to add multiple access conditions on the course and content, then click on the + button
Click On the Save Rule button and click on the rules tab. One row has been created now.
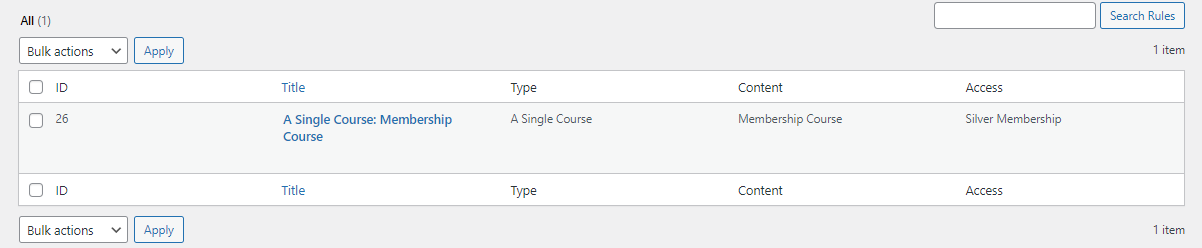
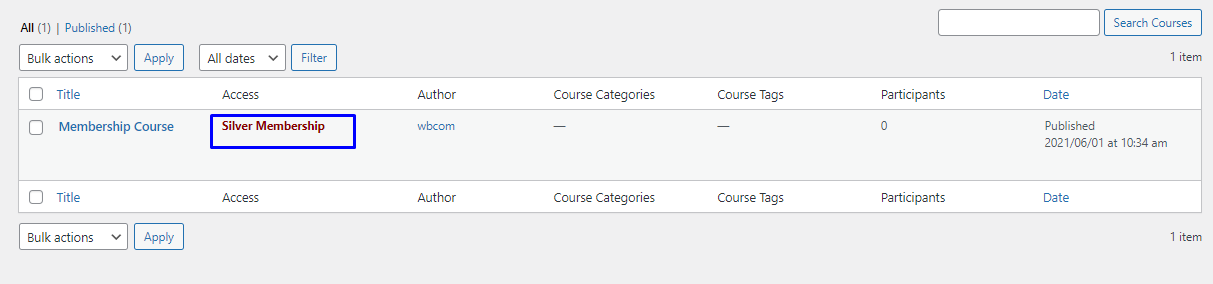
After that, click on the courses tab, and you can see that the public option disappears and sliver membership is displayed there.
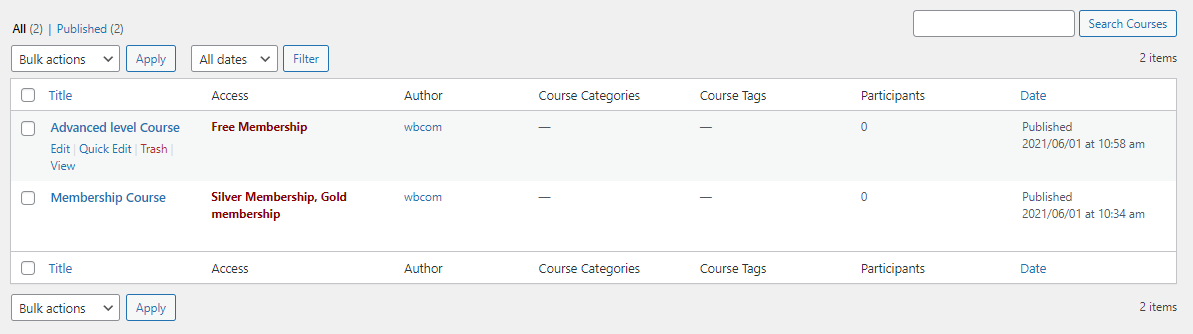
Note-: You can also create multiple courses and set the rules(access permission) on the course
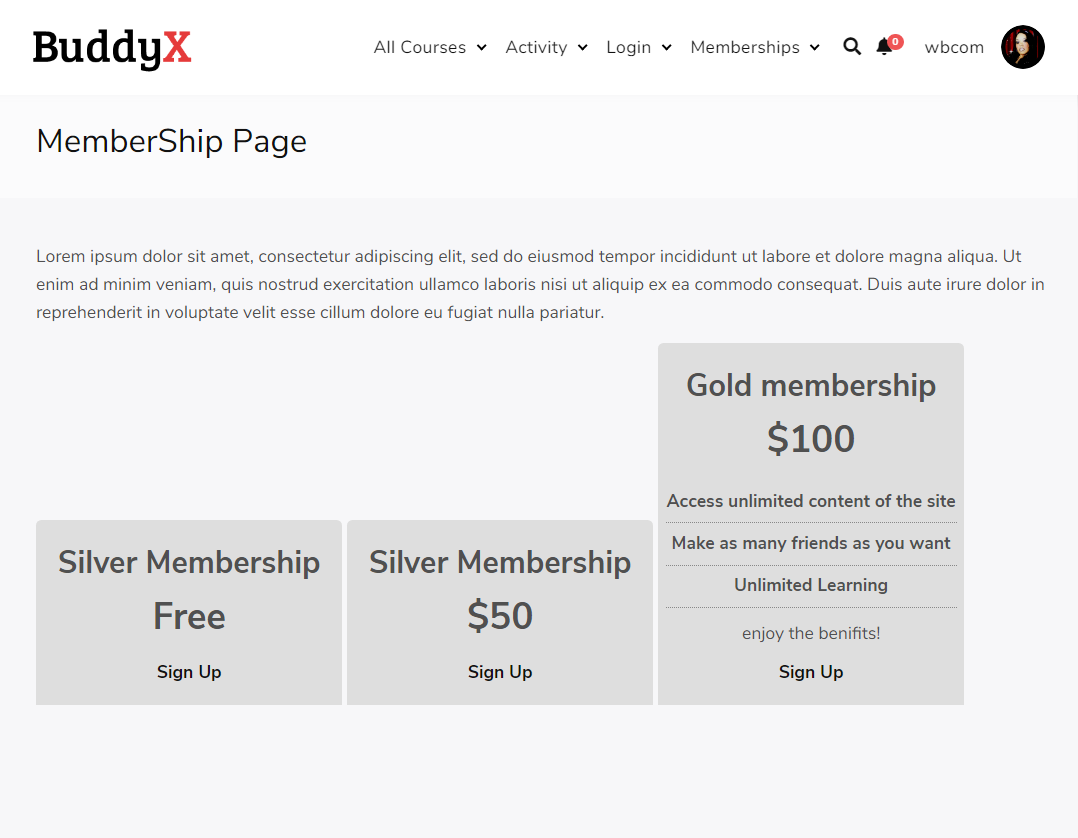
4. Create a pricing page
A pricing page can assist visitors in comparing your membership options and choosing the best one for them. It can also convince visitors to upgrade to a more expensive choice by emphasizing the additional features and perks that come with it.
To create a pricing page, navigate to MemberPress > Groups > Add New. Give your group a descriptive name,

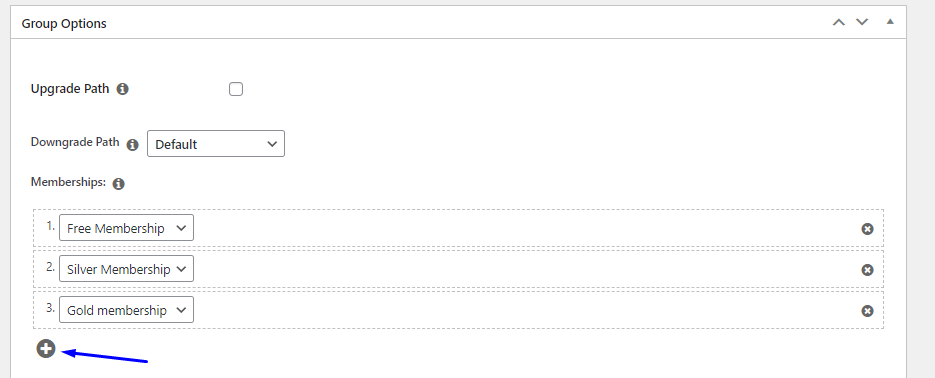
Now scroll to the Group Options section, and fill out the details

You can then click on the plus (+) icon to add your memberships to this page. You can change the order these plans appear in by dragging and dropping them:
Now it’s time to choose the theme by the pricing page’s theme dropdown. This option is given to control the look and feel of the pricing page. Publish the page and view it.
5. How to sign up for a membership
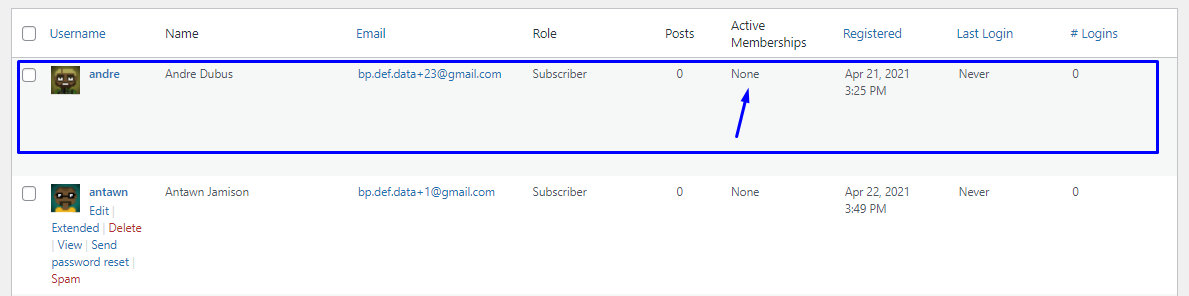
Users can easily purchase the membership by clicking the signup button. Let’s suppose a new user has registered on your website. Navigate to your WordPress dashboard >> Users, and view the new user under the table; as I have a new User, Andre is registered who has not purchased any membership yet. so Active membership is showing none
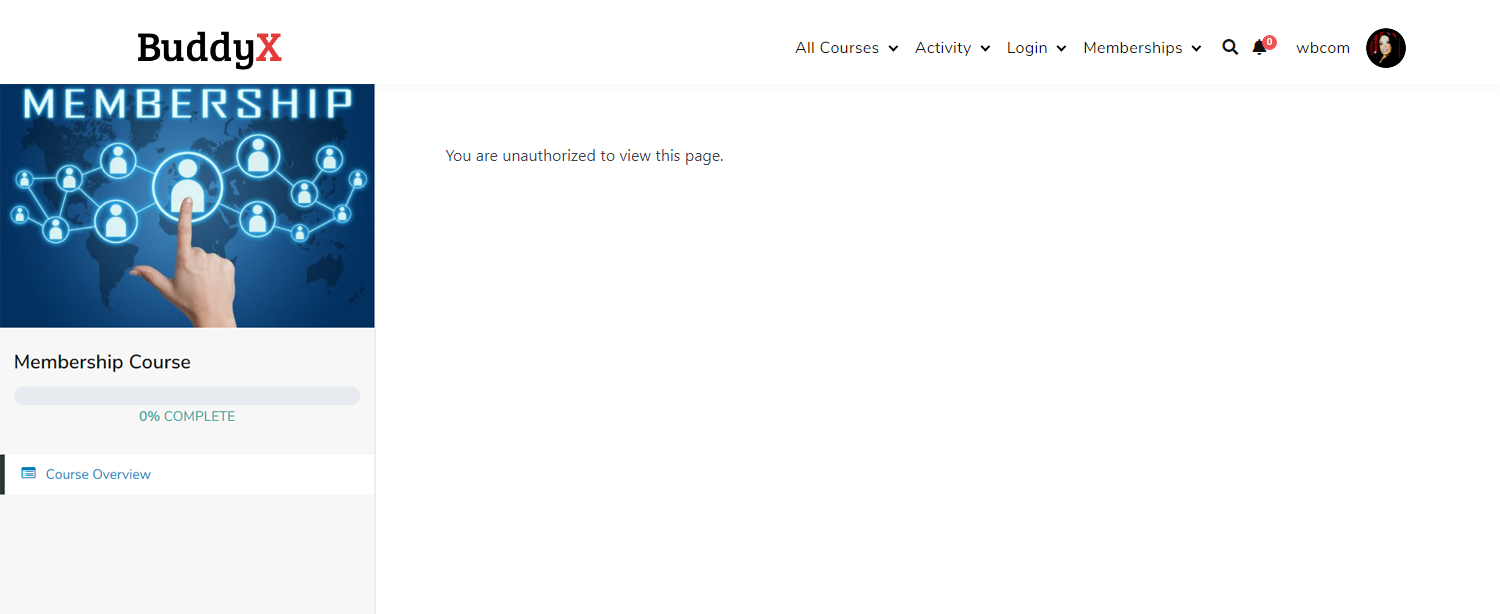
When he will try to access the Membership Course, a restriction message will be shown there
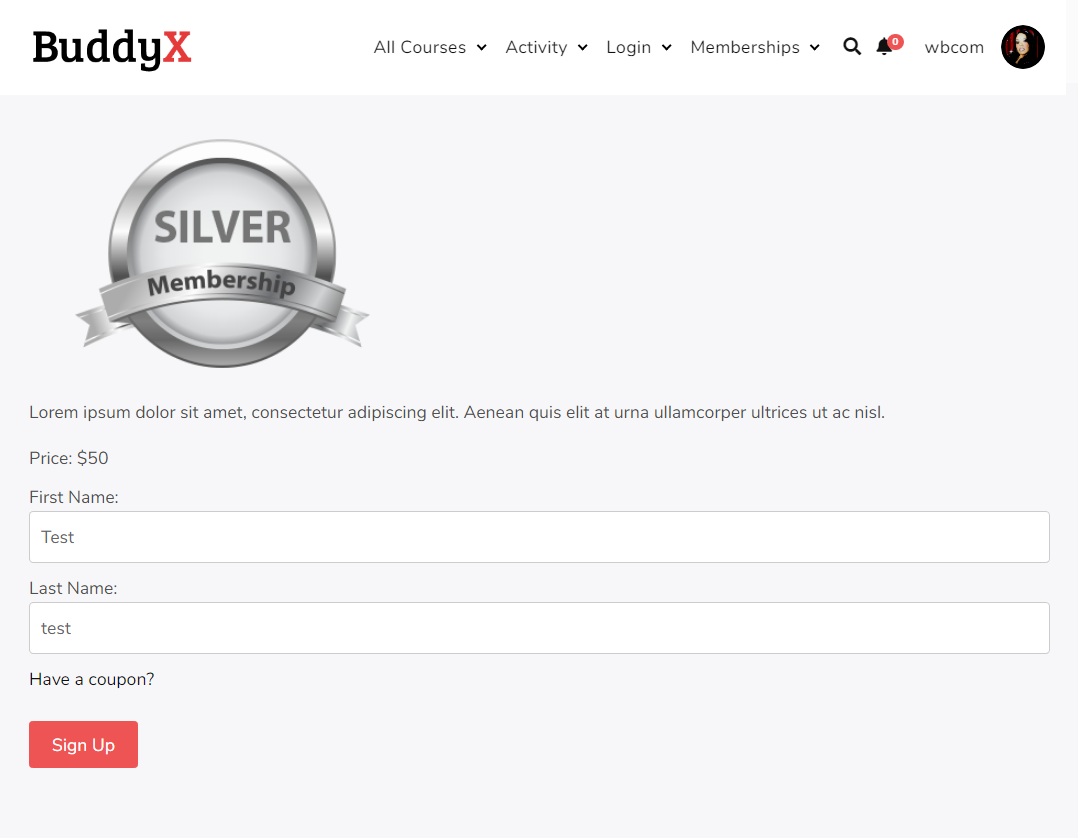
Now Andre purchases a silver membership by navigating to the pricing page.
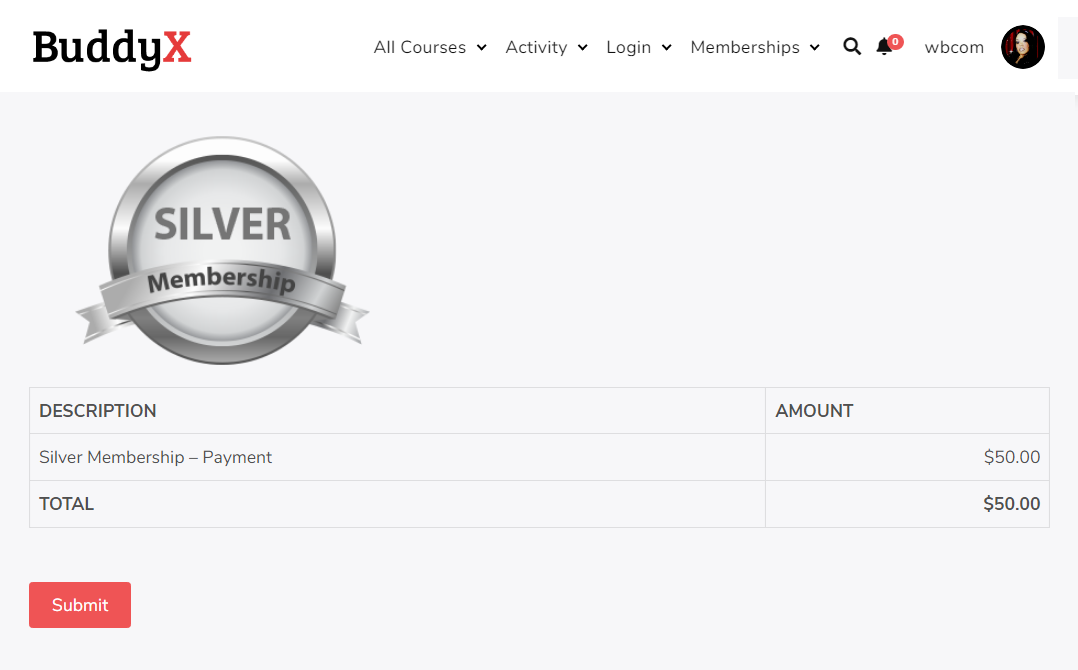
A thank you message will be triggered there, and Andre is now able to access the Membership Course.
Wrapping Up….

A WordPress website can be used to make money in a variety of ways. However, giving membership subscriptions is extremely useful because it allows you to generate recurring revenue and gives you a lot of specialty and format freedom.
If you have decided to transform your WordPress website into a revenue-generating membership site, you just need to complete the following steps as I have explained earlier:
- Set up a membership plugin.
- Configure your membership levels.
- Provide members-only content.
- Create a pricing page.
If you still have any questions about creating an online membership website, Leave them for us in the comments section below!
Interesting Reads:
How to Create a Training Module with WordPress Education Theme
Related reading