8 min read
Create Your Own eCommerce Website Just Like Amazon And Flipkart

Do you want your own brand name where you can sell your products? Do you want your customers to know your product by your own brand? Want to save money by selling your product on your own platform? If the answer to all the above questions is yes then you are at the right place. Here, we are going to discuss to create your own eCommerce site just like Amazon and Flipkart.

Do you know you can create your eCommerce site by yourself without the need for developers or designers? Do you know it is a cost-efficient method and does not require much money? It does not require coding skills.
If no, then stay tuned with us and go through the below guide, on how to create your own eCommerce site.
key points to get start your eCommerce site:
- Get web hosting and register a domain name.
- Install WordPress and WooCommerce.
- Setting up your WooCommerce Store.
- Install an SSL certificate.
- Install a WooCommerce theme.
- Adding products to your online store.
- Customize your WooCommerce store.
1. Get web hosting and register a domain name
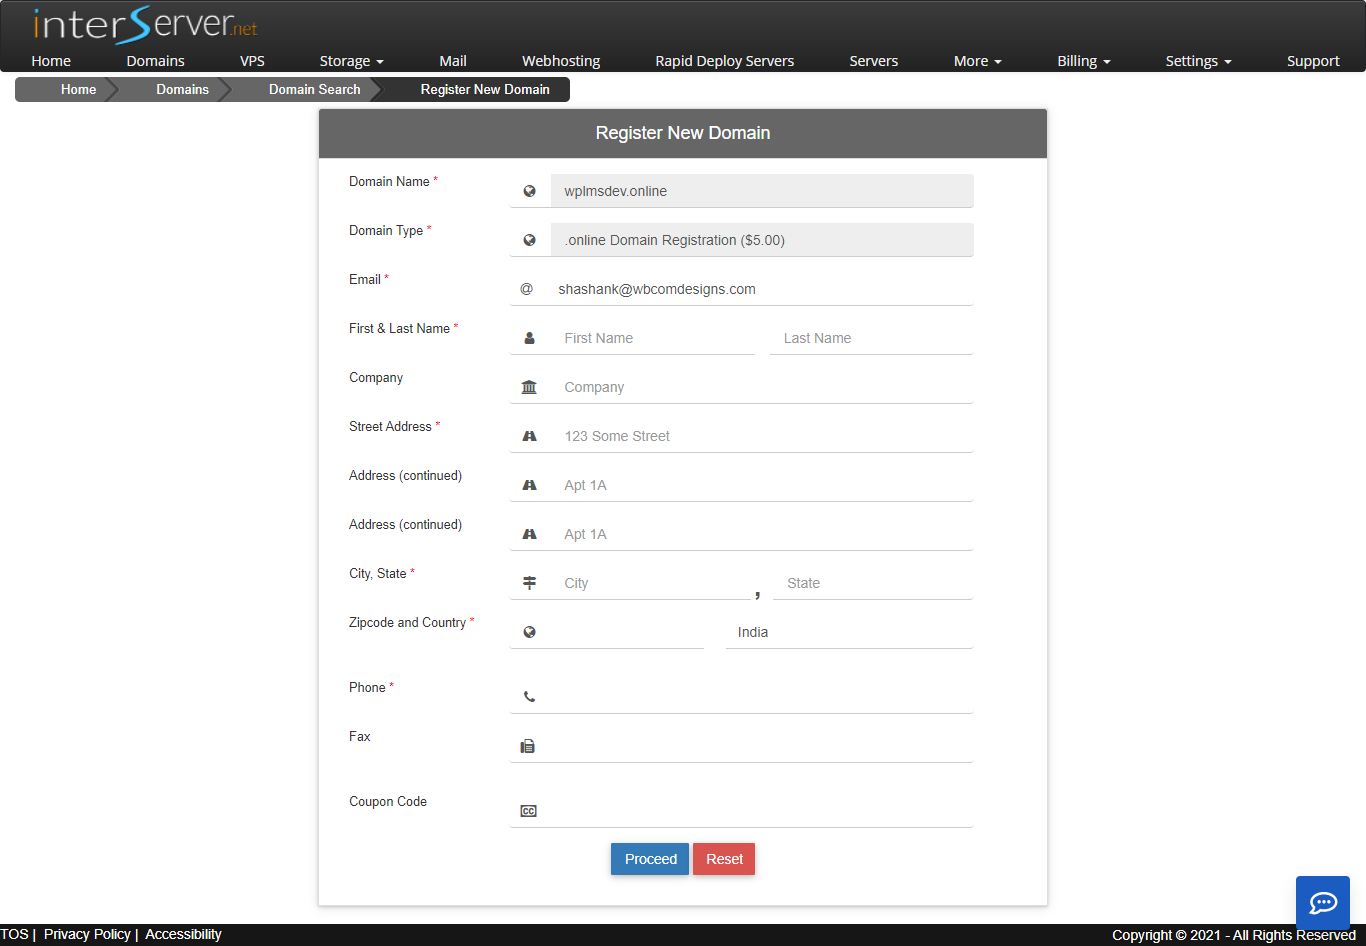
Web hosting is where all your website files are stored and the domain name is your website address on the internet. SSL (Secure Sockets Layer) certificate is a must-have for an online store as sensitive information is delivered there such as email, password, credit card details. Let’s move forward and look at how to register a domain name with an inter-server. Go to the domains section from your portal at https://my.interserver.net

After hitting on the domain button you will be redirected to the screen showing your current domain now to buy a new hit on the order button.

When you click on the order button you will be redirected to a domain search page, where you can search for the desire domain names to see if that is available. If the domain you are looking for is already purchased you will get suggestions with different TLDs (extensions) to find a suitable alternative.

Hit on the register button and fill in the personal details and finally click on the proceed button to claim your domain.
2. Install WordPress and WooCommerce
The most popular eCommerce platform is WooCommerce and hence we are moving forward with it. It is an open-source platform, with almost all important features like highly customizable, secure, optimized in terms of speed, cost-effective, and has thousands of plugins and themes for it, which you can use to accomplish literally any of your requirements.
Almost all hosting have a ready-to-use app installer for installing WordPress. Similarly, the hosting we are using in his blog i.e. Interserve has a Softaculous App installer to install WordPress in cPanel.

There is another way as well, you can install WordPress via “Site software” too.
Following are steps to install WordPress via Site Software.
- Log into cPanel.
- Navigate to “Site Software” under the “Software” section.
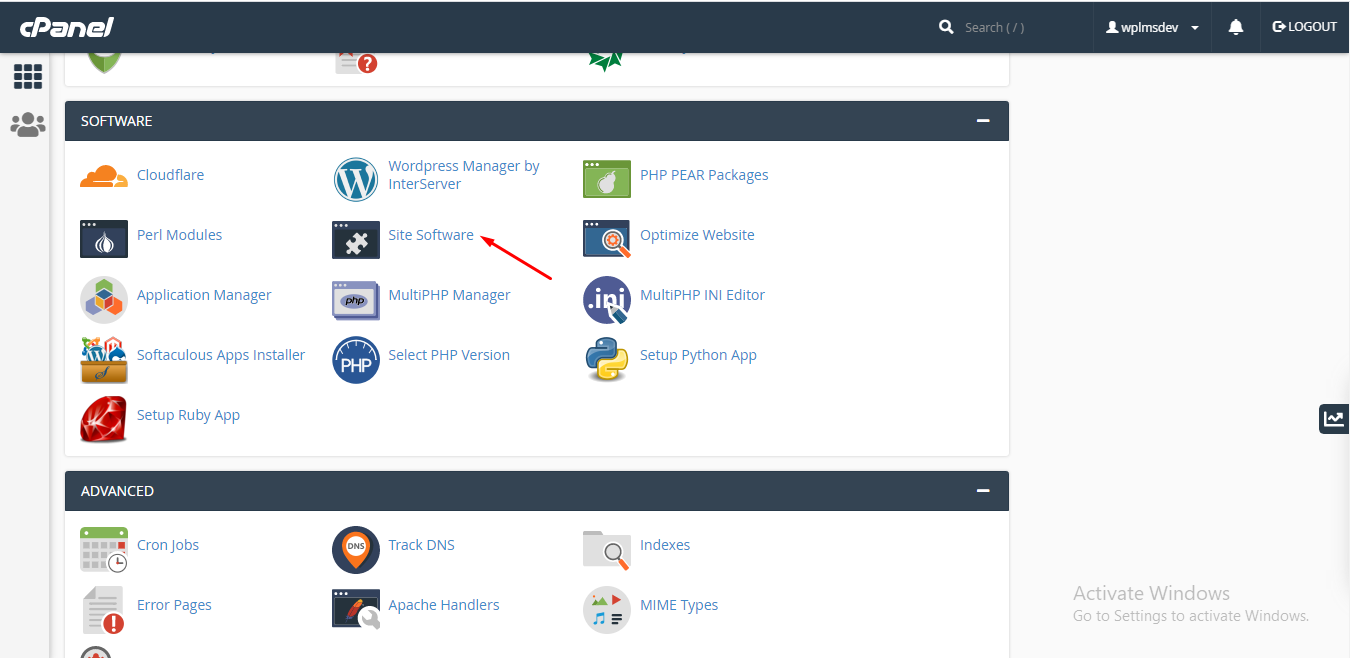
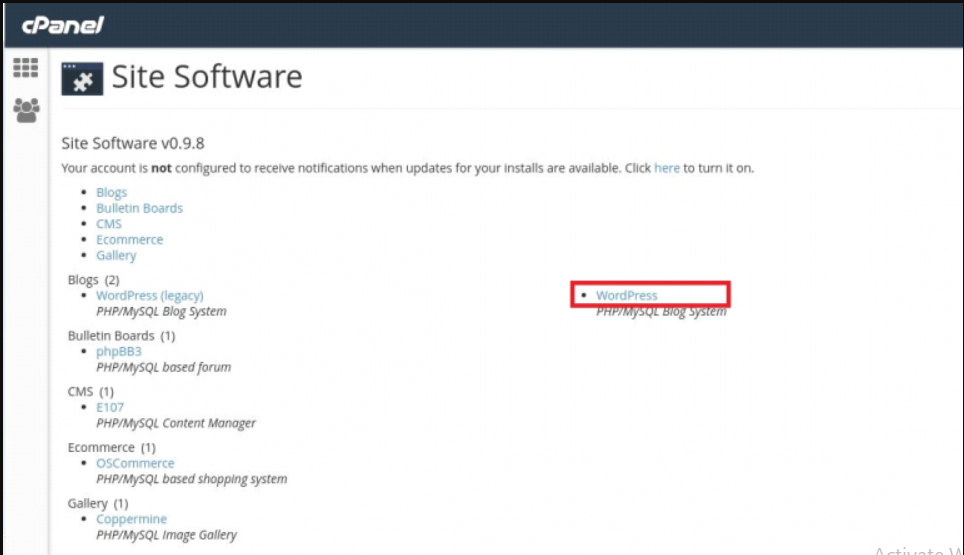
- Click on the WordPress text.

- Select your domain where you want to install WordPress and click on the “Install” button.
- After a few minutes, you will receive the installation complete message.
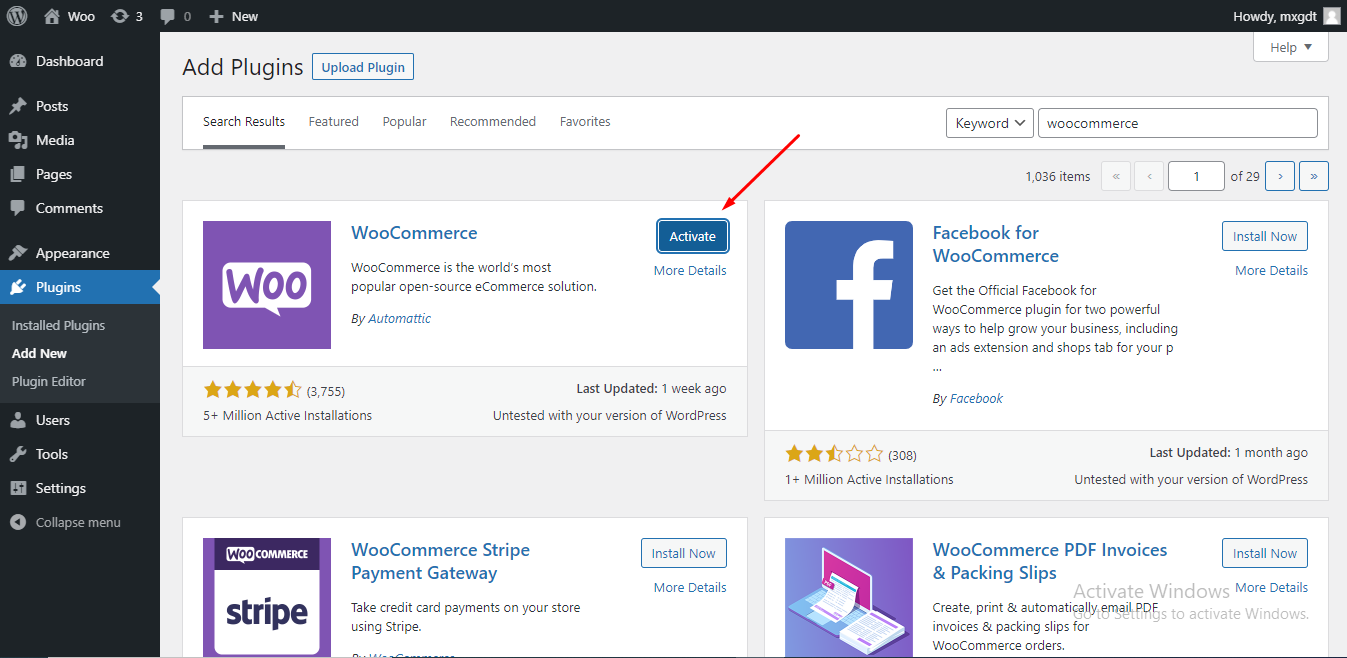
Now, to install WooCommerce login to your WordPress site and follow below steps:
- Navigate to WordPress Dashboard >> Plugins >> Add New.
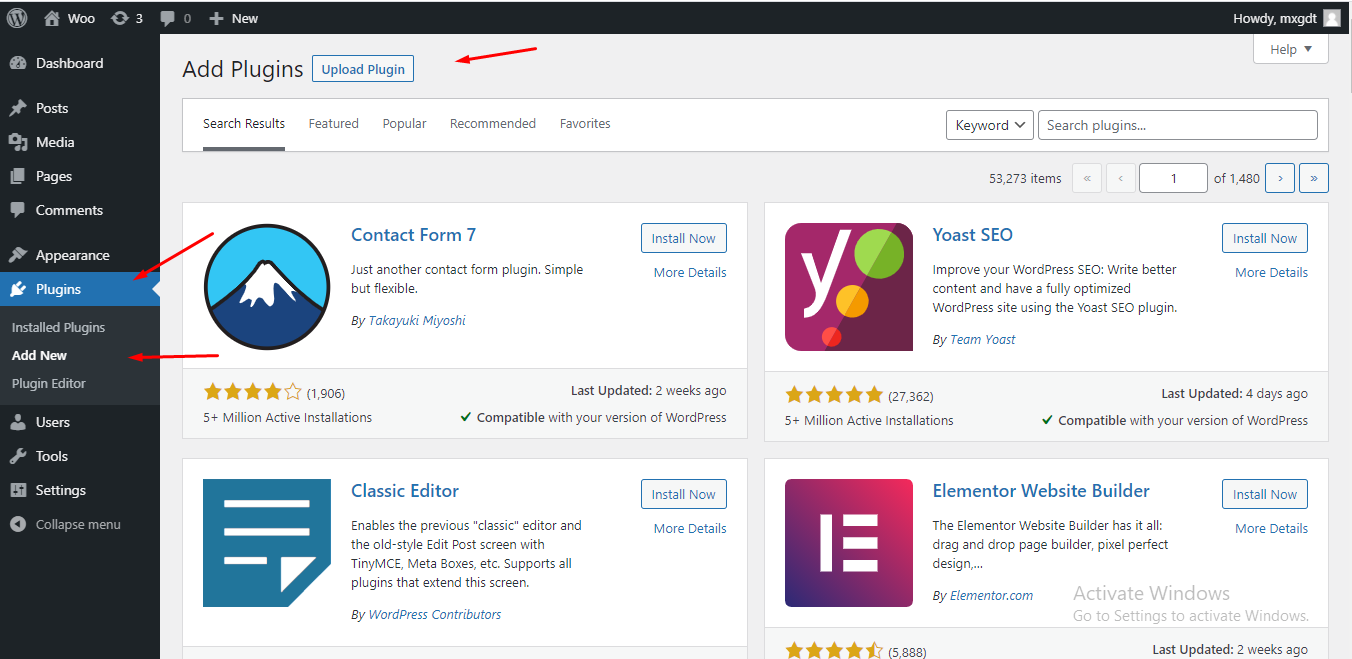
- Search for WooCommerce.

- Click on Install then Activate.
3. Setting up your WooCommerce Store
As WooCommerce is installed let’s start setting up our own WooCommerce Store. WooCommerce comes with a complete store setup wizard to start with ease without needing to dig deep into the documentation.
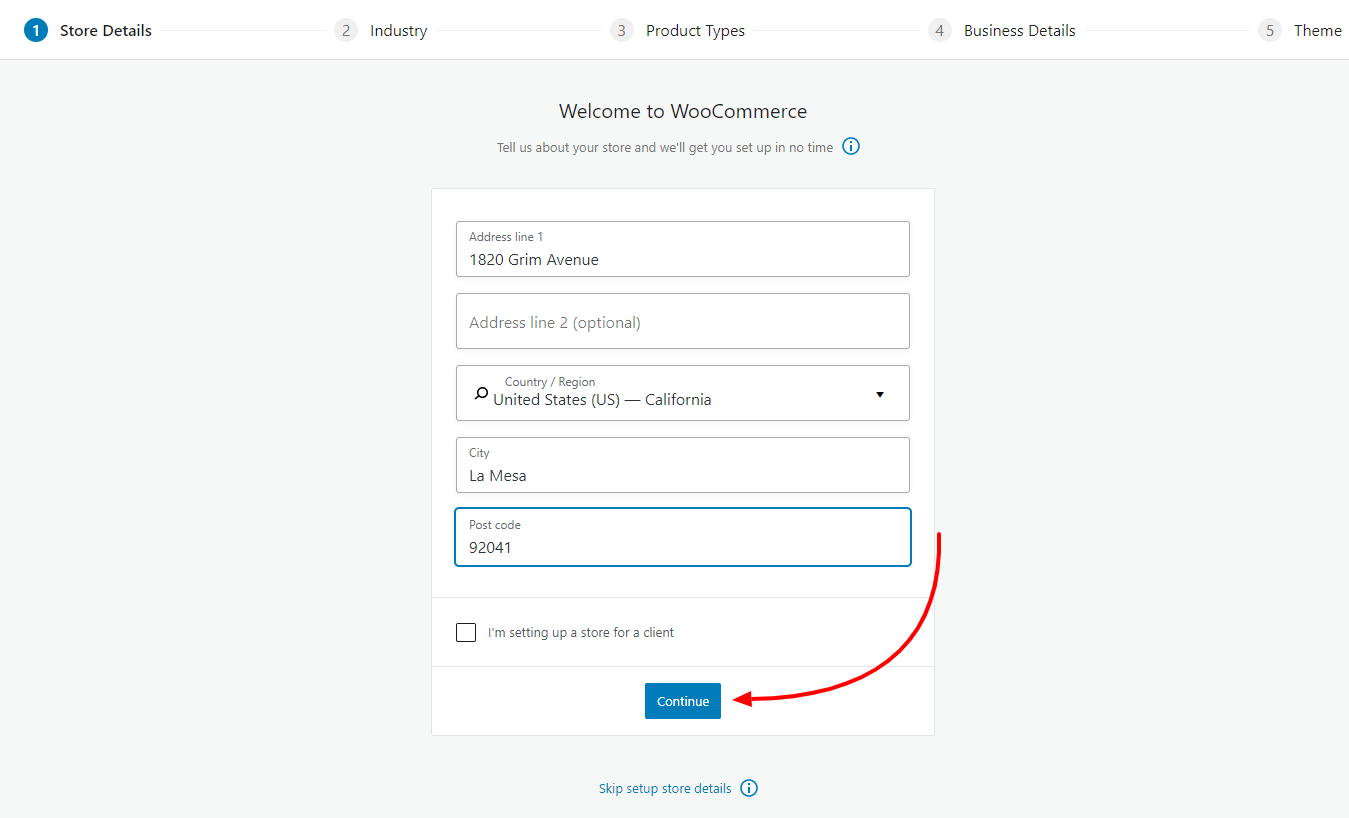
A ready-to-use store by just clicking few buttons. As soon as you click on the activate button it will redirect you directly to the store profiler for filling in important store profile details like locations, type of industry, and products.
Following are the steps of the store profiler:
3.1 - A complete store detail
This allows you to fill in your store physical address.
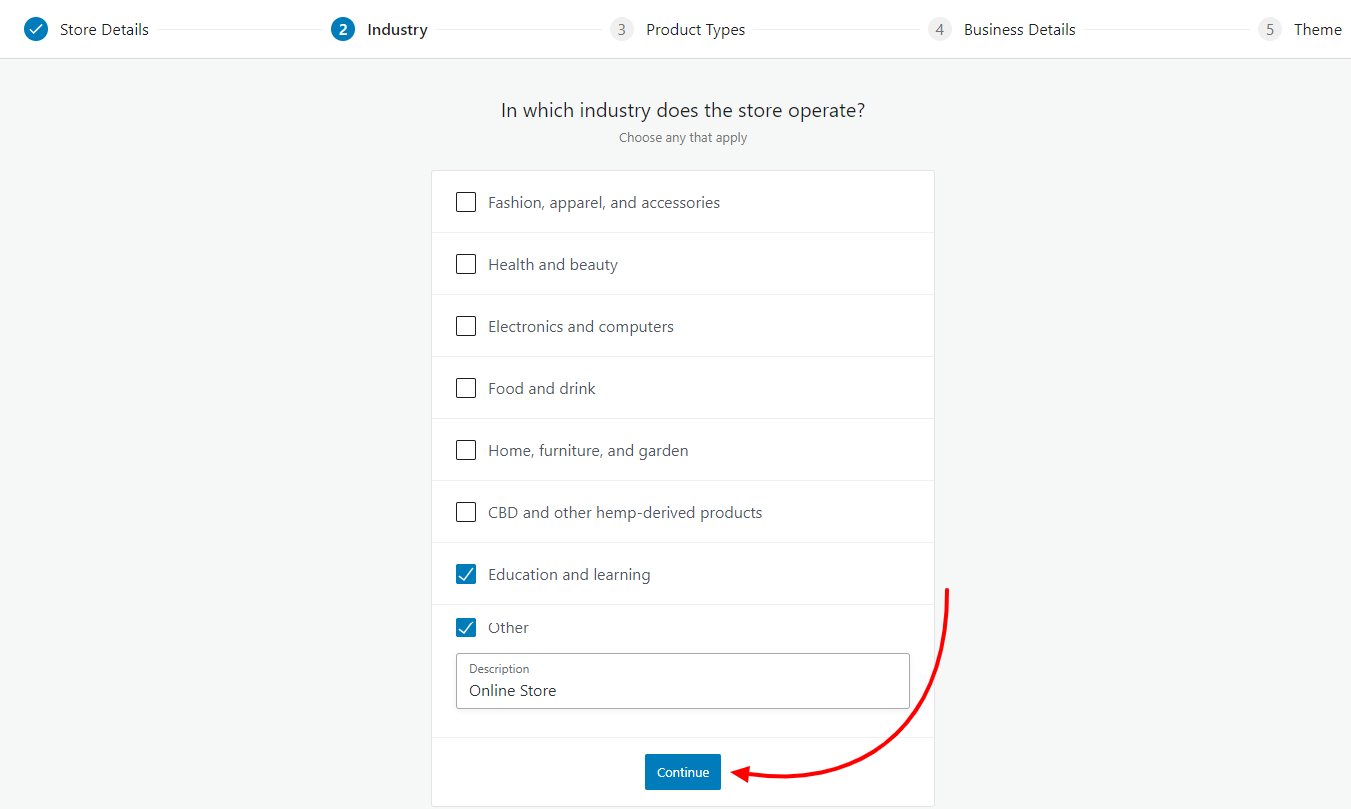
3.2 - Store Type
In which industry does the store operate? - Allows you to select the type of store.
3.3 - Product Type
Allows you to select the type of products you are going to sell.

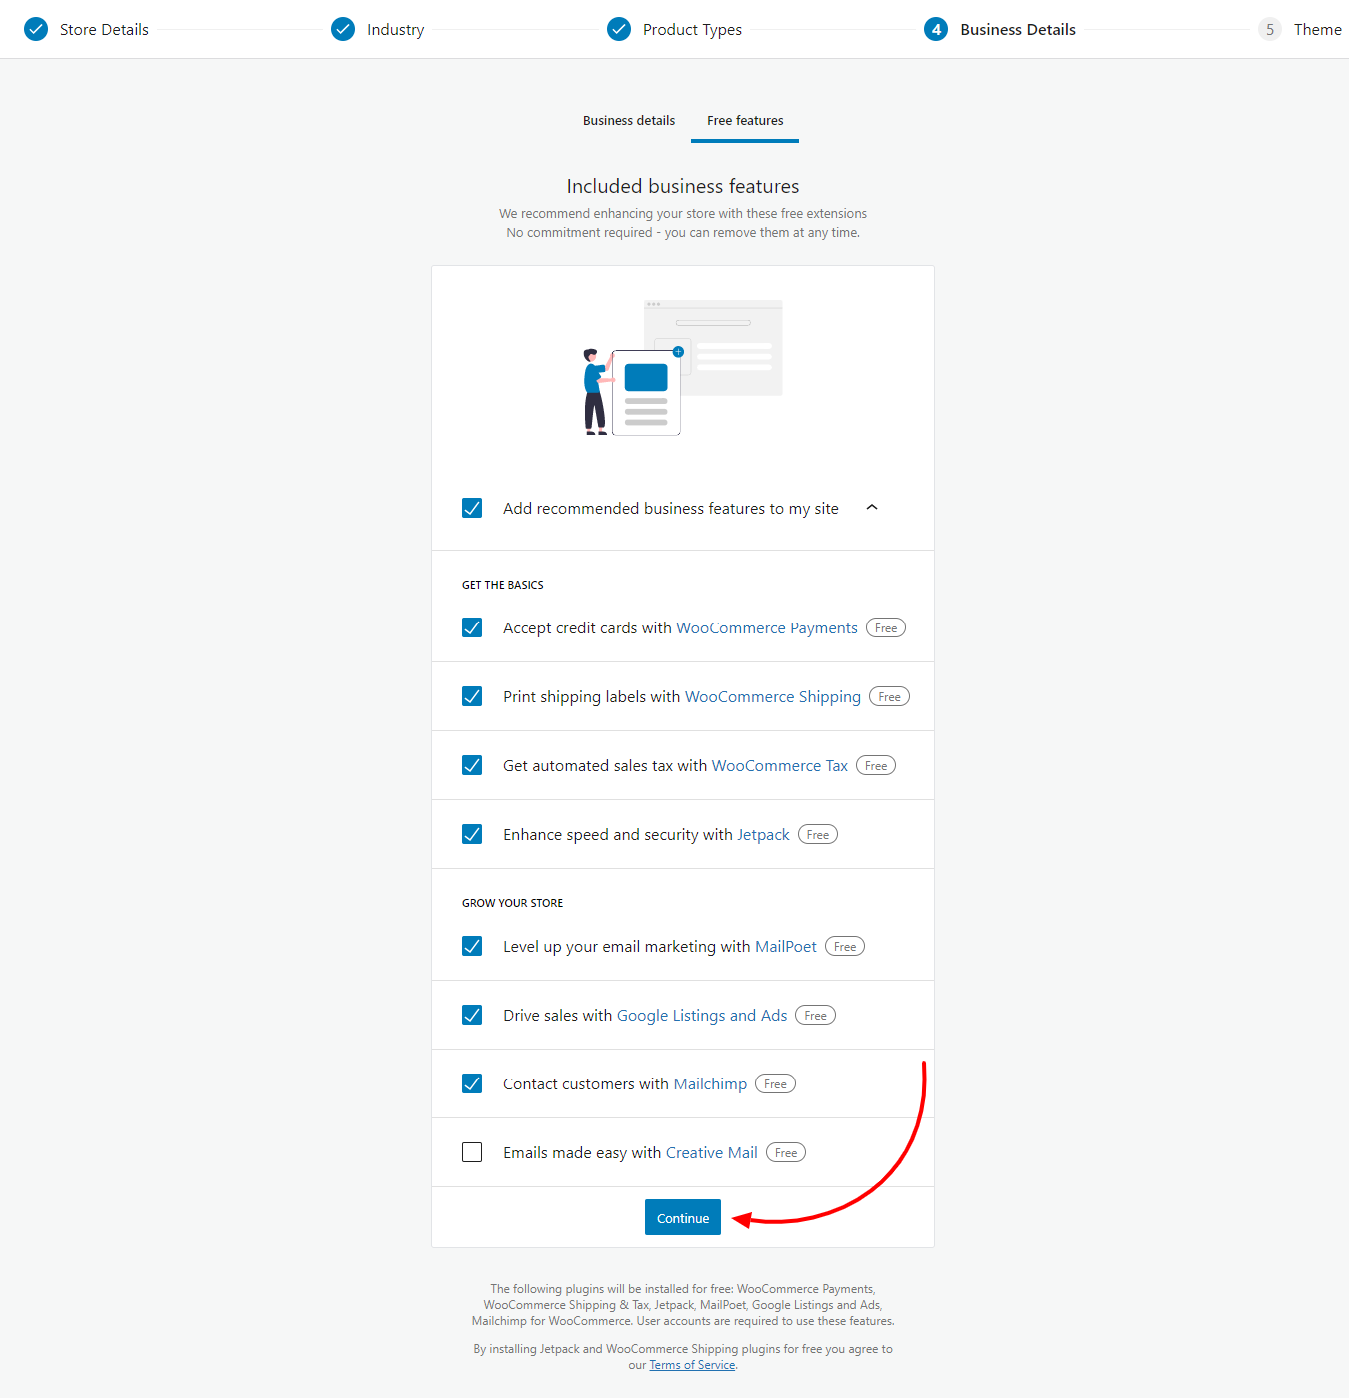
3.4 - Business Details
Gathering details to known whether it is a small or large scale business and recommendations for some essential free features. No worries, these are completely optional and if installed, can be removed later as per choice.

3.5 - Select the desired theme
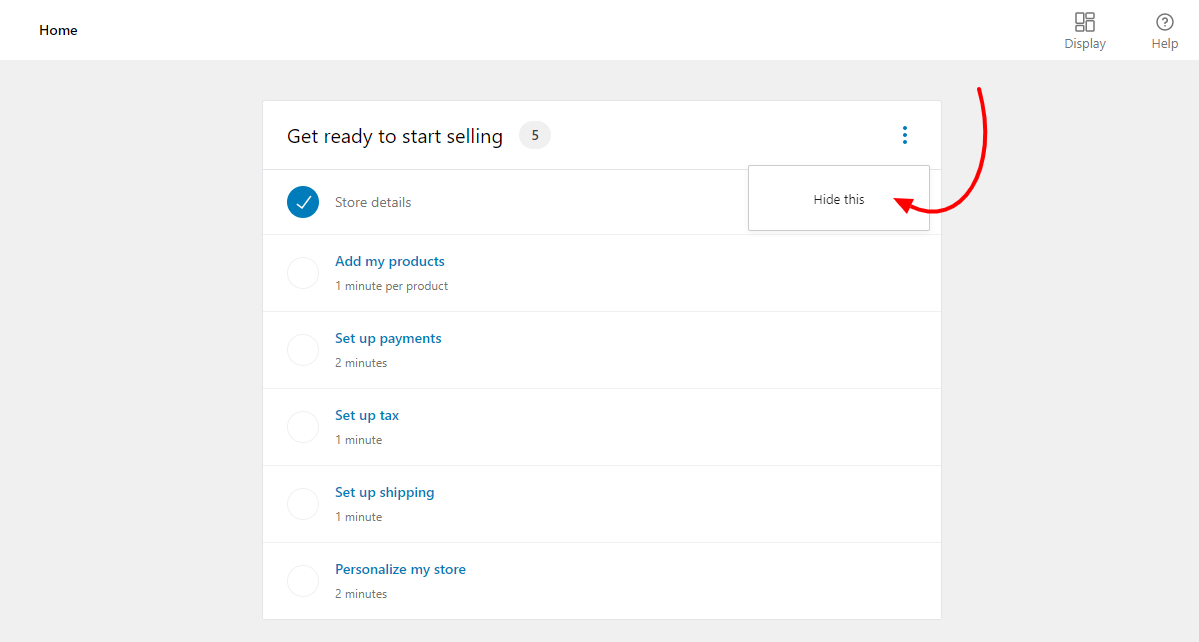
After finishing with the store profiler steps, one will be redirected to the store setup checklist. To get your store up and running complete the step checklist like adding product, setting shipping, payment, and taxes, etc. Follow the checklist and you are done.

If you want you can skip the checklist by hitting on the hide button anytime and can start from any of the steps as per convenience.
Let’s discuss the checklist point one by one starting with adding product.
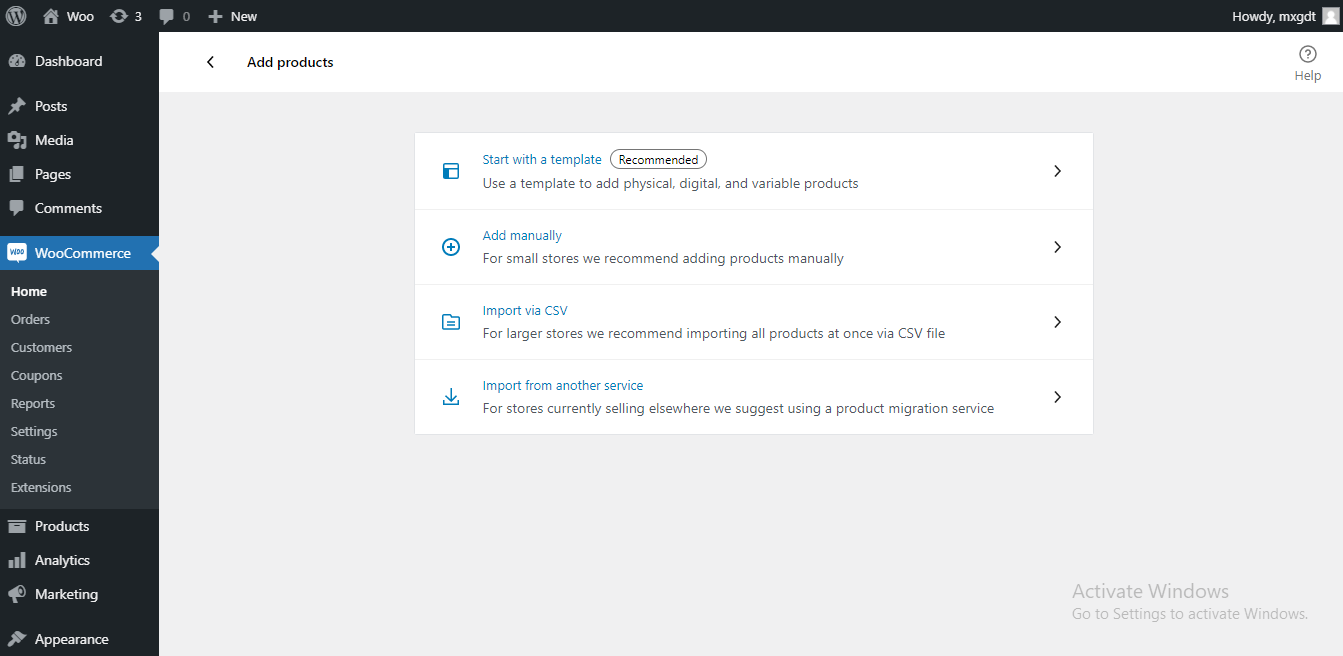
1 - Adding product
This section will provide you three methods to add products. You can choose between adding manually, importing via CSV, or importing from another service/store.
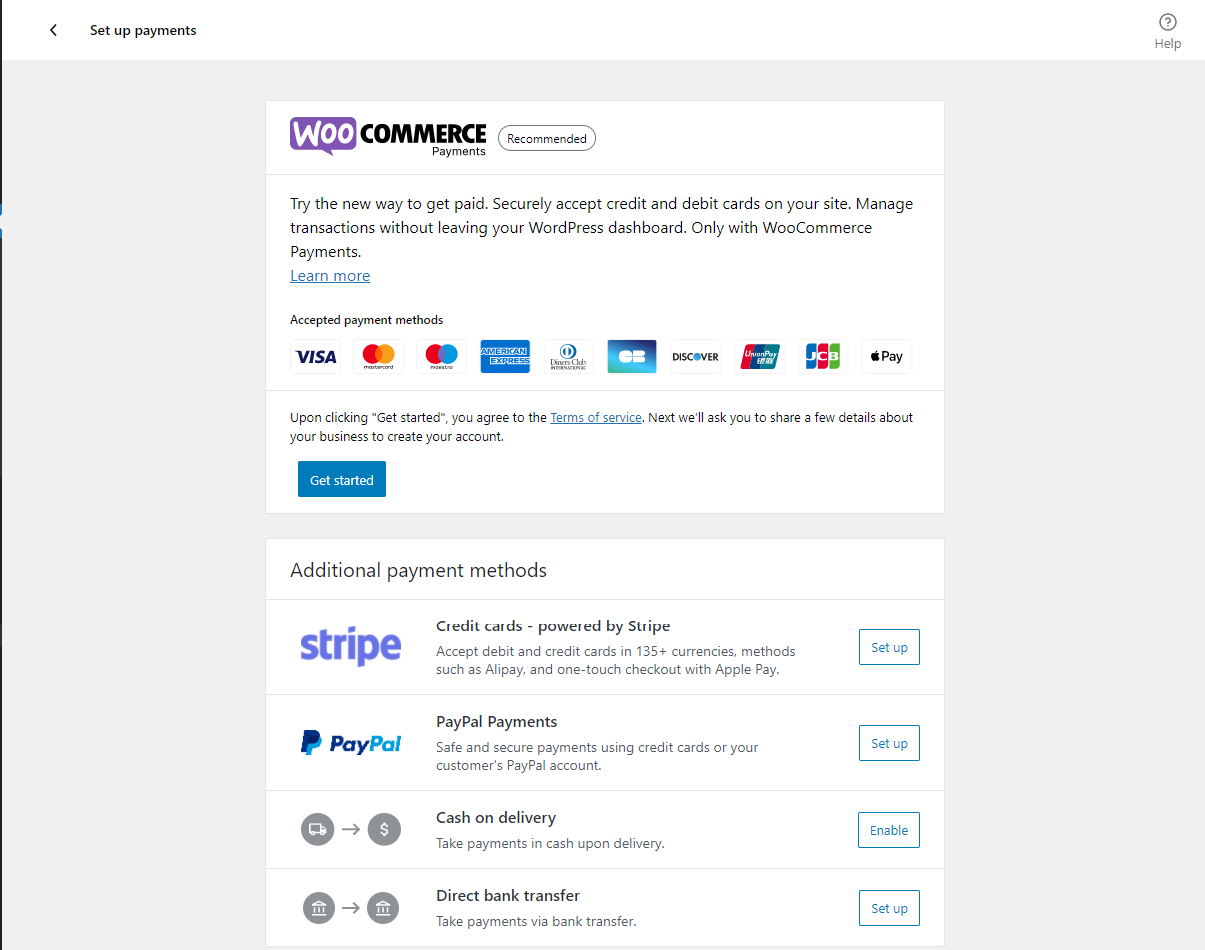
2- Step up payments
In this step, you need to activate options to accept online and offline payments.
3- Product Shipping
Using the product shipping option, you can print shipping labels at home. Select the preferred shipping weight and length units for your products.

4- Recommended Setting
In this Recommended setting, you can simply install a WooCommerce, set automated product or other taxes, WooCommerce admin, and Mailchimp email newsletter.
However, we only recommend activating only “Automated Taxes” and “WooCommerce Admin” from settings. We’ll install a WooCommerce theme later in this step that will look like Amazon.

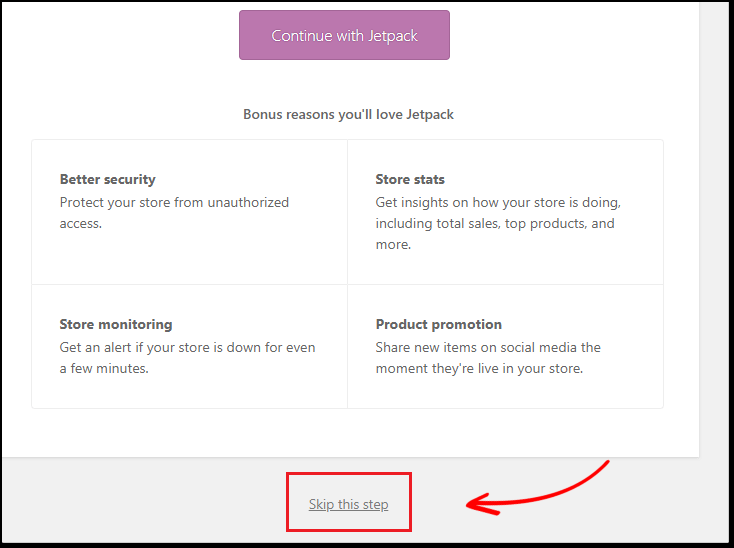
5- Activate
In this step, it will ask you to install Jetpack. We recommend you skip this step.
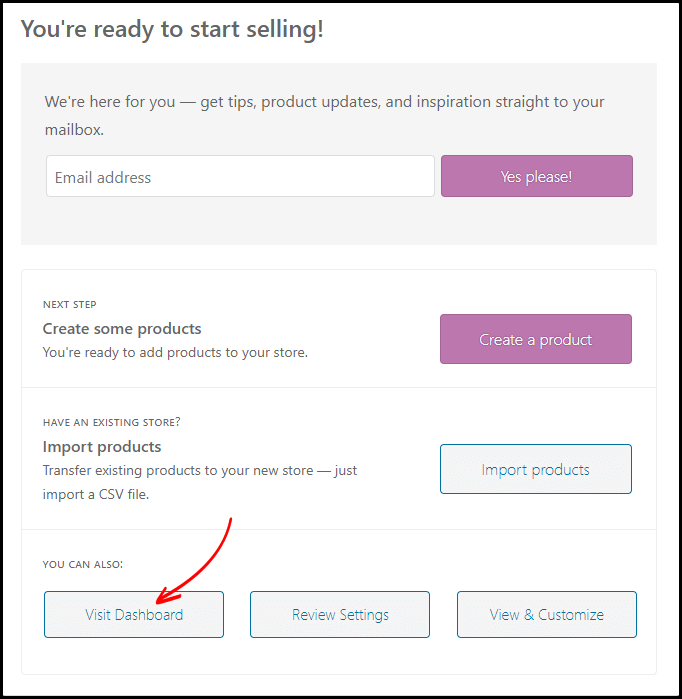
6- Ready to Start
Now you have successfully set up WooCommerce on your WordPress website. And then click on the Visit Dashboard option to go to your WordPress admin panel.
4. Install an SSL certificate
The SSL is very important if you run an online store. By default, you already have an SSL certificate installed on your website. We just need to force your site to redirect SSL.
Now, if you open your website on the browser, you may see your connection to this is not a secure message and might not be able to log in to your site.
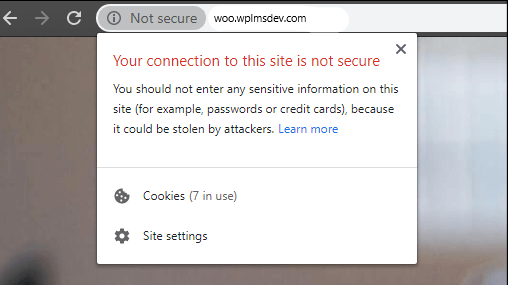
This can be easily fixed by forcing your website to open only with HTTPS.
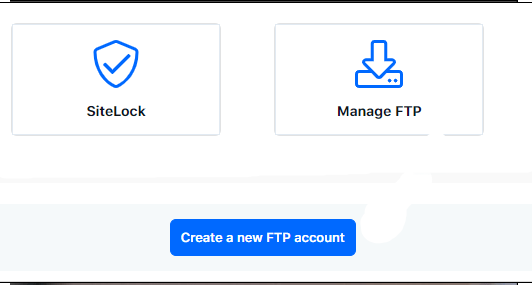
4.1- In this step, you need to log in to your hosting dashboard.
4.2- Then you need to create an FTP account and save the password in a notepad file.
4.3- Download and install the Filezilla client. And then enter your FTP details into the Filezilla client and connect it with your server.
4.4- Once connected, find the .htaccess file and edit it.
4.5- At the end of the file add the piece of code.
4.6- Then save the file and reupload it to your server.
4.7- Refresh your website and you will notice a lock sign that is appearing before your website’s URL. That means your website will open only with SSL.
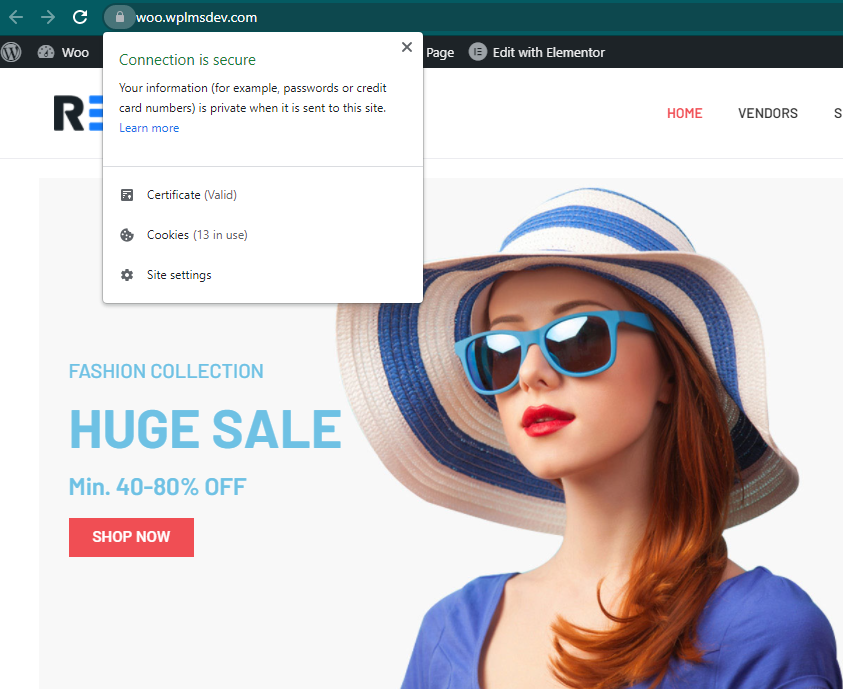
4.8- Go to your website WordPress Settings > General.
4.9- Now change the HTTP protocol with HTTPS. You can also add “www” before your website’s URL but it’s completely optional.
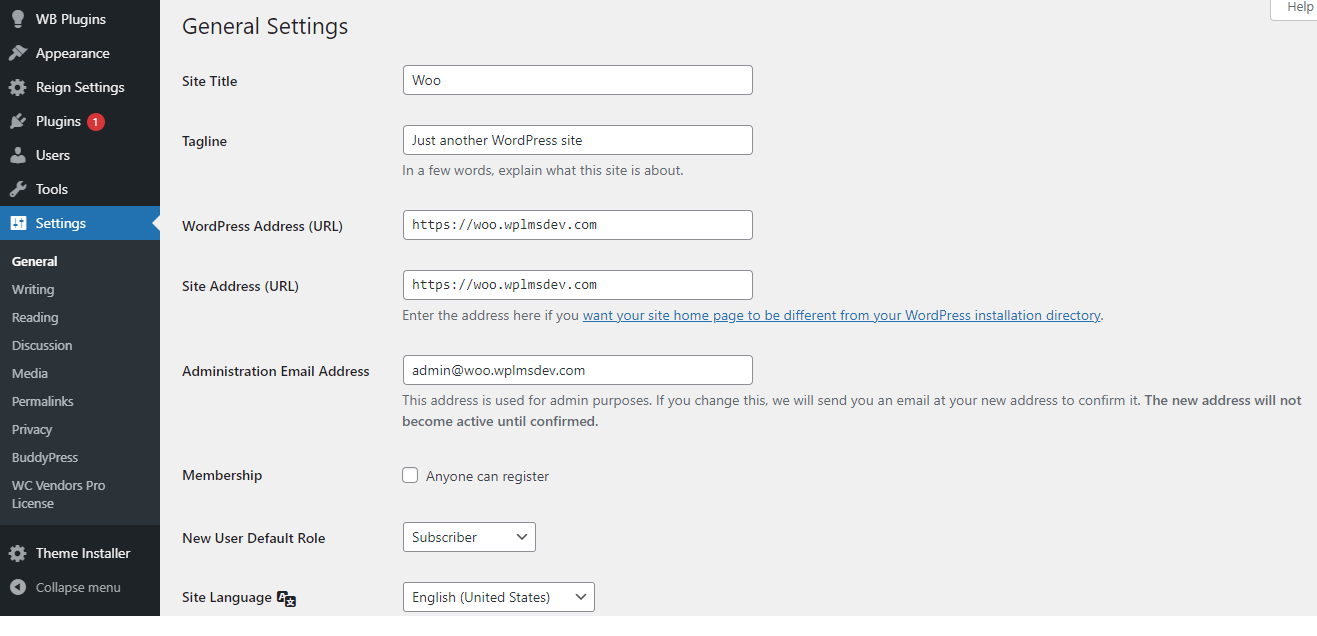
4.10- After the complete process click on the save changes. Once done, you will be automatically logged out.
5. Install a WooCommerce theme
Now, we need to install a WooCommerce theme on the website. There are many of WooCommerce themes available in the market and it’s hard to find the best one for our WordPress website. But, not to worry about it. We have searched and tested many WooCommerce themes and we will suggest you the best one.
StoreMate: WooCommerce Multivendor Theme
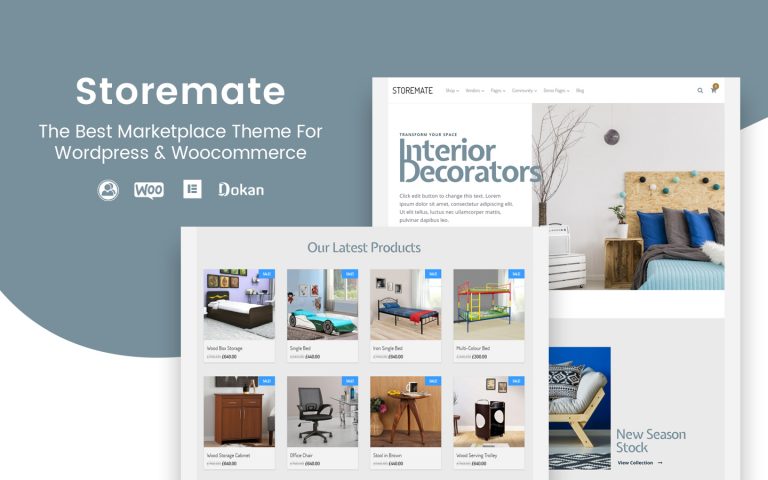
If you are looking for the best WordPress theme to create a multivendor marketplace on WordPress, StoreMate is a perfect solution for you. This theme is designed by a top WooCommerce expert. StoreMate is Dokan based WooCommerce multi-vendor theme. You can easily launch a successful marketplace like Flipkart, Amazon, or eBay. Its intuitive interface makes it easier to manage your eCommerce store. Even you can install and set up the demo in just one click.
Features of this theme include:
- WooCommerce and BuddyPress Support.
- RTL supported.
- Amazing Grid and List Layouts.
- Stunning header layouts.
- Awesome Dokan Page Designs.
- Exclusive WooCommerce Page Designs.
- Unique Single Product Page Customization.
- Automated Mega Menu Support.
- Interactive Ready To Use Demos.
- Color & Typography Options.
- Additional Dokan Widgets.
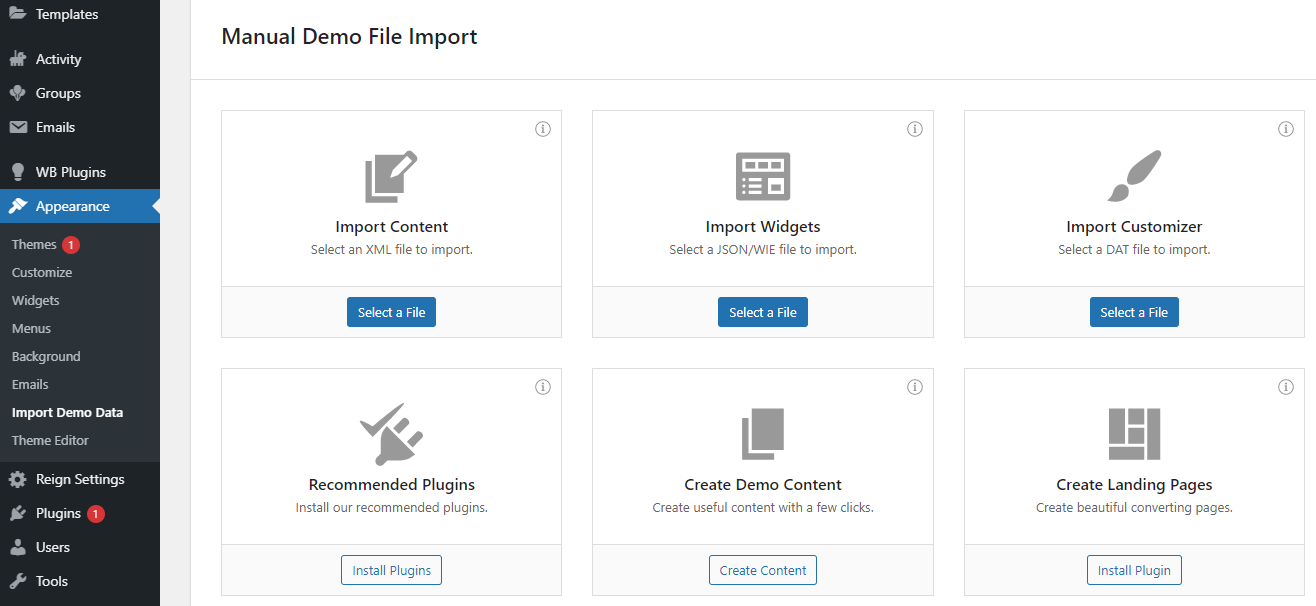
Import Theme’s Dummy-data
To import the theme’s dummy data, go to Website Appearance > Import Demo data.
6. Adding products to your online store
Adding products to your website WooCommerce store is very simple. To add a new product, visit Products > Add New.

Enter your product name and add the product’s description.
Product Data
In this section, you can add a product’s general information such as price, tax information, inventory, product availability, and many more things.
Now, move to the right side of the page. From there, you can set the product’s category, set the product’s featured image, add product gallery images, etc.

7. Customize your WooCommerce store
The best thing about WooCommerce is that it allows you to change every part of your store. To customize your WooCommerce theme, go to website Appearance > Customize.
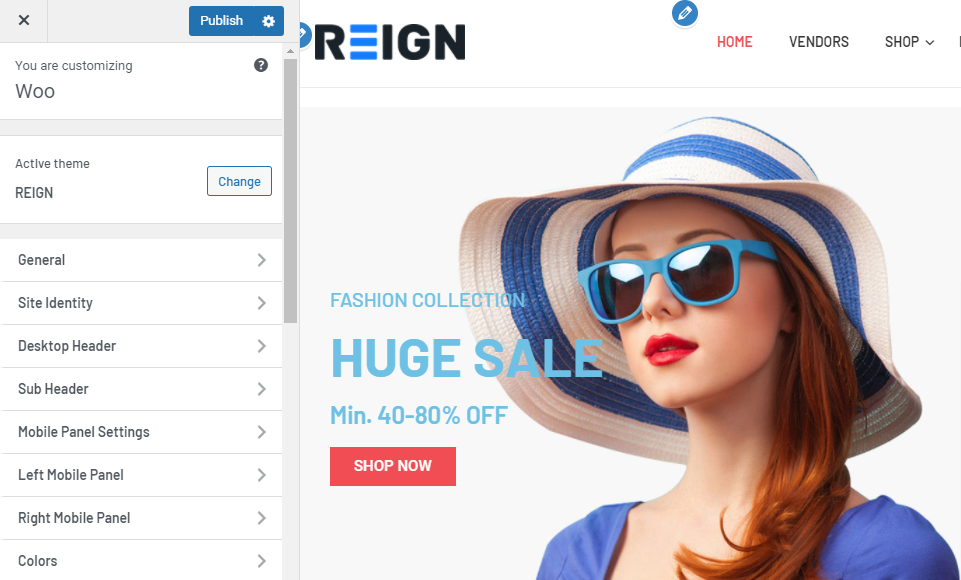
In the customize option, you can change your store’s layout, change header and footer, add favicon, add store’s logo, background color, and much more. When you make the changes, don’t forget to click on the Publish button.
And it’s done, this is how you can make your websites like Amazon or eBay, or Flipkart.
Summary
When you start using the Dokan multivendor plugin combined with StoreMate Dokan WordPress themes, you will not be wasting your time in managing your website, sales, and tax calculations alone. Instead, you’ll have more time to focus on growing your clientele and membership. So, if you have an idea, work on that, create your brand, let the world discover your success.
Interesting Reads:
How To Write A Service Page That Converts Visitors Into Happy Customers
Related reading