6 min read
Available Dokan Shortcodes and Their Usages
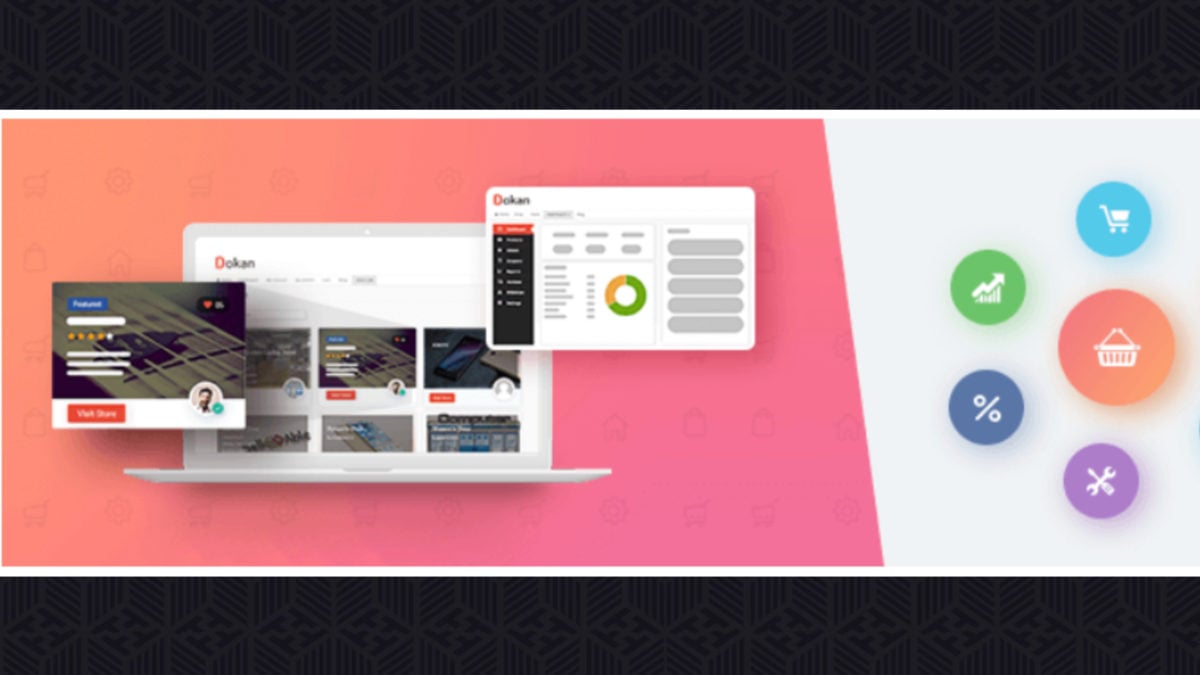
Dokan Multivendor Marketplace has diverse shortcodes for clients to make significant pages right away. So in this article, we’ll examine how effectively you can utilise these shortcodes to build your eCommerce site’s workflow process quickly.
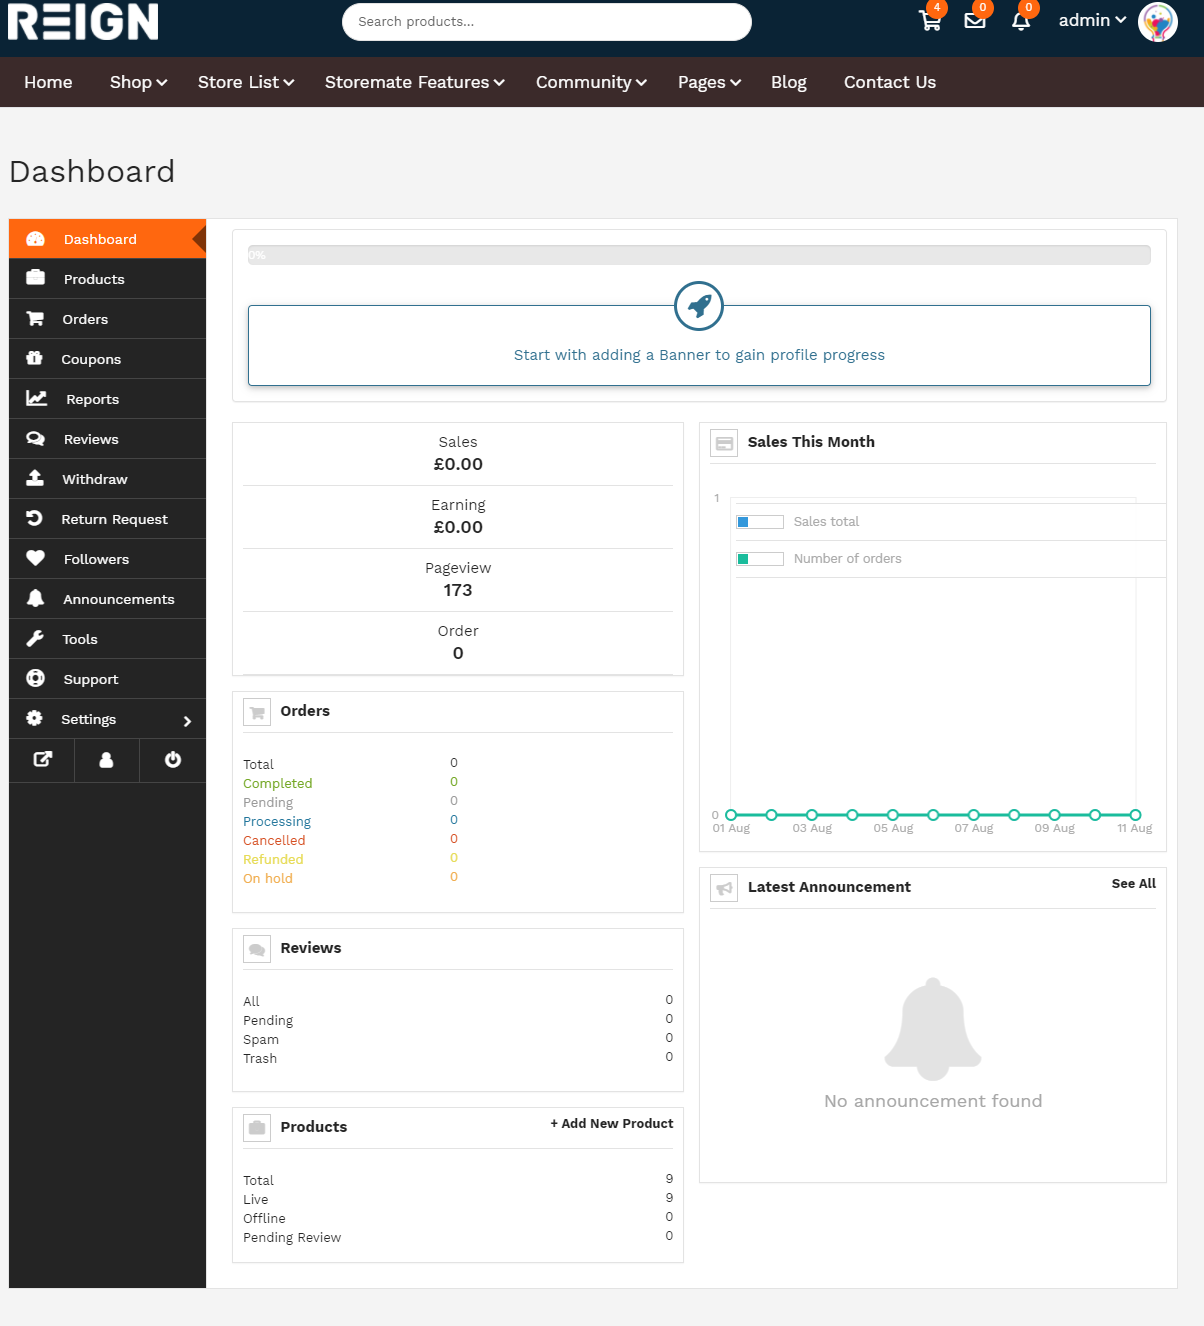
Dokan Dashboard
After successfully installing and activating the Dokan Plugin on your WordPress site, you’ll get a simple-navigated Dashboard. From here, you will get all the information about your online marketplace at a glance.
Information like a list of vendors, sales per month, amount of commissions, list of withdrawals, and more. So in that case, you need to navigate to your WordPress> Dokan> Dashboard.
Also Read: AI-Powered Ecommerce SEO Strategies to Skyrocket Your Sales

Dokan Tool Section
You can make pages automatically by utilising the Install New Pages button from the Dokan Tools segment. The following are the pages that will be installed,
- Dashboard ([dokan-dashboard]).
- Store Listing ( [dokan-stores]).
- My Orders ( [dokan-my-orders]).
Go to the WordPress Admin → Dokan → Tools option. On this page, you will get options like :
- Page Installation.
- Re-generate Order Table.
- Check Duplicate Orders.
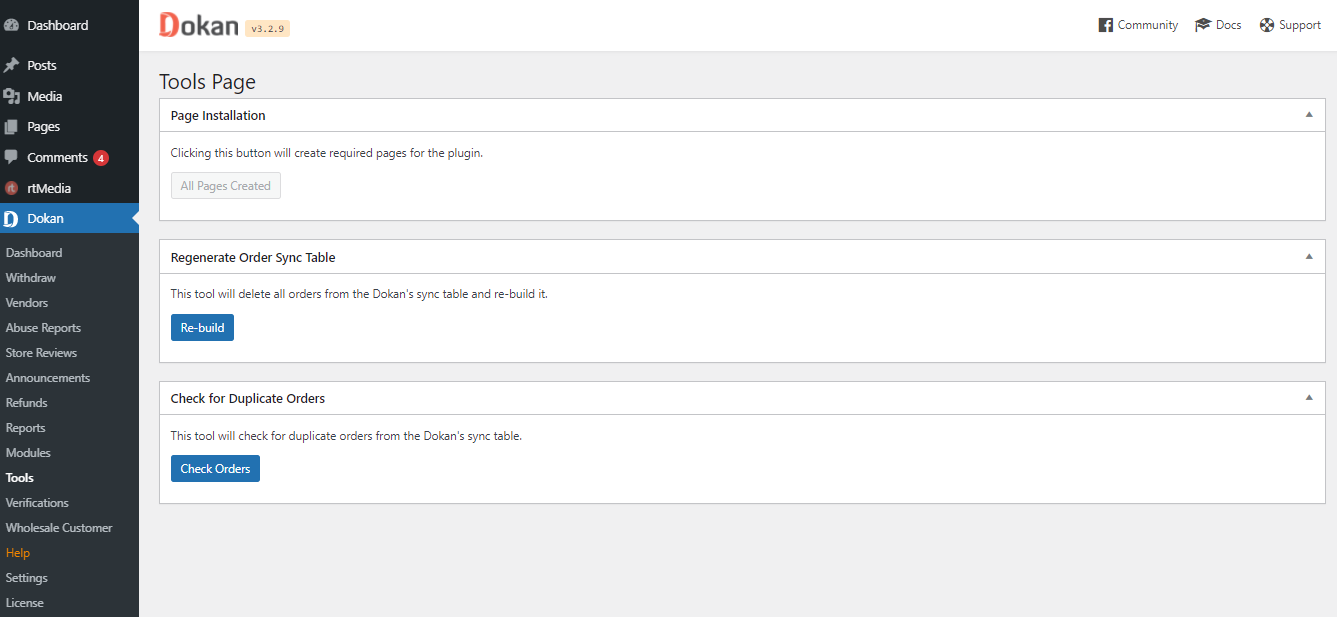
Go to the Dokan menu button then all the Dokan default pages like the dashboard, my-orders, vendor lists, etc will be automatically installed in WordPress. You do not need to create and set them manually from Dokan > Settings > Page Settings.
Also Read:How to Create a Dating Website Using WordPress Plugins
Dokan Shortcodes
1. Dashboard
[dokan-dashboard]: This will display the vendor dashboard and all the elements for the vendor.
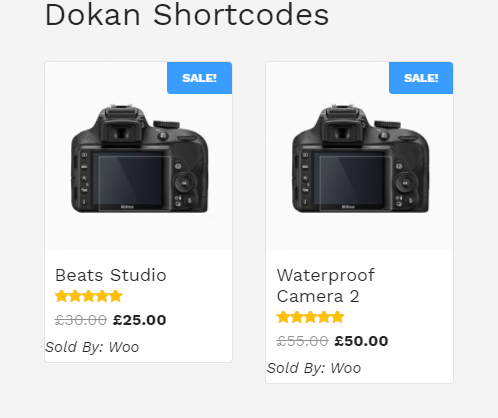
2. Best Selling Products
[dokan-best-selling-product no_of_product=”3″ seller_id=””]: Best Selling Products shortcode is used to display 3 best selling products of vendors.
Also Read: Top 10 Books on Entrepreneurship to Read
3. Top-Rated Products
[dokan-top-rated-product]: The Rated Product shortcode is used to list all the top-rated products in a list.
4. Custom Migration Form [Pro version only]
[dokan-customer-migration]: Used to create the Vendor Registration Form.
![Custom Migration Form [Pro version only]](https://wbcomdesigns.com/wp-content/uploads/2021/08/Untitled-1-2.png)
5. Geo-Location Filter Form
[dokan-geolocation-filter-form]: It gives you easy navigation to find products through filtering products.
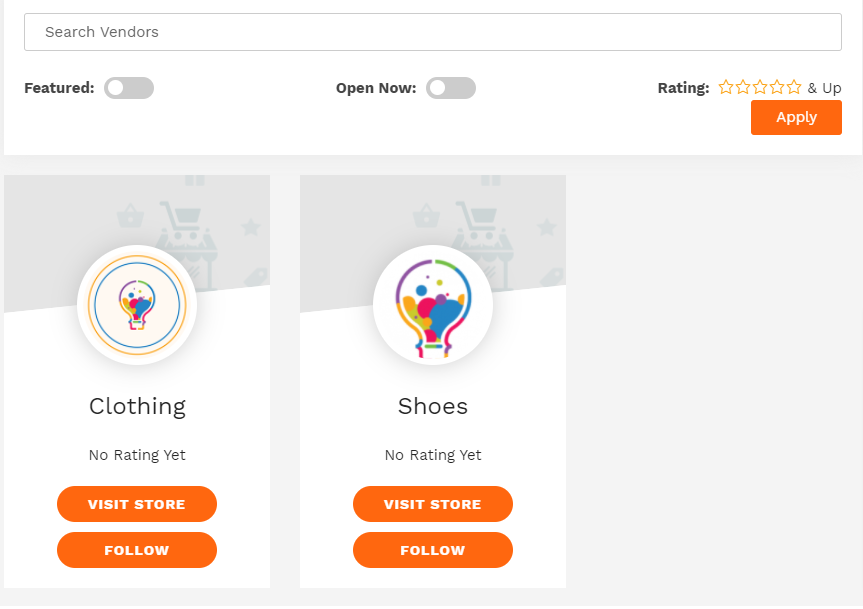
6. Store List
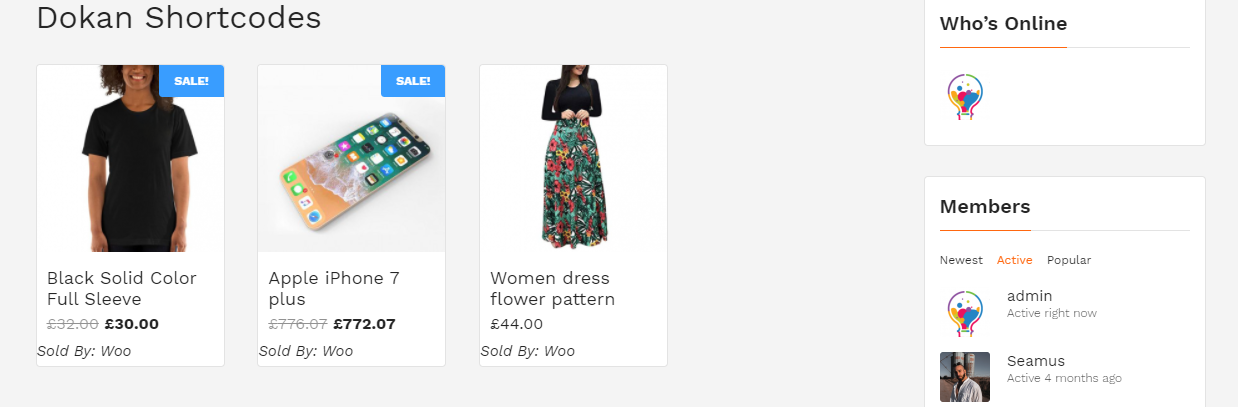
[dokan-stores]: This shortcode is used to list all the stores available on the site on a single page.

Also Read: 10 Best AI Voice Cloning Tools of 2023
7. Store Category-wise
[dokan-stores category=” clothing”]: With the help of this shortcode, you can easily list the stores based on store category
8. Store Order-wise
[dokan-stores order=” ASC”]: This will rearrange your orders in ascending or descending order.
9. Store Order by Wise
[dokan-stores orderby=” registered”]: This will be used to categorise the order based on the vendor registration date.
10. Store_id wise
[dokan-stores store_id=”1, 2, 3″]: This shortcode will help to list the stores according to their store id.
11. Featured Store wise
[dokan-stores featured=” yes”]: This will help to show the featured vendor.
12. Show Store with Products
[dokan-stores with_products_only=’yes’]: This shortcode will help to show the stores that have products.
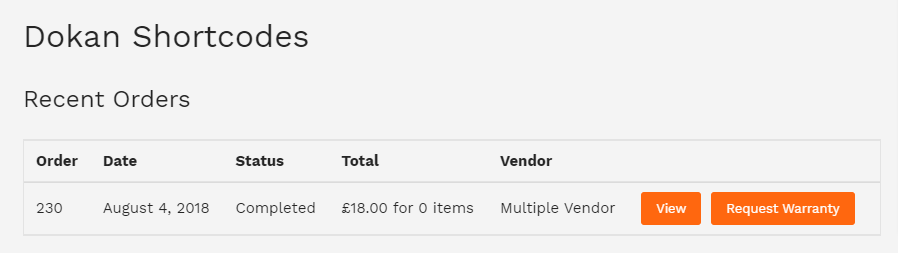
13. My Orders
[dokan-my-orders]: This will be used to list all the orders for the customer.
How to Use Dokan Shortcodes on an Online Marketplace
Including shortcodes, a WordPress site is easier than ever. It just required some simple steps to add a shortcode.
Yes, it is simply by pasting an appropriate shortcode to a page or post, it will consequently make its individual components on that page or post. For a better arrangement, how about you utilise the Dokan shortcodes on an online marketplace?
At first, you have to go to WordPress Dashboard > Pages > Add New Page. And then you have to give a title to your newly created page or post.
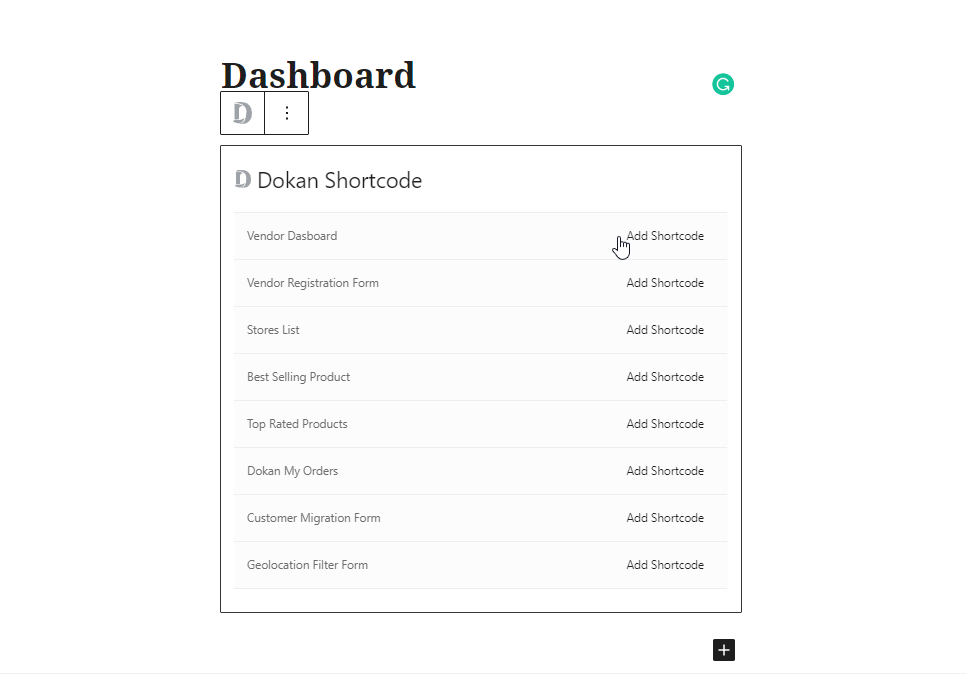
And then, click on the ‘+’ button and find the Dokan logo above your text editor. Then, after selecting it, it will display all available shortcodes described above.

Here are some shortcodes that will appear after you select the Dokan shortcodes.
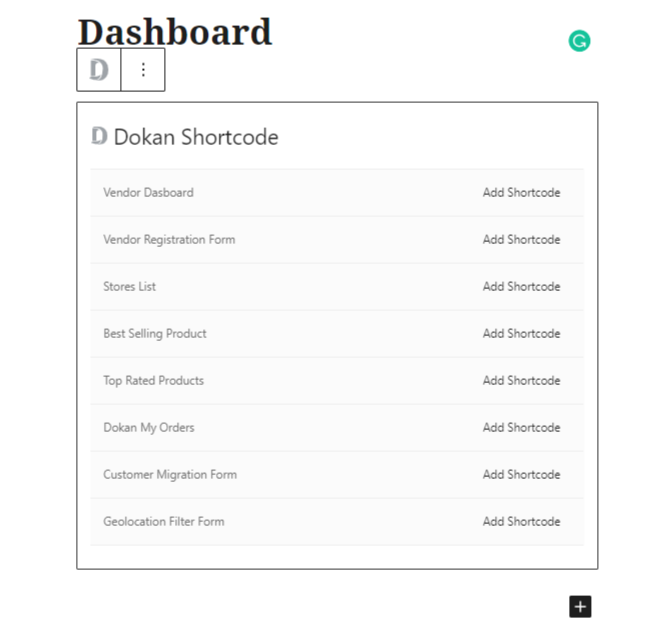
In the next step, you will have to click on the shortcode that you want to show on your front end. You don’t even need to learn to remember or copy-paste the shortcodes. Simply select the shortcode and add it to the page or post. Here, we are going to create the Vendor dashboard form. So, we will have to select ‘Dokan Customer Migration”. Then the shortcode will be placed automatically.
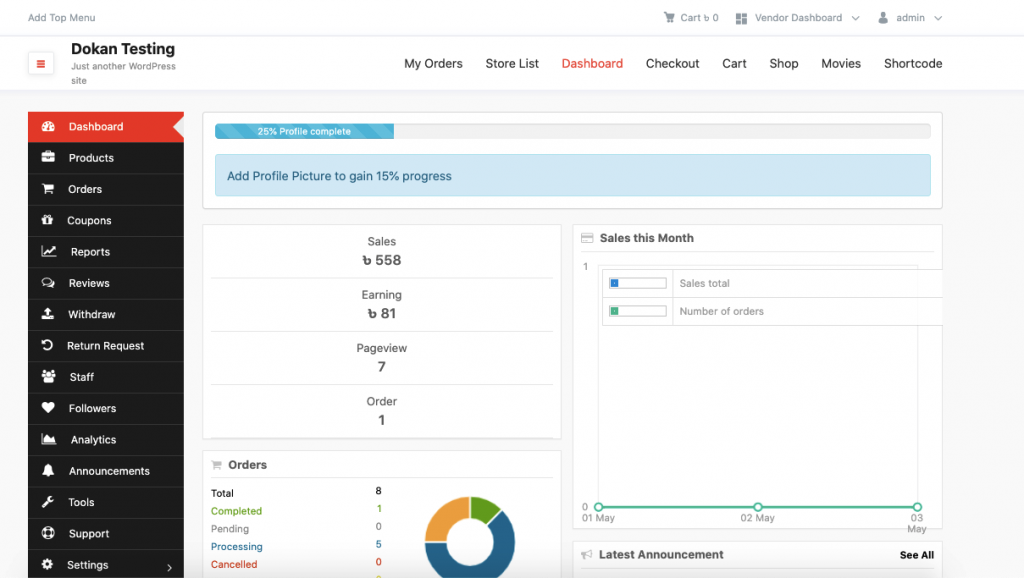
Vendor Dashboard
Then, publish your page or post & check if it has created what you were looking for or not.
Activating & Deactivating Dokan Modules
As a full-fledged multi-vendor marketplace system, Dokan comes up with more than 25 modules. It takes some simple steps to activate and deactivate a Dokan module.
Modules Introduction
This feature is known as an extension or add-on. Dokan presently offers premium and free Modules in additional packages that effectively further develop the client experience. These Modules work the same way as the previous extensions did, except that they are much easier and better to manage. You can now simply view and control all your add-ons from a single page or post. You will also get the latest updates for all the upcoming modules from now on directly from within the plugin. Also, there are no more manual downloads and installations!
Also Read: Benefits of Building an Open-Source Knowledge Base
Premium or Pro Modules
Navigation
To access these Modules, navigate to WordPress Admin->Dokan->Modules.
Lastly, every extension had to be purchased separately and uploaded in the zip files, and then installed and activated. But now you can easily go to the Dokan in-built Modules page to find all the modules that are provided in your package.
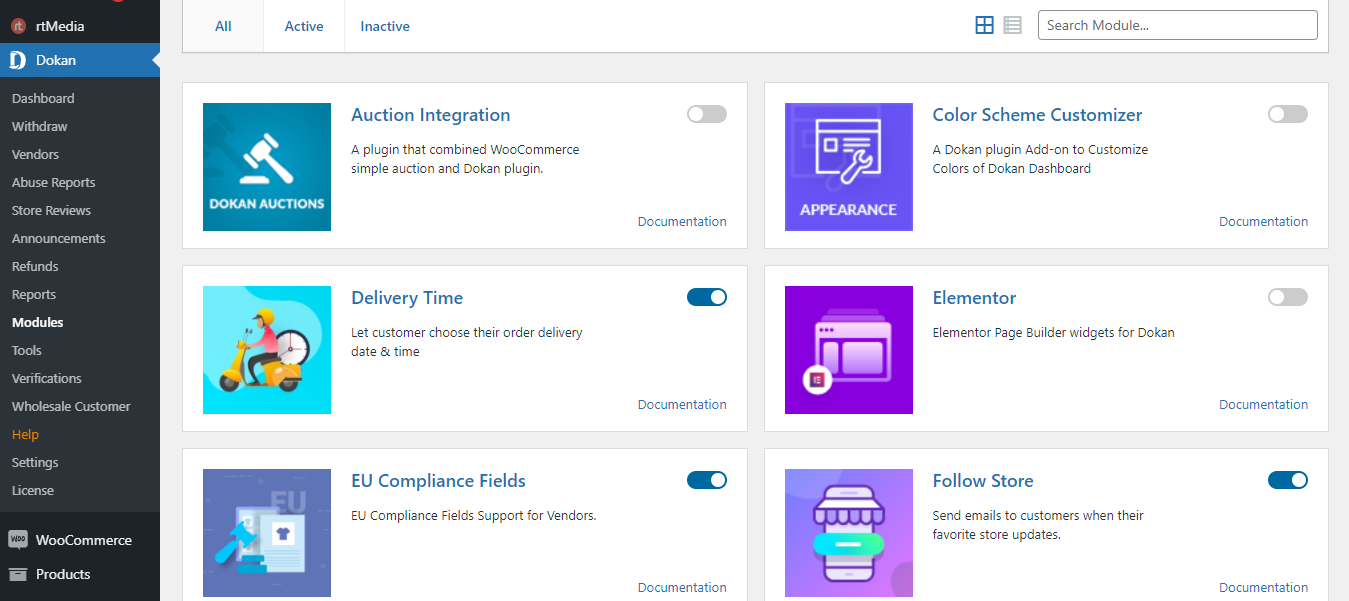
Activating a Module
To activate every module, you simply have to activate the toggle button present on the top right side corner of each integration. When you activate a module, it will display that it’s activating, as shown below.

Deactivating a Module
If you want to deactivate the module, you just have to stop using a previously active module and turn it off by simply clicking on the toggle button. When you turn it off, it will simply display that it’s deactivating, as shown in the image below.

Free Modules
Navigation
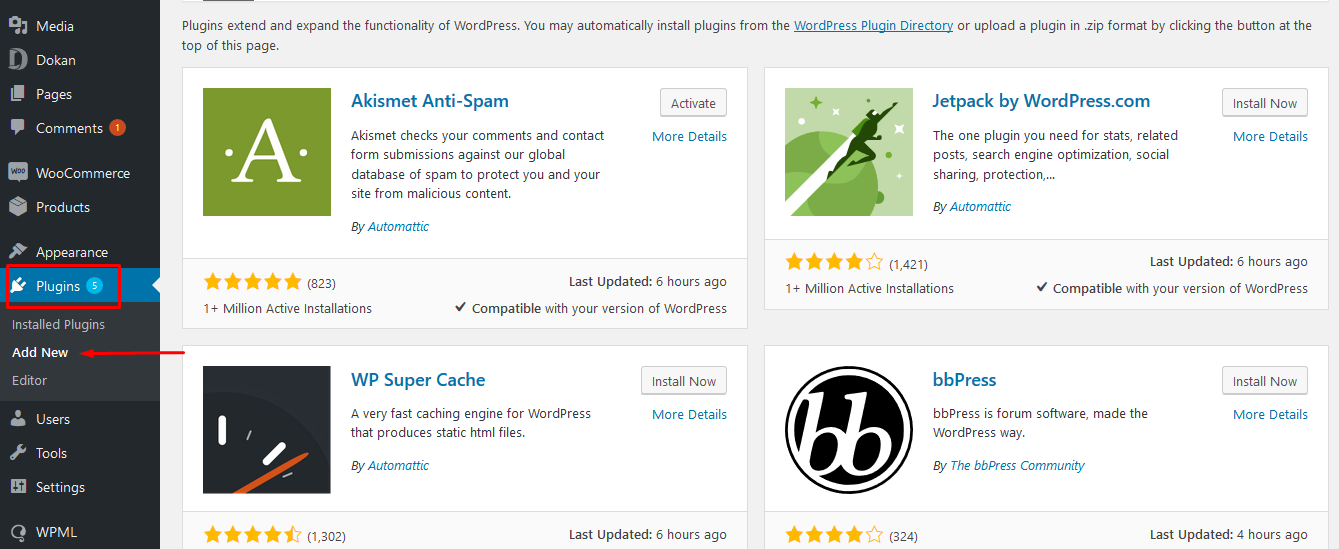
To install the free modules, navigate to WordPress Admin>Plugins>Add New.
Also Read: 10 Best AI Sales Tools
Installation
From here, you can easily search for the free module you are looking for in the Search Plugins bar, as shown below.


And then simply click on Activate to start using this free module!

Dokan Plugin Requirements
To get started with the Dokan Plugin, you’ll need to keep in mind the things below:-
- PHP 5.6 or higher.
- MySQL 5.6 or Higher.
- WordPress 4.4 or higher.
- WooCommerce Latest Version.
Also Read: How to Use Google Bard AI in 2023 (Tutorial)
Dokan Multivendor Compatible Themes
1. StoreMate Dokan
Introducing StoreMate Dokan, the ultimate solution that not only allows you to sell your products but also gives you the power to build and establish your brand. Imagine having your very own online store, proudly showcasing your brand name and a curated selection of products. This personalised touch not only sets you apart but also fosters recognition and loyalty among your cherished customers.
With StoreMate Dokan, the possibilities are endless. Tailor your online store to match your unique style and preferences, creating a distinct and memorable shopping experience. The platform provides you with the flexibility to showcase your products the way you envision, ensuring that every aspect of your brand is reflected in the digital storefront.
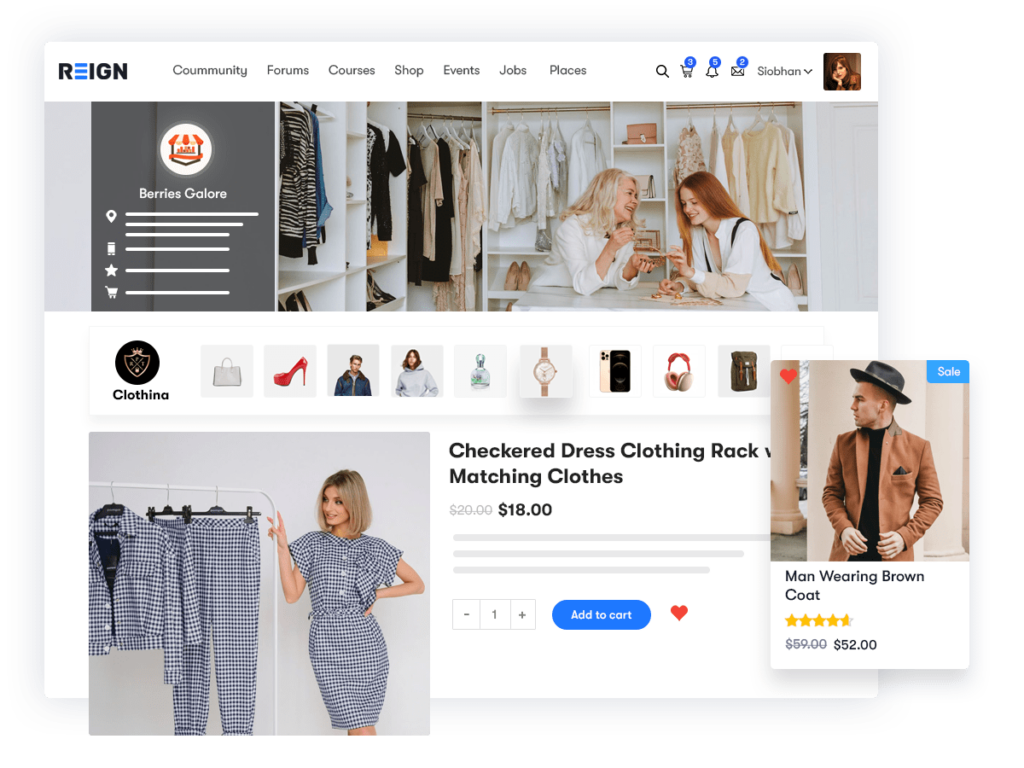
2. BuddyX Theme
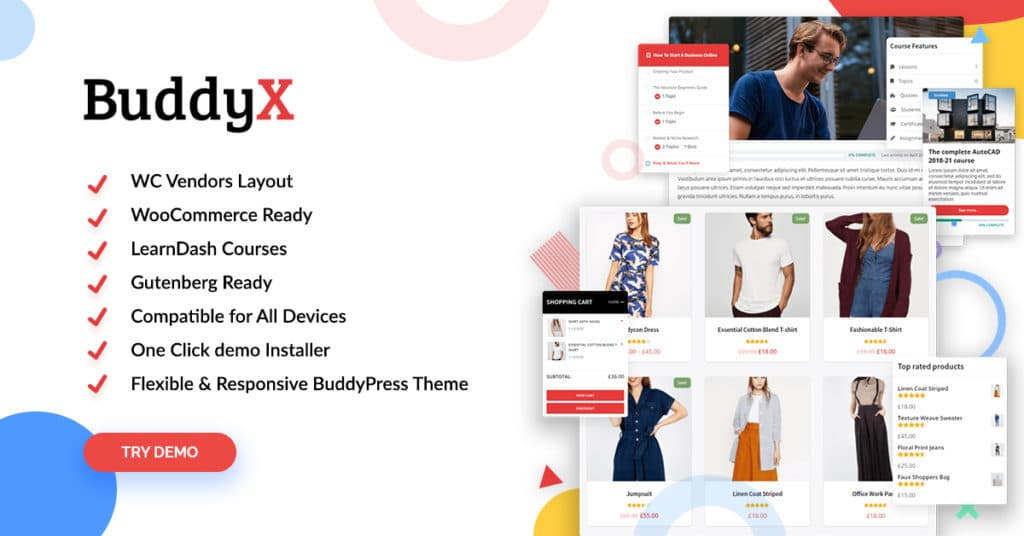
BuddyX theme is a multipurpose WordPress theme that works extraordinarily and performs very well. The advanced features of this theme are simple for the multivendor and buyers. BuddyX theme is observed in WordPress configuration coding guidelines, which makes it easy to customise and handle. This will come with a completely responsive and Retina-prepared plan, and shop owners and vendors will have a smooth experience on desktop and mobile. BuddyX theme supports the WooCommerce marketplace and allows you to sell your products online to your community members. For more advanced features, you can try our BuddyX Pro theme.
Conclusion on Dokan Shortcodes

With the help of these simple Dokan WooCommerce setup steps, all these multivendor marketplace themes and plugins are very flexible to create a multivendor marketplace website. I hope that this article helped you create a Dokan Multivendor WordPress for your website. So, for any query, feel free to comment below. Thanks for reading.
Interesting Reads:
How to Start Your Own Social Network Website?
How Premium Themes Are Better Than Free WordPress Themes?
Related reading