7 min read
How to use BuddyPress for building a Community Website

Turning your WordPress site into a community with BuddyPress has never been easier thanks to improvements in recent versions of the social networking plugin. BuddyPress works great with a huge number of free and premium themes, and the BuddyPress components look great in responsive themes too. If you want to learn all about how to use BuddyPress, then the dedicated BuddyPress site is a great place to go, and we also have plenty of BuddyPress guides here on Wbcomdesigns. But for me the best way to learn anything is by having a bash at it, so let’s get started!
How to Install and Setup BuddyPress

If you have ever installed a plugin on your WordPress website, you’ll have no problems installing BuddyPress. In your WordPress dashboard, click on Plugins > Add New and then search for BuddyPress. It should come up as the first result so go ahead and click on Install and then Activate.
You will immediately be taken to the BuddyPress welcome screen which has links to help you set up and manage your community.
The first thing we’ll do is configure BuddyPress settings. Clicking on the Get Started button on the welcome screen will immediately take you to the settings area for BuddyPress.
Configuring Your BuddyPress Setup

As you can see from the screenshot (above), there are three areas that need to be configured:
- Selecting the components you want to include
- Creating and assigning pages
- Tweaking BuddyPress options
Let’s walk through each of them, one step at a time.
Step 1 - Activate the BuddyPress Components
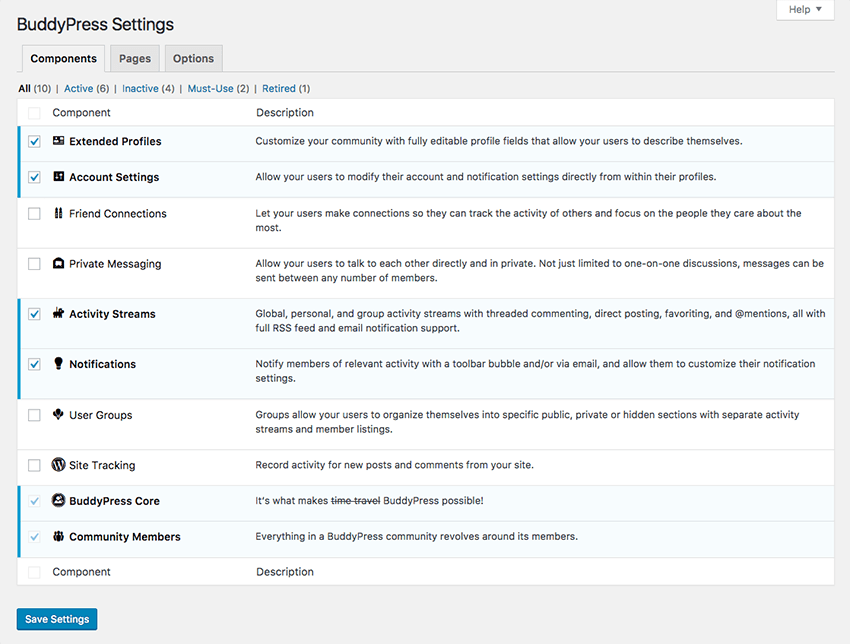
By default, BuddyPress will have some of the components pre-activated. You can activate or deactivate all but two components. The BuddyPress Core and the Community Members components cannot be deactivated because they are needed for the plugin to function properly.
The rest of the components include:
- Extended Profiles - Users can customize their profiles.
- Account Settings - Allows users to edit their account settings and notifications.
- Friend Connections - Let users make connections with each other.
- Private Messaging - Enables private messaging between users.
- Activity Streams - Global, personal, and group activity streams with threaded commenting, direct posting, favoriting, and @mentions.
- Notifications - Notify members of relevant activity with a toolbar bubble and/or via email.
- User Groups - Allows users to organize themselves into a specific public, private or hidden sections with separate activity streams and member listings.
- Site Tracking - Lets you record activity for new posts and comments from your site.
You can select as many or as few of them, depending on the needs of your website. It’s also easy to enable certain components at a later date. Once you’re done selecting which components you want, click on Save Settings.
Step 2 - Set Up Your Pages
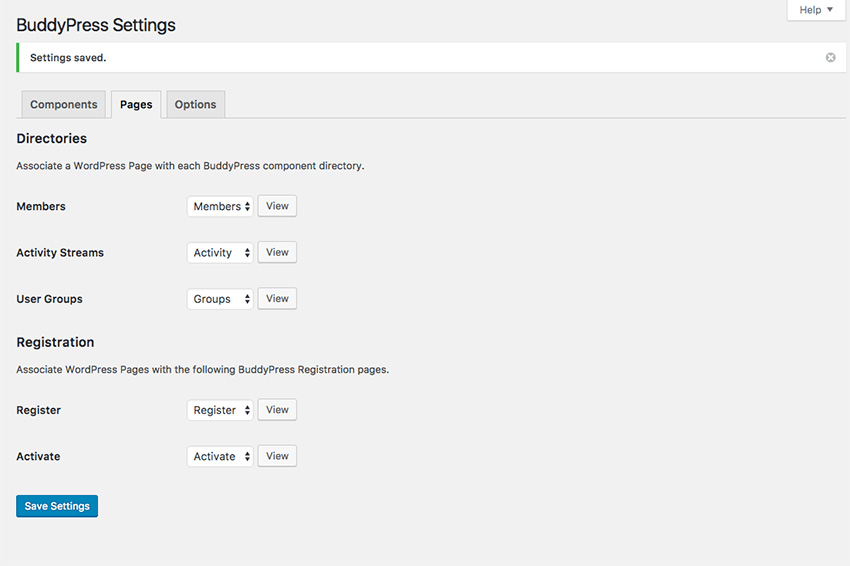
The next step is to configure the pages that BuddyPress will use. Most of the pages are already created, but you will need to manually create the pages for user registration and activation.
Keep in mind that you will also need to enable user registration in Settings > General > Allow anyone to register for the site if you plan on having a public community.
If you want to keep your community closed, you will have to enter new members manually and can skip the following step.
In your dashboard, click on Pages > Add New and then create a blank page called Registration and another one called Activation. You don’t need to add any content to those pages as BuddyPress will automatically display the appropriate content.
Once your pages are created, go back to Settings > BuddyPress and select the Pages Tab. Under Registration, select the pages you just created for the appropriate functions.
Click on Save Settings.
Step 3 - Tweak Your BuddyPress Settings
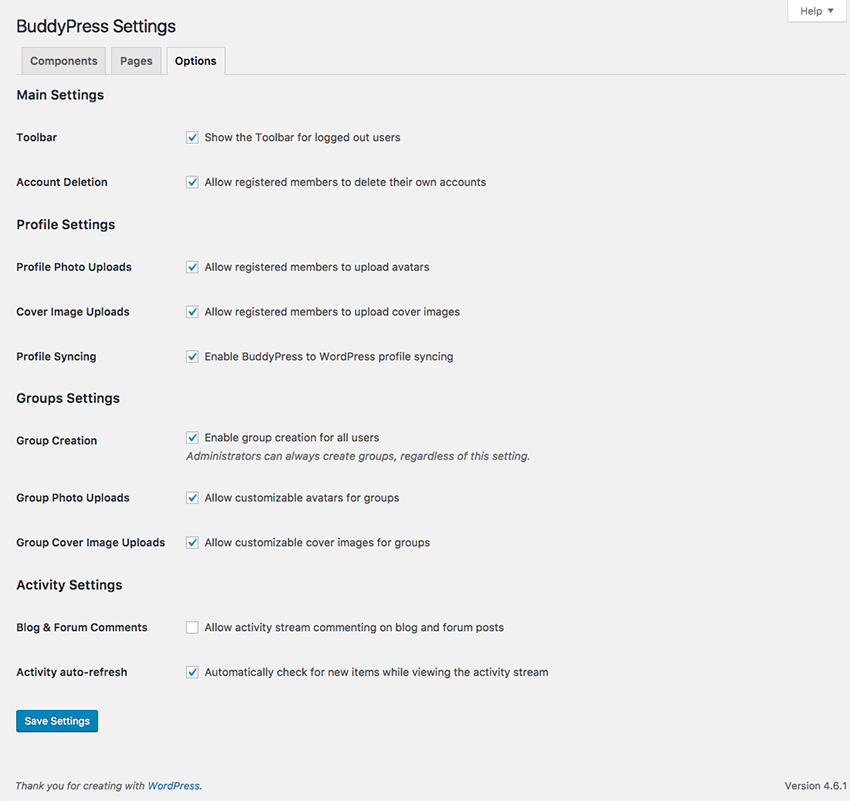 Now that the main options have been set up properly, it’s time to tweak the settings. Click on the Options tab. Here you can configure various settings regarding user profiles, groups, activity, and main settings.
Select the ones that are relevant to your community and click on Save Settings.
How to Work With BuddyPress
The core of BuddyPress revolves around users. We’ve mentioned before that you will need to enable user registration on your site if you want to have an open community where your visitors can freely register for your website.
BuddyPress itself doesn’t have any default member roles. Therefore, the safest option is to set the user role of new members to Subscriber or Contributor.
1. User Profiles
Once someone registers, they are given their own profile which they can control from the admin area. Aside from the regular profile options, each user can access the Extended Profile settings if you enabled it in the previous step.
From there, they can enter as much information about themselves as they want to. You can create different profile fields under Users > Profile Fields to allow your users to enter their name, birthday, a short biography, links to their other profiles, and more. You can also group various profile fields to organize them better.
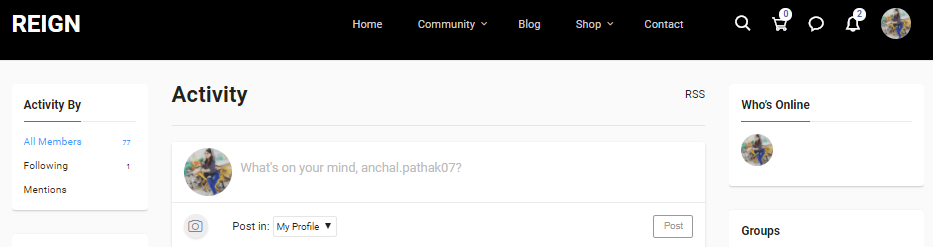
Once your users are done entering their profile information, they can access their public profile which has a large number of features:
This page also serves as a personal dashboard from where anyone, including you, can message other users, post status updates, join groups, modify global settings, and much more.
Aside from allowing user registrations, you can also add users manually from your WordPress dashboard under Users > Add New.
2. How Groups Work
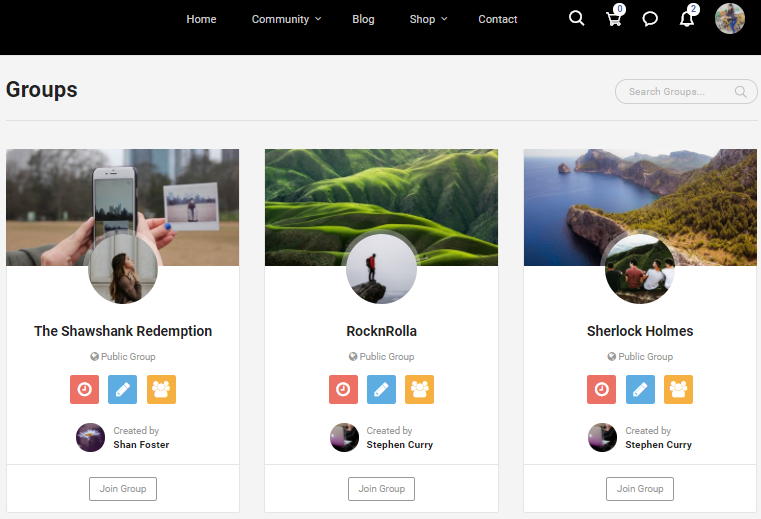
If you selected the Groups component earlier, you and your users will be able to create groups. Groups can be set to be public, which allows anyone to join the group. Public groups will also be visible sitewide and their activity will be displayed in the Activity feed.
Private groups require users to request membership and they will be visible sitewide. The activity of a private group, though, is only visible to group members.
Finally, hidden groups are invite-only, aren’t visible on the rest of your website, and the group activity is visible only to group members.
Each group regardless of the group type can be set to allow new invites in one of three ways:
- only group admins
- group admins and mods
- any member of the group
Similarly to members, each group can have an avatar and a header image which makes it more recognizable.
3. Adding Widgets and Menus

To make your community as user-friendly as possible as well as to make navigation easier, you can create a custom menu and take advantage of the widgets that come with BuddyPress.
Let’s take care of the menu first.
Go to Appearance > Menus and click the create a new menu link. Give it a name and set the menu to be used in whichever menu position you’d like the menu to appear.
Add the pages you want to show up in your navigation from the Pages section and add the desired BuddyPress pages. Here’s how our custom menu looks:
Now click Save Menu to save it.
Next, let’s add some widgets to our sidebar so our members and site visitors have an easier time navigating around the site and can immediately get an overview of the site activity.
Click on Appearance > Widgets. The default WordPress theme TwentySixteen has a sidebar widget area and two widget areas that appear below the content. For the sake of simplicity, we’ll be adding a login and Who’s Online widgets to our sidebar, but depending on your theme, you can add them to any widgetized area on your website.
Bear in mind that the available widgets depend on the components you activated earlier. They allow your users to log in or register, see notifications, discover who is online, and you can also use them to post a sitewide notice to your entire community.
How to Extend and Customize BuddyPress
Now that your community is properly set up, you’ll need a theme to make it visually appealing. Our theme marketplace, ThemeForest, has a large selection of high-quality premium BuddyPress themes that are sure to take your site to a new level.
They can be used to create any type of website but they are designed and developed to be fully compatible with the BuddyPress plugin to ensure all your pages, user profiles, groups, and all the functionality works as expected without any issues. Be sure to check out our curated selection of the best BuddyPress themes for community sites.
Installing BuddyPress on WordPress is a tough job. It’s a long process. If you face any difficulty or want to ask anything about the installation process or meet with any glitch in between the process, then feel free to ask about it via the comments section below. I would be glad to answer and guide you. Happy Connecting!
Related reading