3 min read
Create A Social Network Site With BuddyPress- Part 1

BuddyPress is an amazing plugin that allows you to create a social networking site with WordPress. This plugin is considered one of the best plugins for social site creation. It is the most active and fully featured plugin for WordPress. Therefore, we decided to let you know how you can install this plugin and make it work to create a social community website of your own. So let’s get started with our BuddyPress Tutorial.

BuddyPress Tutorial
Some of the key features of BuddyPress are Ease of integration, Ease of use, Extensibility, Powerful yet simple, Membership profiles, Connections, Groups, and Private Messaging.
1. Installing the Plugin- BuddyPress Tutorial
So before the BuddyPress Setup, you must make sure that you have a WordPress website created. After you have WordPress installed, follow these steps one by one to install the BuddyPress Plugin.
2. Installing a theme- BuddyPress Tutorial
The first and foremost step is to install a theme that suits your purpose. We would suggest installing a theme that is WordPress and BuddyPress compatible.
For this tutorial, we will use the Reign BuddyPress theme which is the ultimate BuddyPress and WordPress-compatible theme that lets you create a social community of your own.
3. Installing BuddyPress
Let’s now install the BuddyPress plugin on our website.
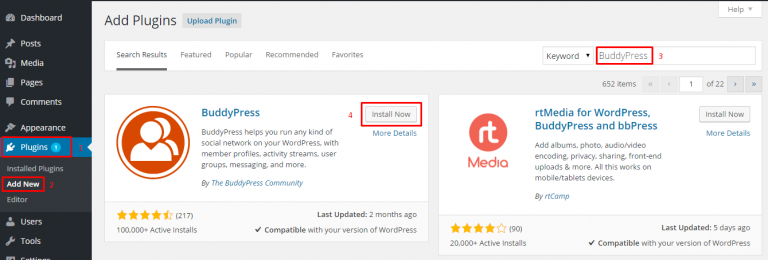
- Go to Plugins>>Add New
- Search for BuddyPress in the Search Box on the top right. Click on Install Now.
- Activate the Plugin
Now, BuddyPress should be installed and ready to go.
We will now configure the BuddyPress plugin to use it with the Reign theme.
4. Configuring BuddyPress- BuddyPress Tutorial
Now proceed with the configuration settings of BuddyPress.
This will take you to three navigation bars:
Components
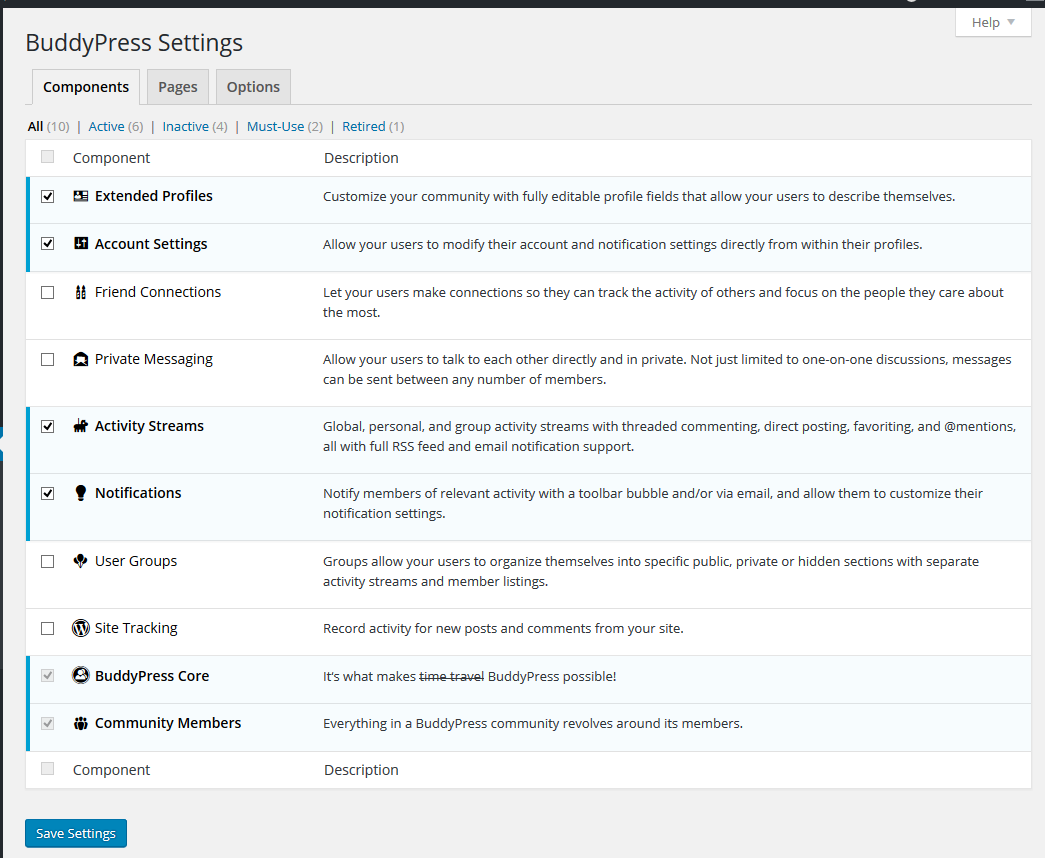
This lets you configure BuddyPress according to your needs. There are many options like Extended profiles, Account Settings, Friend Connections, Activity Streams, Notifications, etc. Checkmark the options you wish to have in your community and Save the Settings.
Pages: This setting lets you add different sections to your website. This is one of the most important settings and must be configured properly.
You will find 3 major settings
- Members
- Activity Streams
- User Groups
Also Read: Try Reign PeepSo WordPress Theme To Create A PeepSo Powered Community
You have to leave these 3 sections as they are.
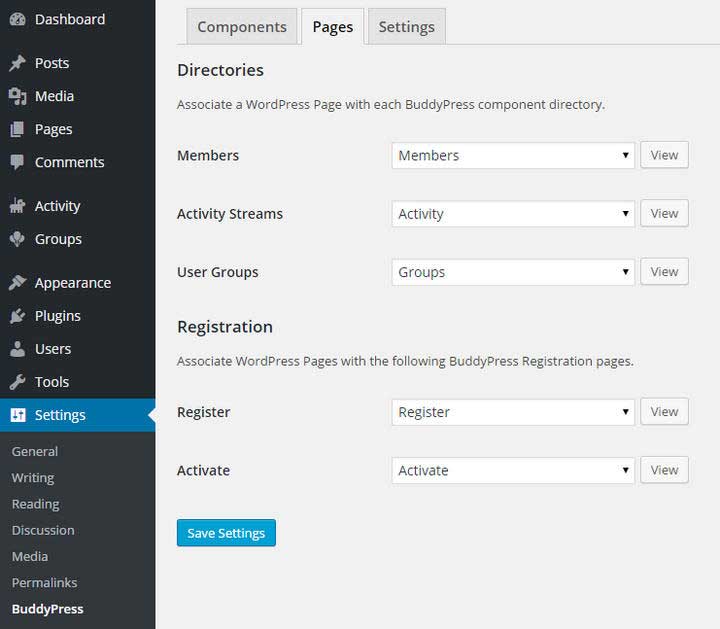
Next, you will find Activation and Registration Tabs. For this, you will be required to create two pages by Going to Dashboard> Add Page.
Register Page: In BuddyPress, this is the default Registration form. BuddyPress needs a page to assign its sign-up form. That’s why we need to add a new page from our WordPress admin panel.
Activate: this is also a default account activation process of BuddyPress. For this, we have to create a new page again by going to the WordPress admin panel and adding a new page.
Just create two pages namely register and Activate and leave them blank. Now Navigate back to Settings>> BudyPress>> Pages and assign both Pages respectively. Save Settings.
Settings:
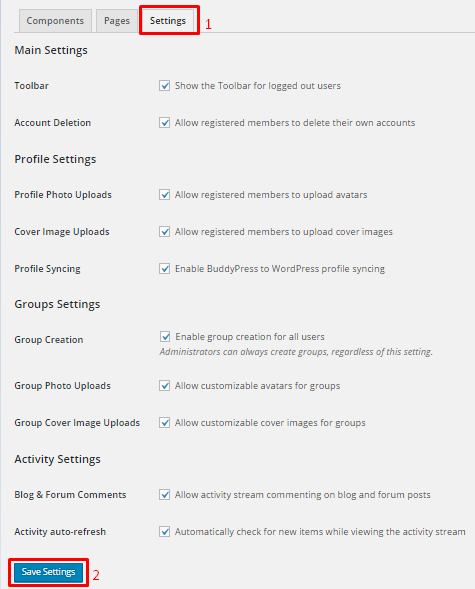
Here you can set the changes as per your needs. These are basically a few general settings related to profiles, Groups, and Activities.

Conclusion of BuddyPress Tutorial
You are done! There are many settings in BuddyPress that allows you to create a social community website as per your needs. You can choose to select or deselect these settings. We showed the basic setup of the BuddyPress Plugin. We will continue with creating menus and other settings of BuddyPress in our next BuddyPress tutorial. Hope this article was helpful!
Interesting Reads:
bbPress WordPress Plugin Tutorial - Forum Plugin
Related reading