7 min read
How To Build Buddypress Registration Form With Gravity Forms

You’re ready to let users sign up for your new site once you’ve installed WordPress and BuddyPress, create WordPress pages for BuddyPress to use for Registration and Activation, and enable “Anyone can register” (under Settings > General).
How to Customize BuddyPress Registration Form
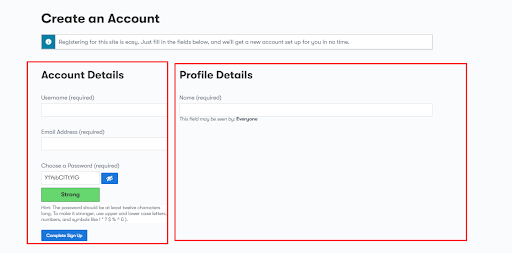
If you’re already logged in to your new site, going to example.com/register will take you to the home page. Not to worry, this is normal behavior; after all, there’s no point in registering if you’re already registered, right? So open a second browser or an incognito window that isn’t logged in to the site and navigate to your registration page. By default, it will look like this.

Where Account Details are part of WordPress while Profile details are part of BuddyPress. See in Below image
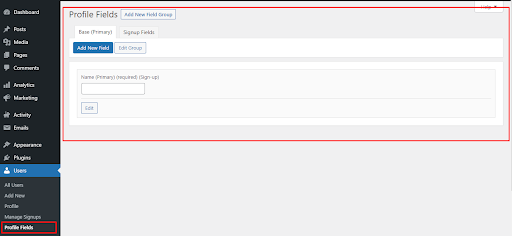
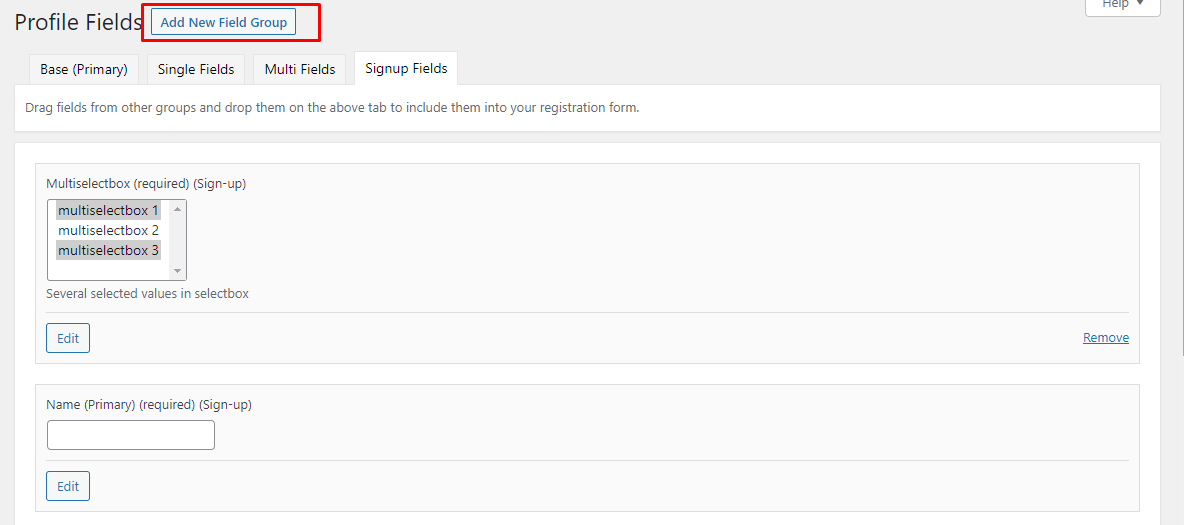
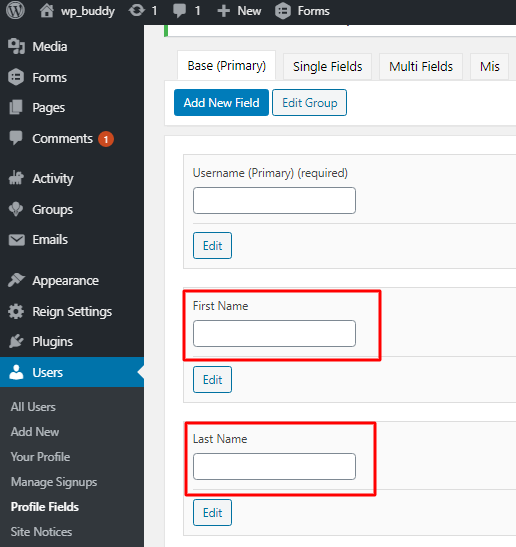
BuddyPress includes a tool for personalizing the Profile Details section. You can use it by navigating to Users > Profile Fields in the WordPress administration area. Name (Primary), which is a required field, is the only field that appears by default. This field is the user’s name that displays all over the site; it appears at the top of the user’s profile as well as in the activity items.
BuddyPress also includes a new field group that is “SignUp fields”. Fields added under this group will automatically be displayed on the signup form. You can also Drag and drop fields from other groups onto the above tab to include them in your registration form.
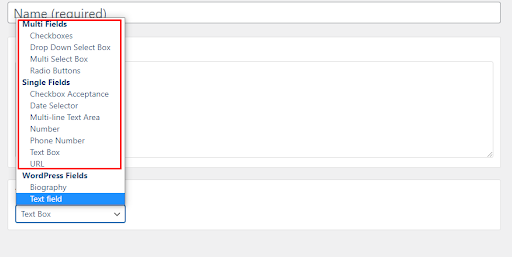
Profile fields can be used to collect a wide range of information from your users. In BuddyPress text box, multi-line text box, date selector, radio buttons, drop-down select box, multi-select box, and checkboxes are all available.
Let’s suppose you want to add a group of the multi-select box to get the information of the user’s favorite color upon signing up.
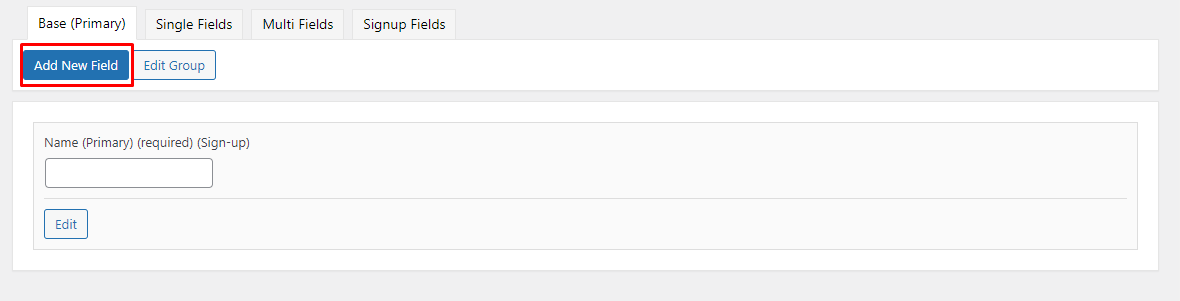
For this, navigate to Users > profile Fields > Add New Field.
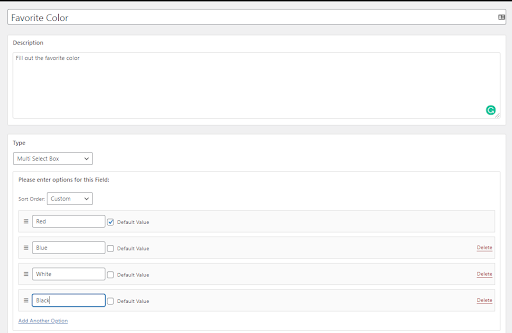
Enter the field name (This name will be displayed on the registration form for users), and the field description. Now select the type of field suitable for your option as I have selected the Multi-Select Box.
You may require additional options, so click the link “Add another option” link to add more options until you are satisfied.
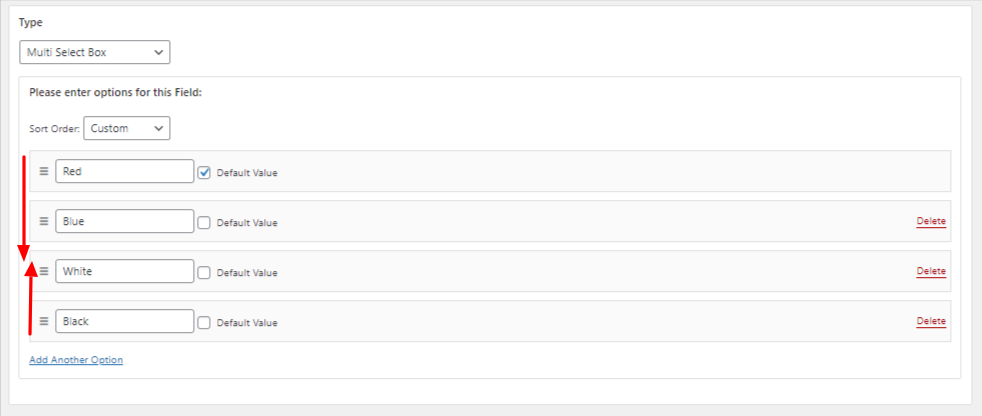
The position of these options can also be rearranged by using drag and drop features.
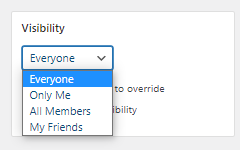
Now it’s time to set the default visibility settings. Save the new field after adding an option for the user to override the visibility settings.
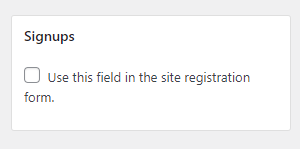
Now check the box to add this field on your registration form to be filled by users.
Save the settings and check them by reloading the registration form. You’ll notice that the color multi-select box is now added to the registration form.
Profile Fields, That are appearing on the registration form can be re-ordered by Drag and drop.

While the new user’s favorite color is fascinating, you’ve later decided that it isn’t relevant enough to overfill the registration form. Instead, you’d like to have a form that the user can fill out after the registration by going through their BuddyPress Profile. Profile field groups come into play here.
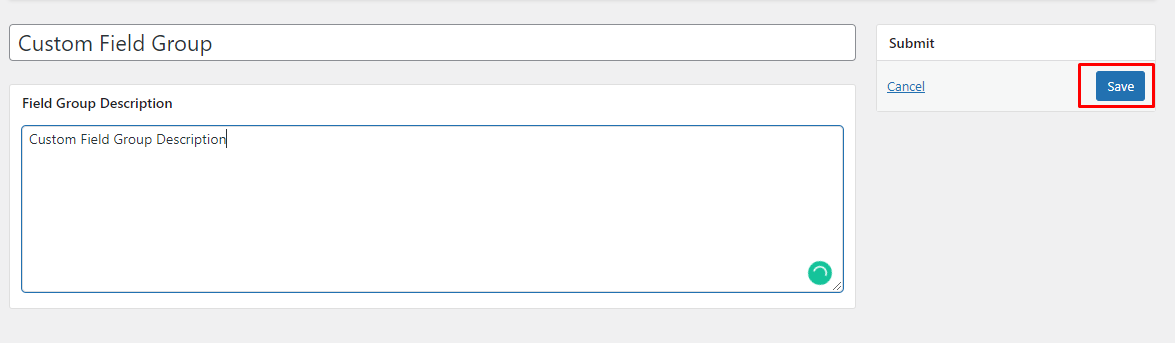
Fields added to the “Signup Field” group will appear on the registration form. You can add some other groups to gather additional information. We’ll create a new group by clicking the “Add New Field Group” link next to the page title “Profile Fields.”
Enter the name and description of the field group and save the setting.
Now you can move the Color field from the Signup Field Group to the Custom Field Group.
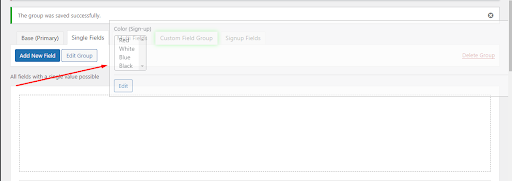
If you reload the registration form again, do notice that the “Color” field is no longer present on the registration form, but it can still be filled from the user’s BuddyPress profile.
There is another method for creating and customizing the BuddyPress form, by which you can easily create a BuddyPress registration form. Now, let’s look at this solution.
Build Buddypress Registration Form Using Gravity Forms
Gravity Forms is an easy-to-use and secure WordPress form builder plugin. The Gravity Forms User Registration with BuddyPress Registration Form allows you to register users on your website.
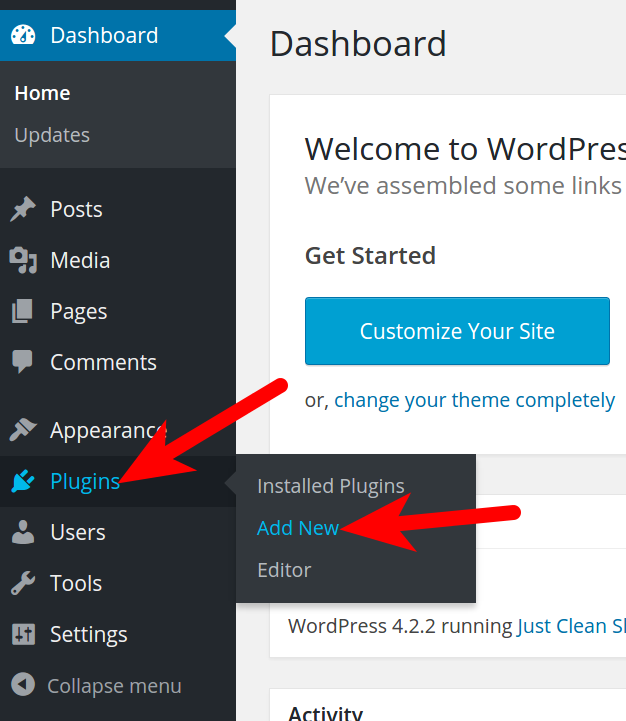
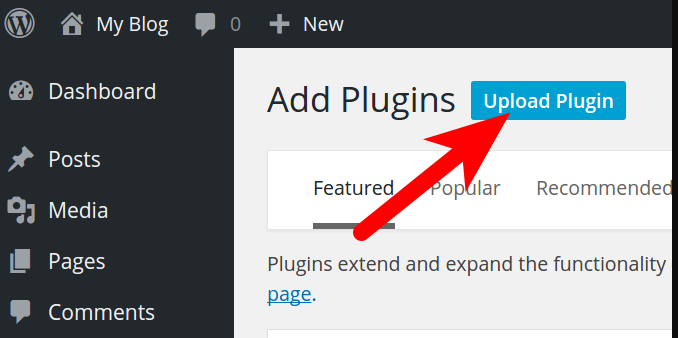
Install the BuddyPress Plugin and Gravity Forms in WordPress
Installing BuddyPress Plugin
- You can download BuddyPress from https://wordpress.org/plugins/buddypress/
- Purchase Gravity forms
- Install gravity form and activate it on your WordPress site.
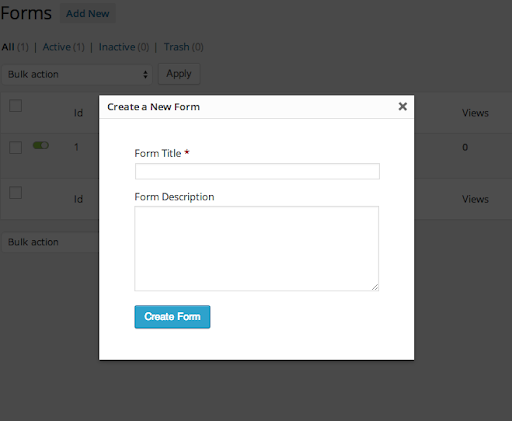
Create your first form
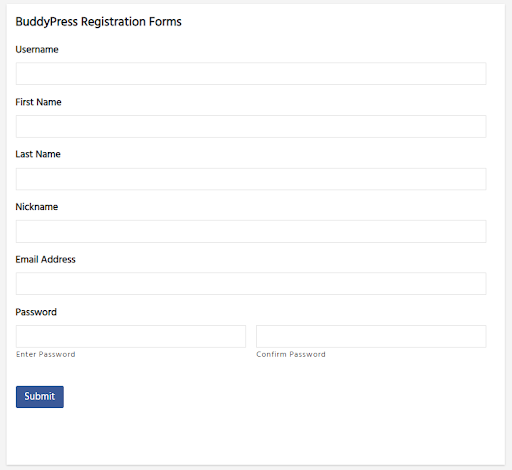
The first step in integrating the User Registration Add-On is going to be creating the form you would like to use. This can include existing forms. The only required fields a Gravity Form must contain to be compatible with the User Registration Add-On are the Username and Email fields. Here are the steps used to create an optimal User Registration form.
1. Go to New Form under the Forms navigation or choose an existing form from Edit Forms.
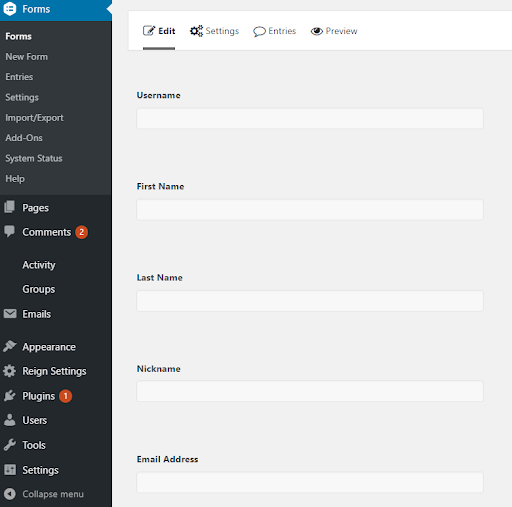
2. Add the following fields in your form:
- Username (required): Add a Single Line Text field for user registration.
- First Name & Last Name: Add a Name field (under Advanced Fields). This will be used for the first and last names for user registration.
- Nickname: Nickname allows the user to have a name different from their username or first/last name.
- Email (required).
- Add an Email field (under Advanced Fields). used for the Email Address for user registration.
- Password: Add a Password field (under Advanced Fields). This field will be for the Password field for user registration.
- Additional Fields: You can add as many additional fields as you require. These fields can then be mapped to various User Meta fields available in the User Registration feed.
Custom BuddyPress Registration Page
Go to Forms > Settings > User Registration, and check the box Enable Custom Registration Page. and create the user.
User Settings
- Username: Select the field that will be used to set the username of the newly created user. Be sure that an appropriate field exists within your form as this is a required setting. This setting is not available for Update User feeds.
- First Name and Last Name: Select the corresponding form fields in which your user would enter their first and last names. While these are optional settings, they are highly recommended as they will help immensely if you need to review or edit users.
- Nickname: The Nickname field allows the user to have a name different from their username or first/last name. If not set, the content of the Username will be used for this field when the user is created inside WordPress.
- Display Name: That allows you to set the display name for the user, based on existing information within the user’s profile, such as {nickname}, {username}, or {first name}. By default, it will use the Nickname set. If the user has not defined a nickname during registration, the username will be used.
- Email: When the user is created, it will use the contents of the form field defined here within the user profile and is used for things like user activation or password generation/resets. This field is required.
- Password: The Password setting allows you to either choose a specific field within the form in which a user can create their password or automatically generate a password for the user.
- Role: Select the role of the newly created user within your site. This field is required.
BuddyPress Integration
The User Registration Add-On coordinates with the BuddyPress Plugin enabling you to populate BuddyPress profile fields from Gravity Form fields. The BuddyPress Meta area of the User Registration feed works indistinguishable from the Custom Meta segment except for not having an Add Custom choice. To include new BuddyPress meta alternatives, you should include an extra BuddyPress profile handle on the BuddyPress Profile Field Setup page.
Add Custom choice. To include new BuddyPress meta alternatives, you should include an extra BuddyPress profile handle on the BuddyPress Profile Field Setup page.
you can choose a current meta key or characterize another custom meta key by choosing Add Custom Meta and entering it into the content field that displays.
Map BuddyPress profile fields with gravity form fields.
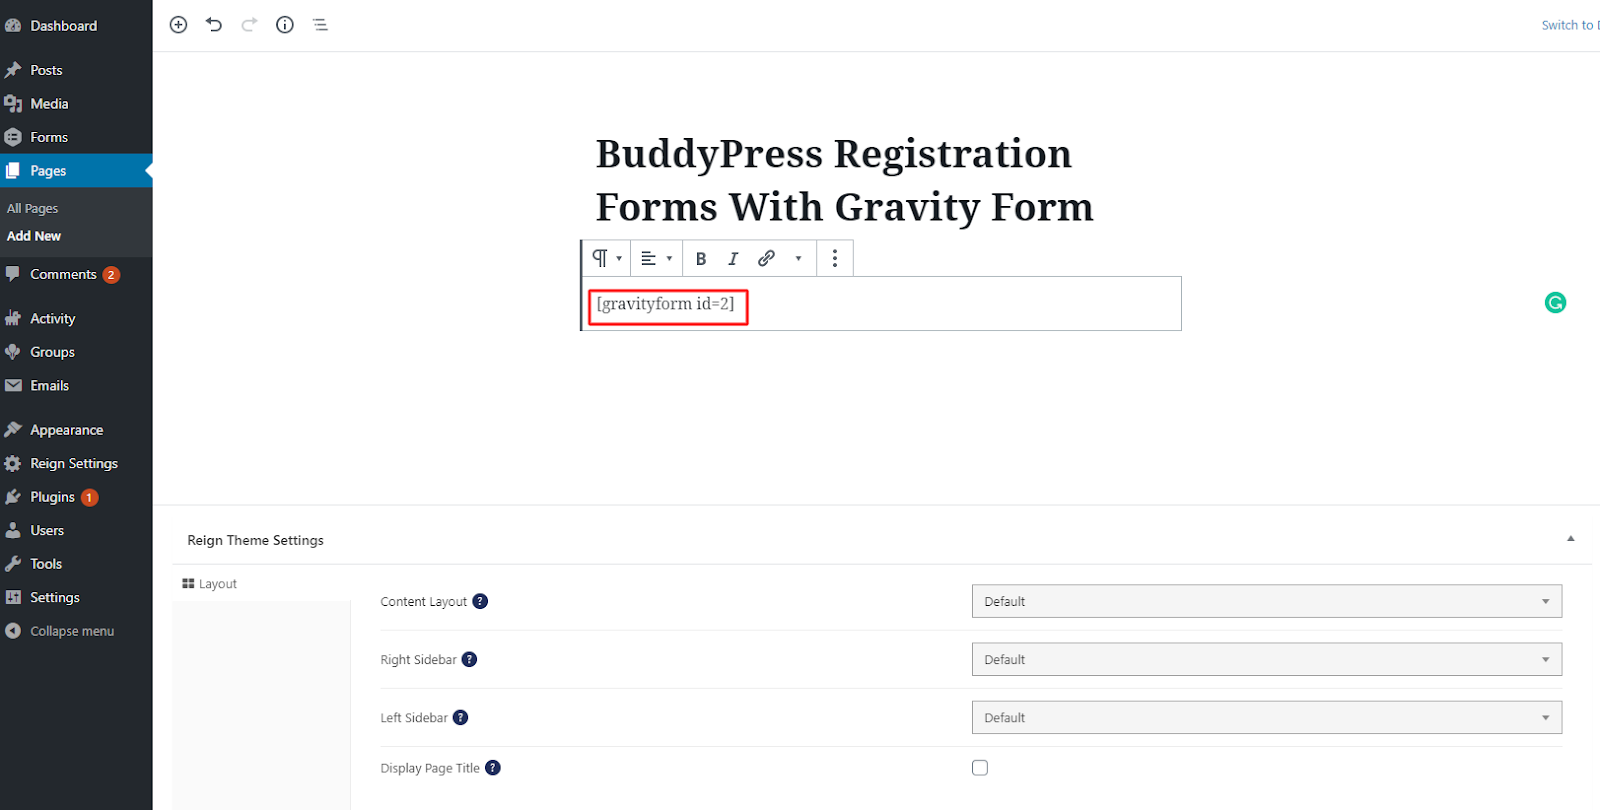
How to find the form ID?

Adding the Shortcode
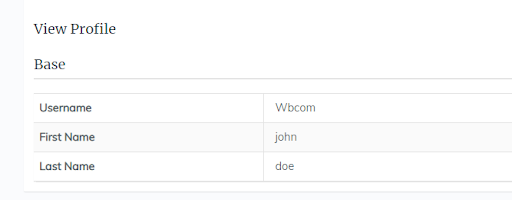
- After registering, log in using your username and password.
- Go to profile->view.
- There you can find BuddyPress profile fields that are mapped with a gravity form field.
Summary

Create a member registration form for your BuddyPress-powered WordPress social community using gravity forms and user registration forms shortcodes on any page. Once members sign up, BuddyPress Auto Friends: Give every new member friends before they say hello helps new members feel welcome instantly by automatically connecting them with existing members.
Please comment below if you have any questions.
Interesting Read:
10 Essential BuddyPress plugins For a Community Website
The Best Premium WordPress BuddyPress Themes
Useful Hacks And Customizations For Your BuddyPress Powered Website Via Reign Theme
Related reading