8 min read
Setup Paid Memberships Pro to Create Membership Community Using BuddyPress & BuddyX Theme
WordPress membership sites have the ability to offer you nothing but a constant source of money. For example, Create appealing content and get paid for it. Let’s suppose you have a paid memberships website with some exclusive content, and access restrictions of these contents are divided based on various membership levels. Membership websites increase the level of exclusivity for the users who have signed up for a particular membership.
If you’re not sure how to start a membership site or which WordPress plugin to choose, Paid Memberships Pro is the answer to go with. This fantastic and free plugin includes various features and an easy-to-use interface that will help you transform your website into a profitable membership site in no time.
But what comes after you’ve chosen “the best” membership plugin?
This article will show you how to set up a membership community website with Paid membership pro using BuddyPress and BuddyX theme.

Specialties of a Standard Membership Website
Most of the paid membership websites have similar standards when it comes to functionality. So it’s necessary to know about those while creating a membership site. Let’s take a look.
- Deliver high-quality content based upon the level of registration
- Feature to create membership levels
- Fron end member registration forms
- Feature to create and manage profiles
- Feature to deliver emails for new and existing members
- Secure Payment methods
- Communication feature for the members
These are some must-have features for a membership site. Of course, depending on the type of membership website you’re building, you might need more features.
What is Paid Memberships Pro?

Paid Memberships Pro provides you all of the functionalities you need to create, manage, and expand your membership site. The plugin is suitable for premium content sites, organizations, subscription products, magazines, Newsletters, and other similar applications.
Users can choose a paid memberships level, pay the bill, check out, and become members of your site right away. You get to decide what content your members have access to. Members can use your website to log in, view payments, manage their profiles, update billing information, update their subscriptions, or cancel their accounts.
Following are the major features of paid memberships Pro:
- Unlimited membership levels, whether Free, Paid, or Recurring Subscriptions.
- Custom Trial Periods and Introductory Pricing.
- Integration with payment gateways such as Stripe, Authorize.net, and PayPal.
- Updates member profile information directly on your website.
- Integration with third-party tools such as WooCommerce, bbPress, and several email subscriber service providers.
- Allow to Generates reports regarding memberships and revenue.
- Optimize for high search rankings.
- Provide custom advertising opportunities.
- Customize email notifications.
- 100% GPL.
- Work with all WordPress themes and most WordPress plugins.

Get familiar with BuddyX:
BuddyX is a multipurpose community theme that can be used to create a membership website easily. This theme is designed to enable anyone to build an interactive community website quickly. This theme is perfect even for non-developers or anyone new to web design.
Although the BuddyX theme is free, it has a high-quality design and a plethora of useful features. This theme was also created to assist you in attracting more visitors to your community and improving your online presence.
So! If you want to create your membership website without investing in premium themes, buddyx can be the best choice for you.
How to Create a fresh membership website with Paid Membership Pro and BuddyX
We are now familiar with the features of paid membership pro and have an idea of the BuddyX theme. So we’ll now create a membership website by following simple steps.
Let’s Begin
Step1: Install and Activate paid membership Pro
Navigate to Plugins >> Add New, and search for the “Paid membership Pro.”
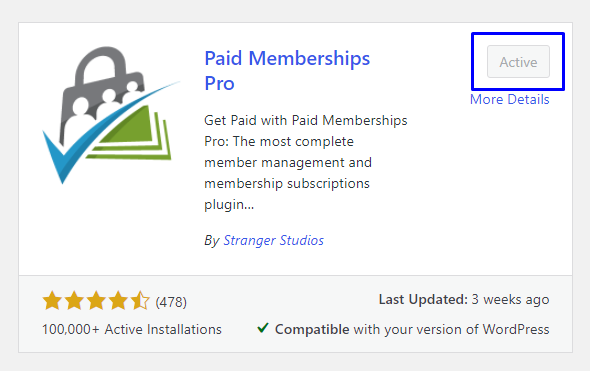
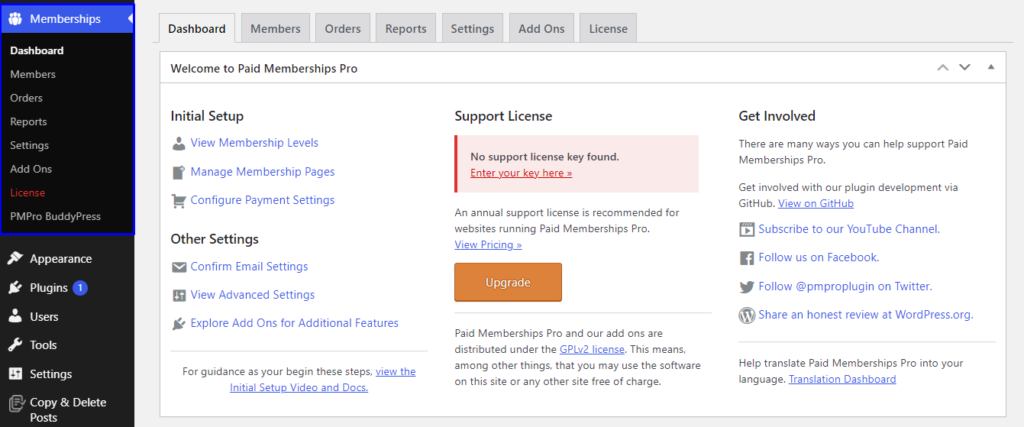
Click the activate button followed by install.
In your WordPress dashboard, a new menu item is labeled. Memberships will appear. Also, find tabs connecting you to your membership functions.
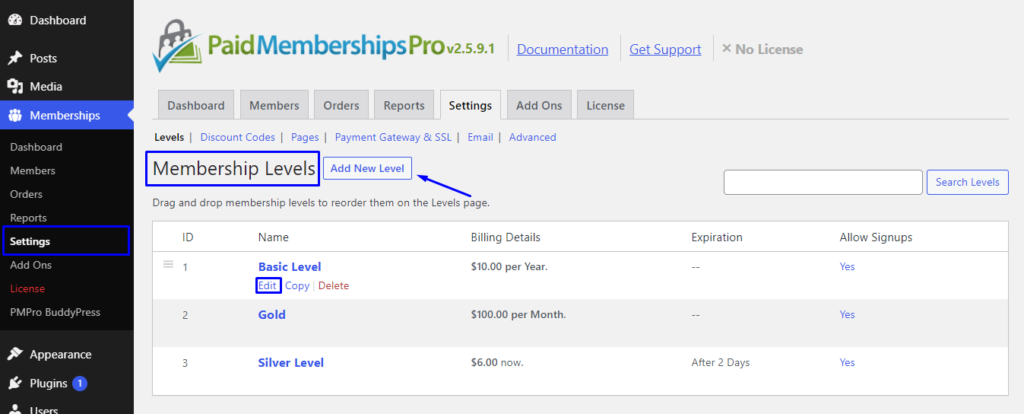
Step2: Create/Manage Membership levels
Navigate to memberships >> Settings >> Membership Levels, and create a new Membership Leve or manage the existing one.
While creating a new membership, fill out the name and description of the membership. In the description, you can provide all the information about the membership they need before the purchase.
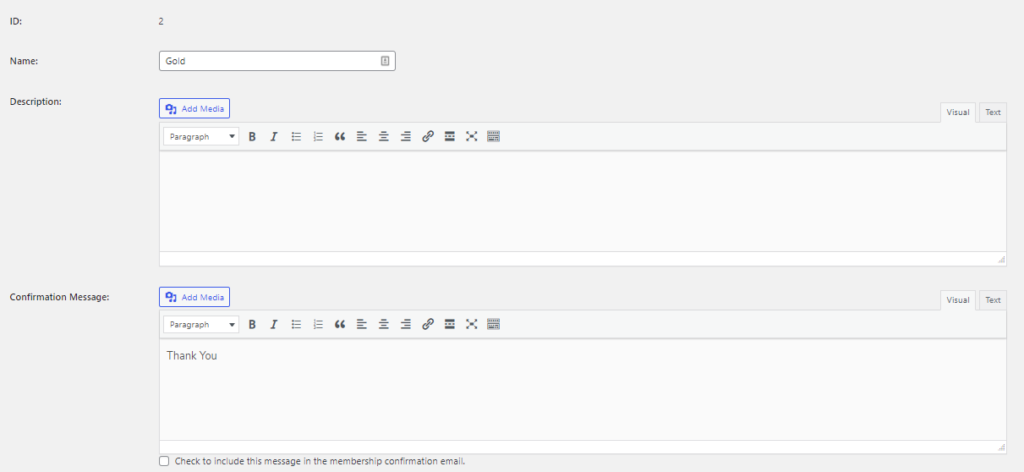
Name- The name of the membership level.
Description- The description of the membership level is displayed on the default ‘Membership Checkout’ page.
Confirmation Message- The confirmation message is displayed on the Membership Confirmation page after a successful registration.
Scroll down the page to insert Billing Details. Here you can choose how much to charge your users for accessing your content, set payments as a recurring subscription, and more.
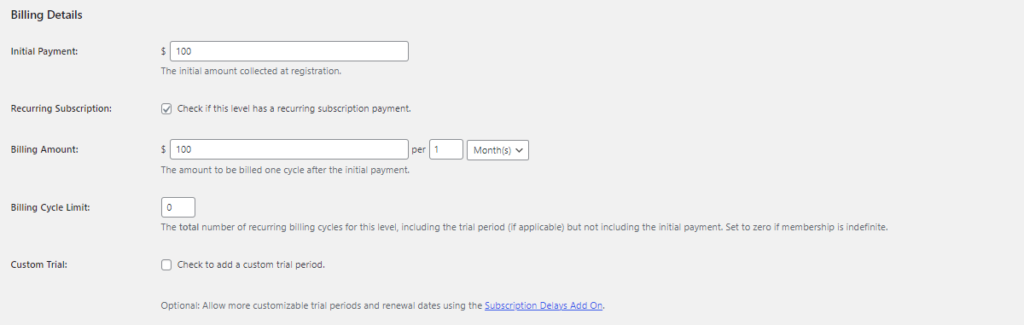
Initial Amount: Set the initial amount that a customer has to pay at the time of membership registration.
Recurring Subscription: Check this option if you want to enable a recurring subscription for the membership.
Billing Amount: Set the billing amount to pay by the customers on every subscription cycle after the initial payment.
Billing Cycle Limit: The total number of recurring billing cycles for this level, including the trial period (if applicable) but not including the initial payment.
Custom trial: Check to enable the custom trial.
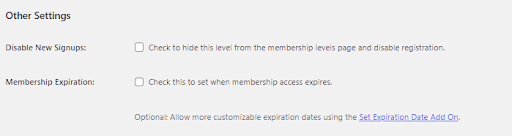
Disable New Signups: Check this option to disable the registration for the current membership.
Membership Expiration: Check this option to set an expiration time for the membership.
Also Read: How To Start a Community Membership Site
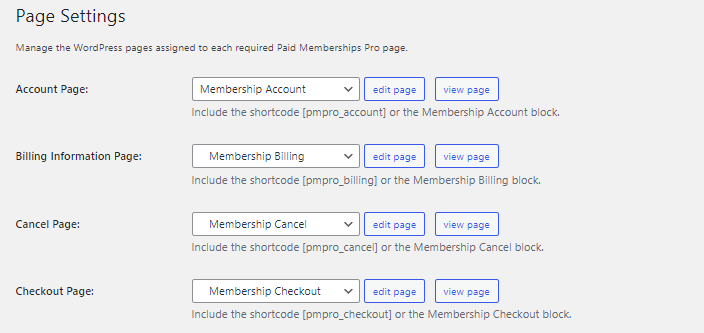
Step3: Configuration of pages
Using these settings, you can configure the pages for your membership site.
Step4: Setup payment Gateways
Paid membership pro provides various types of payment methods for their users to go with. So now it’s time to choose the current payment gateway for your site.
These includes:
- Stripe
- PayPal
- Authorize.net
- Braintree Payments
- 2Checkout
- Cybersource

For this, navigate to Membership >> Settings > Payment gateway and SSL. Configure the settings and save changes.
Step5: Setup Emails
Paid Membership Pro provides the feature to send various emails to your members once they are registered. Setting up the email, navigate to Membership > settings > Email.
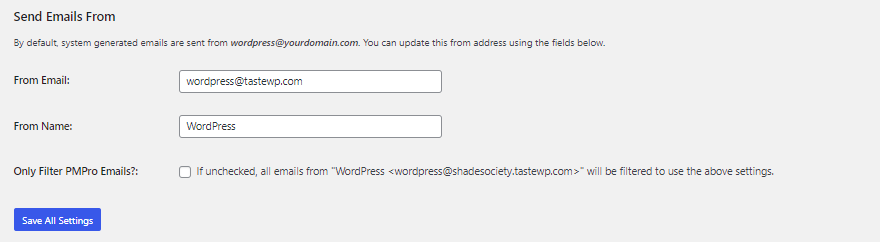
It also has some default occasion on which site admin wants to send the email to their members.
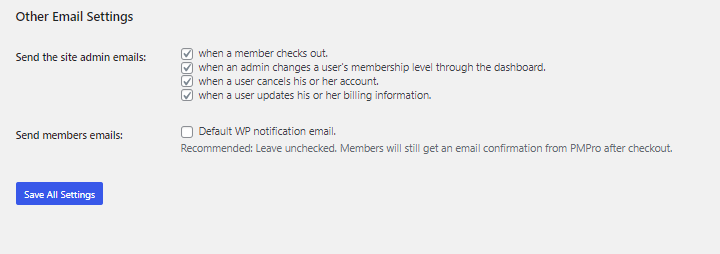
Checkout
Admin Changes
Cancellation
Bill Updates
To customize the text of these system-generated emails, you can install the free Paid Memberships Pro Email Templates plugin.
Step6: Configure the advanced settings
Paid membership Pro provides some advanced features to make your membership website outstanding. For example, direct a message towards logged-in and non-members. Or utilize reCAPTCHA and set a Terms of Service Agreement.
Following are some important settings are given in this section.
Restrict dashboard access

Using this section, you can restrict the WordPress dashboard and Toolbar access from the subscriber role.
Message Setting
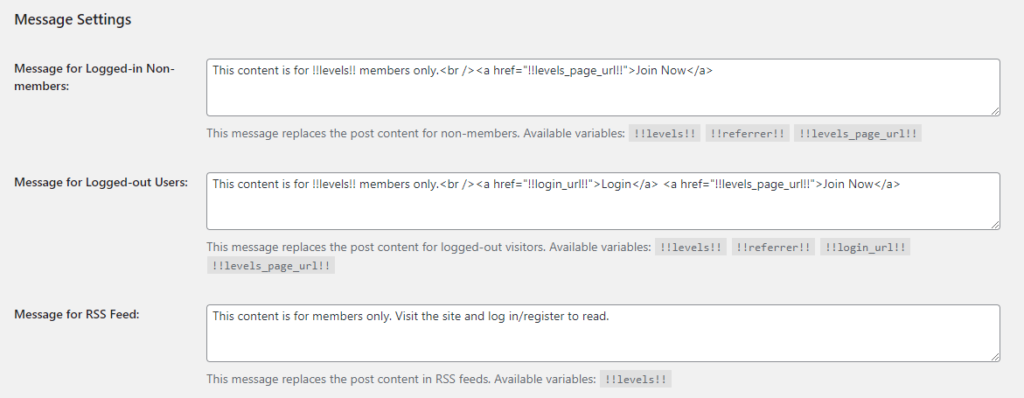
Using this setting, the Site Admin can set messages for Logged in and Logged out users.
Content Setting

Filter searches and archives: Select whether you want to show/hide post/page searches and archives to non-members.
Show Excerpts to nonmembers: Select whether you want to show/hide excerpt searches and archives to non-members.
Checkout Setting

Create and assign terms and condition pages, and enable/disable reCAPTCHA according to needs.
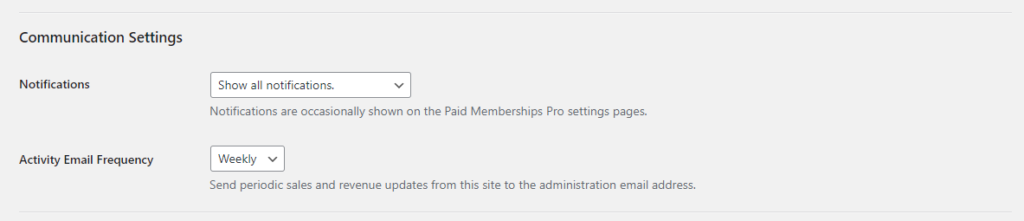
Communication Setting
Integration of BuddyPress to Create Membership Community
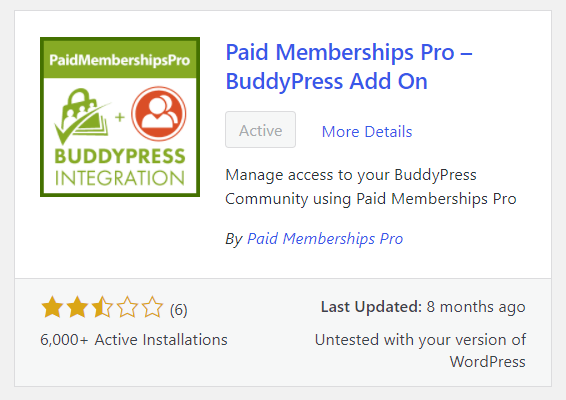
Now, for our community website, we need to restrict the BuddyPress components. For this restriction of the BuddyPress component, Paid Membership Pro has an addon of BuddyPress: Paid Membership Pro - Buddypress.
Once the plugin is installed and activated, you can access a new tab under the Membership menu.
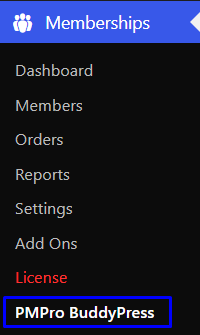
On Click of this tab, You can configure the settings of PMPro BuddyPress. Access the Document here for more detailed info.
It has the following settings to configure.
Page settings
Use these settings to configure the pages for the access restriction for BuddyPress.

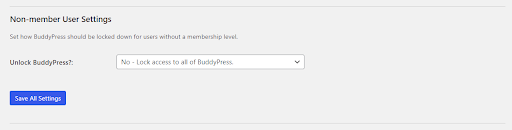
Non Member User settings
Manage the access restrictions of BuddyPress Components for the non-members.
Membership Level setting
This setting is to configure BuddyPress Component restrictions based on membership level.

On clicking the Edit Membership level button, You will redirect to the Levels page. From here, individual memberships can be managed by editing them.
As I am editing a previously created Gold level.

Now the members, who have signed up for the gold membership will have full access to Buddypress components.
Also Read: Top 5 WordPress Membership Plugins
Now I’ll show you how a user can purchase the membership.
Here I have a user On my site named Andre. He has not purchased the membership yet.
He’ll get a restriction message on trying to access the community pages.

Now He’ll try to purchase Gold membership Level by navigating to the membership Level page. Here all memberships are listed.
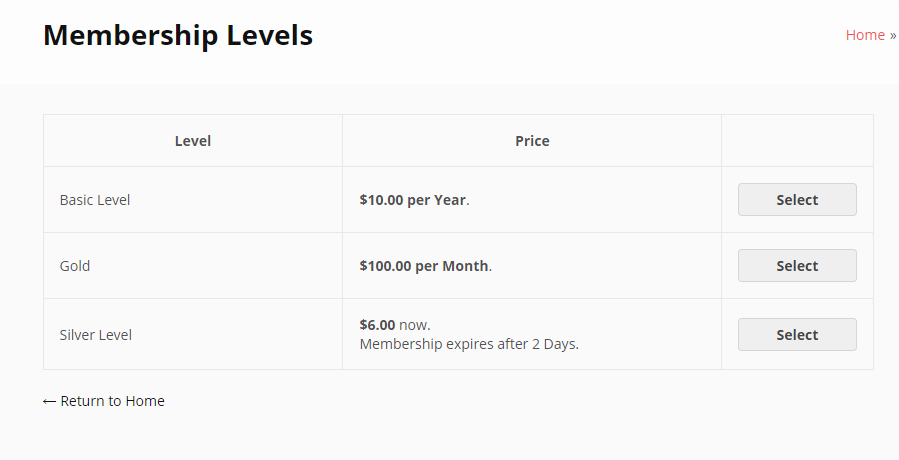
He will select Gold and do a checkout. On successful payment, he’ll be redirected to the membership confirmation page.

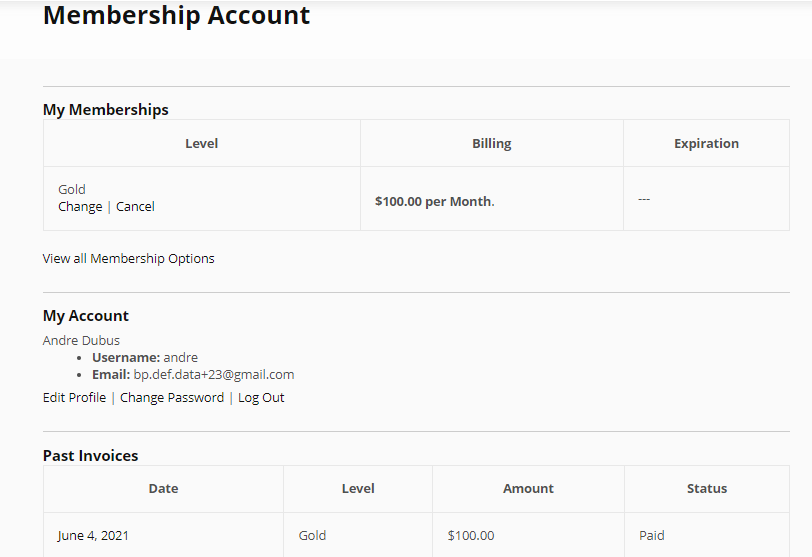
This invoice can also be printed, and the membership can be accessed on the Paid Membership Account page.
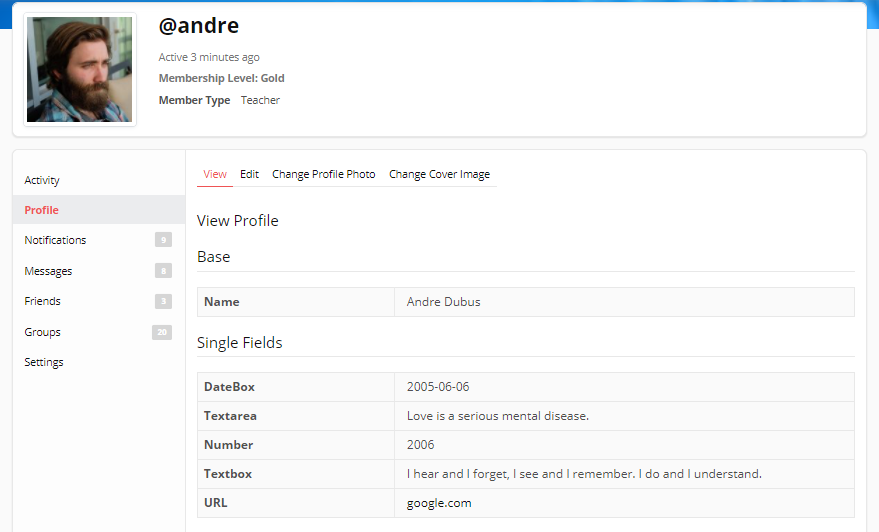
This Membership will also be shown on the BP member profile header.
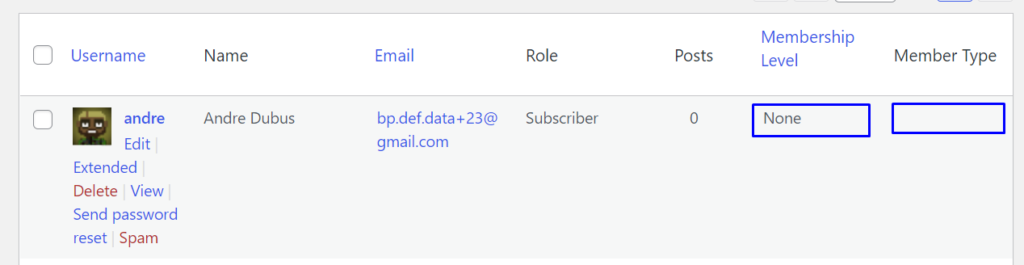
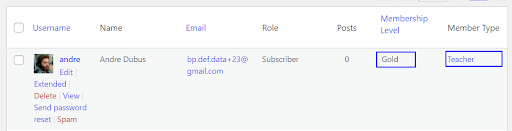
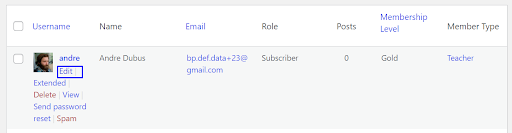
Now when the admin views the user info again in the WordPress dashboard user list. His profile will be updated with purchased membership.
Step 8: Manually assign the membership to a user
A membership can manually be assigned to a user through editing, navigate to Users >> Edit User, and Assign the Membership Level.
Edit the user and scroll down the page till you find the Membership related meta box.

Assign the level and update the user.
Also Read: Create Social Membership Website Using Paid Membership Pro
Wrapping Up of Paid Memberships

Here it is. Now you are familiar with the process to create and manage a paid memberships website with a cost-effective plugin and a free and multipurpose theme.
So, if you want to increase your supplemental income by providing premium content to your site visitors, consider creating a WordPress membership website today.
Finally, how about you? Have you ever created a WordPress paid memberships website? Which tools and/or plugins did you make use of? I’d love to hear all about it in the comments section below!
Interesting Reads:
The Power Of Membership Model Over Other Business Models
Role of UX design in the Success of Online Marketplace
How are online communities doing the heavy lifting this year?
Related reading