5 min read
WordPress Gutenberg Tutorial – How to Use New WordPress Block Editor

WordPress 5.0 introduces the Gutenberg editor, a game-changer in content creation. This new editor brings powerful features that make building content easier, faster, and more visually appealing. With Gutenberg, you can create posts and pages using blocks - each block represents a piece of content, like text, images, videos, or buttons.
This block-based approach allows you to design engaging layouts without any coding knowledge. From simple blog posts to complex pages with multimedia elements, Gutenberg gives you full control over the appearance of your content, helping you deliver an enhanced experience to your users.

Using the new WordPress Gutenberg block editor:
The block editor is extremely flexible and it provides you with all the features and functions which the classic editor had. Apart from that, it also has certain additional features which make it so special. So, let us look at some of the most useful features of the Gutenberg editor:
Creating new blog posts or pages:
You will be able to create new blog posts and pages extremely easily. All you have to do is click on Posts and go to Add New. If you wish to create a page, then click on Pages and then Add New. Your new block editor will appear.
How do you add a block in the Gutenberg editor?
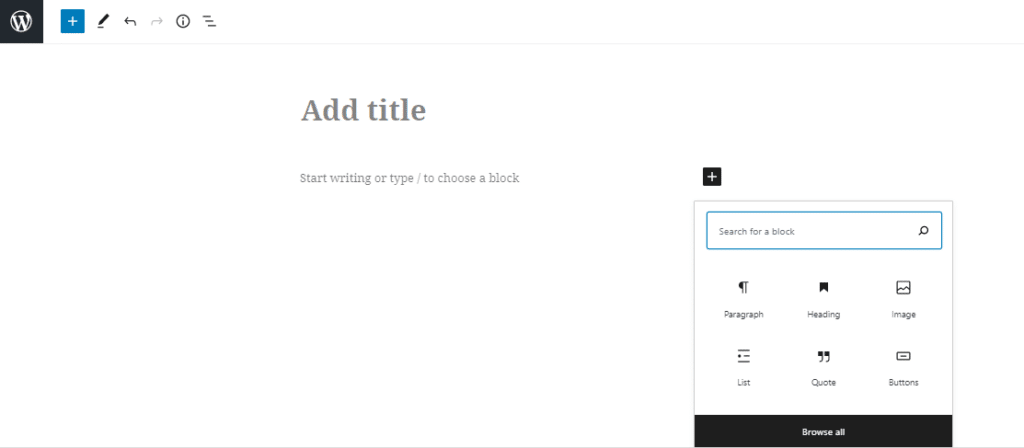
The first block for every page or post is the title. After that comes the paragraph block. You will be able to move your mouse around the screen and start writing your content in the paragraph block. You may also add some other blocks instead of the paragraph block. For that, you simply have to click on the Add New Block button and add a new block to your page.
Working with the Gutenberg blocks
Each block has its own toolbar. The toolbar is displayed on the top of the block. The buttons of the block depend on the blog that you are currently editing. Apart from the toolbar, every block also comes with its block settings option which appears at the right column of your screen. You will be able to move the blocks around your web page simply by using the drag and drop option.
Also Read: How To Auto-Suggests Locations From Google Maps During Search And Job Submission
Saving and reusing your Gutenberg blocks:
You will be able to save and reuse the Gutenberg blocks individually. This is extremely useful for bloggers who continuously make changes to their original content. You need to click on the menu button which is present at the right corner of the toolbar. From there you need to select the Add to reusable blocks option. This will help you to create reusable blocks for your website.
Publishing and managing your WordPress posts
Your WordPress posts may contain a huge amount of metadata. This may include categories, tags, publish date ,featured image and many more. All these options are present at the right column on your editor. Using these options, you will be able to manage all your blog posts extremely easily.
Plugin Options in Gutenberg
WordPress plugins can be used to add special features to your Gutenberg blocks. A lot of plugins will automatically be provided to you. This includes WPForms using which you will be able to add different types of forms to your content. Using the Yoast SEO plugin, you will be able to create SEO optimised content for your website. The WooCommerce plugin allows you to set up an e-commerce store.
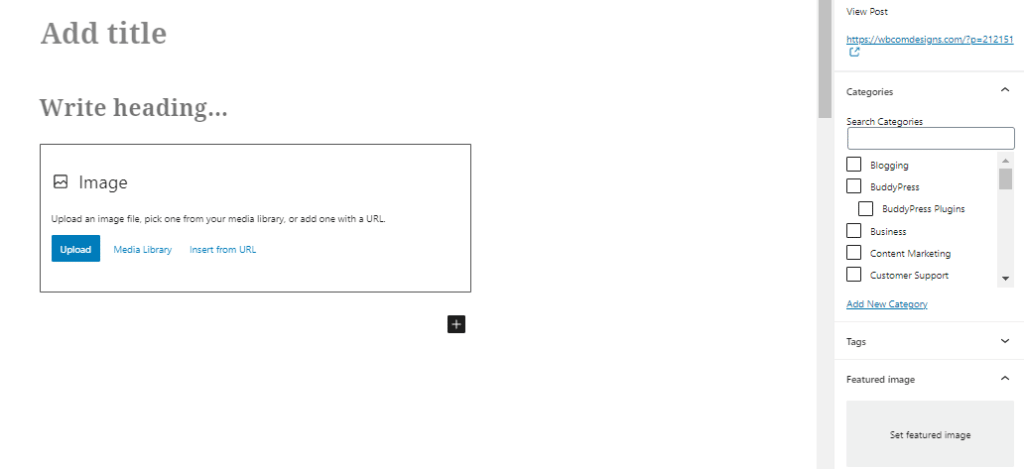
How to add an image using the Gutenberg editor?
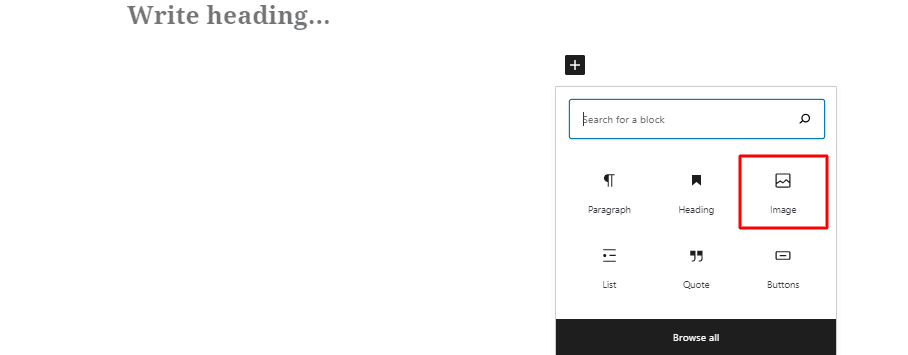
The Gutenberg editor comes with ready to use image blocks using which you will be able to simply upload the image file or select an image from the media library. You will also be able to drag and drop images from your computer. The editor will automatically create a block each time you add an image to your website. After adding the image, you will be able to view the block settings. From there you can add the metadata of your choice. You may even add a link to your image.
Also Read: Best WordPress Finance Plugins
How to add links in the Gutenberg editor?
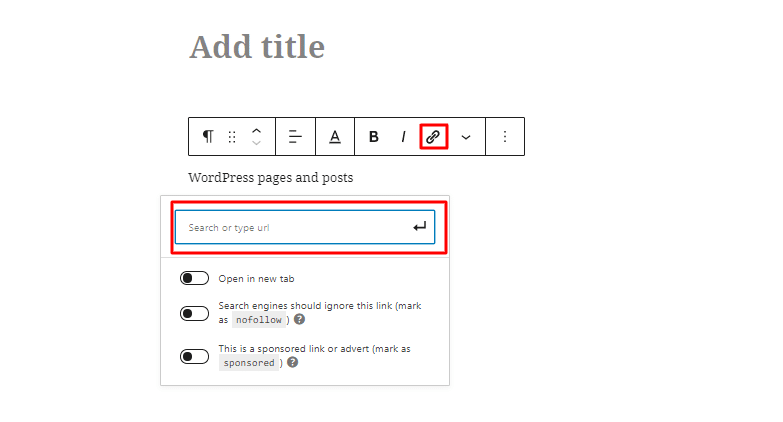
The Gutenberg editor provides you with a lot of blocks where you will be able to add text. The most commonly used blocks for adding text is the paragraph block. The paragraph box has an insert link button in its toolbar. You will also be able to include links in other text boxes. In order to insert the link from the keyboard itself, you need to press command + K for Mac and Control + K for Windows computers.
Also Read: How to Authenticate Owncast with WordPress
Adding buttons to the WordPress pages and posts
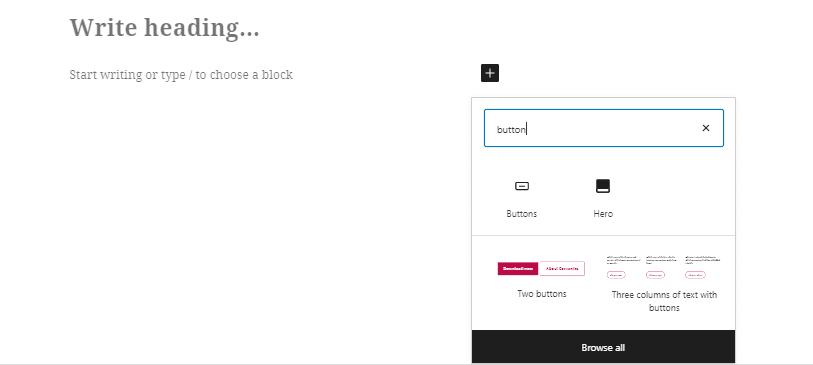
Adding a button was quite a difficult task in the classic editor. You either had to use an external plugin or switch to HTML mode and insert the code for including buttons. The Gutenberg editor comes with a button block using which you will be able to add your button to any of the pages and posts. You can even attach a link to your button. You may change the style and color of your button as well. Three different button styles are available.
Add a cover image to the landing pages and blog posts
Another new feature of the Gutenberg editor is that you will be able to add cover images to your pages and posts. A cover image is basically used as a cover for a particular section of the page. You can also use it as a beginning of the story. Using a cover image, you will be able to create engaging content layouts for your users. All you have to do is add a contact block and upload the image of your choice. You will also be able to add parallax effect to your cover image.

Wrapping Up:
So, as you can see, Gutenberg has made it extremely easy for us to create websites and blogs on WordPress. We will be able to make any kind of customizations to our posts and pages. You need not even be an expert in order to work with Gutenberg. Even a beginner will be able to design a fully functional WordPress website using Gutenberg. We hope our tutorial has helped you to understand the basics of the Gutenberg editor. For further queries, don’t forget to get in touch with us.
Interesting Reads:
Related reading