3 min read
How to install font in WordPress website?

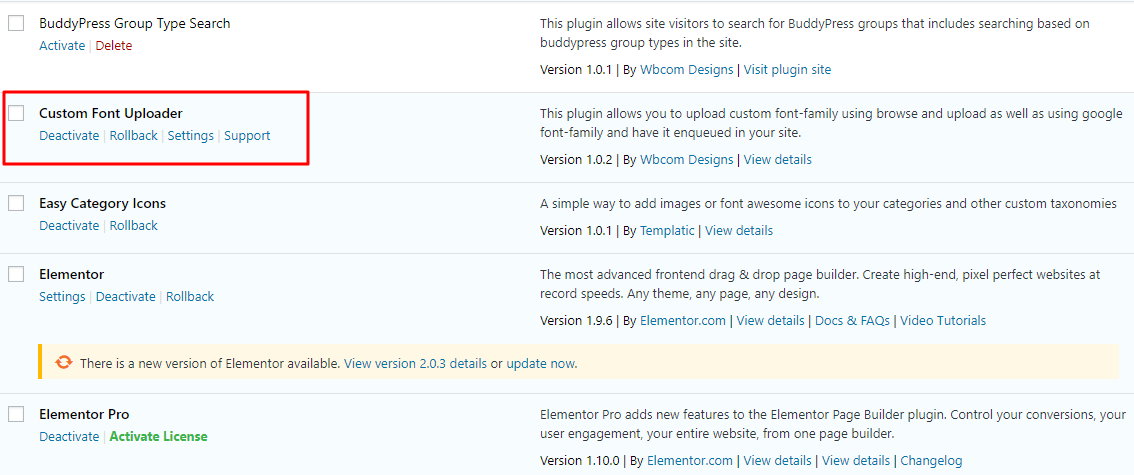
Custom Font Uploader is a free WordPress plugin that allows you to upload font to your WordPress website. You can easily upload a custom font family using browse and upload as well as using Google font family and have it enqueued on your site. In this article, we will tell you how you can setup Custom Font Uploader Plugin on your WordPress website. So let’s begin with how to add fonts to WordPress-
Installing the plugin to install font in WordPress website
To install the WordPress Custom Font Uploader. Follow the steps given below
Step 1. Log in to the WordPress Dashboard.
Step 2. On the Dashboard of your website, scroll down the left-hand sidebar and click on Plugins.
Step 3. From the Installed Plugins page, click on Add New at the top of the page. Alternatively, click on Add New from the drop-down menu under Plugins on the sidebar.
Step 4. On the Add Plugins page, you can see the upload button on the left-hand side, at the top of the page.
Step 5. After click the upload button, you can upload the plugin zip & install it.
Step 6. The plugin is now installed and unpacked into your website. The last thing to do now is click Activate Plugin.
Also reads: Benefits of WordPress Online Business Directories
Installing font in WordPress website
After the plugin has been installed and activated, we will upload the fonts and get them enqueued on our website. Before uploading any font please note that upload font file format of type: TTF,tf,woff. Let us start with the settings step by step:
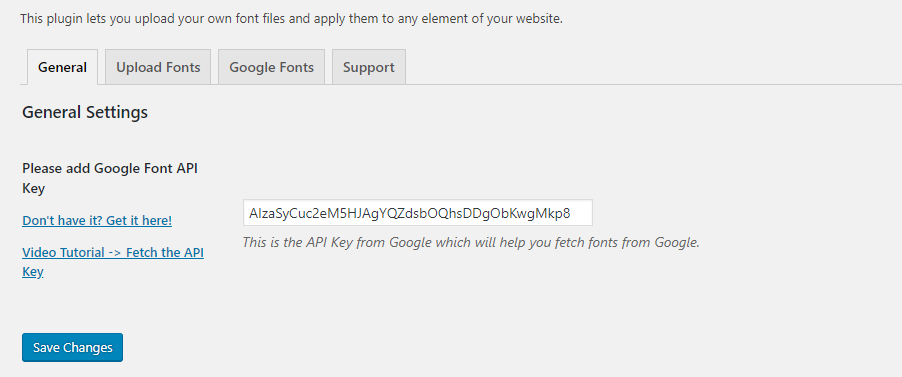
General Settings: Go to Dahsboard>>plugins>>Font Uploader>>General. General settings give you an option to API Key from Google which will help you fetch fonts from Google. Here you will add the API Key and Save Changes.
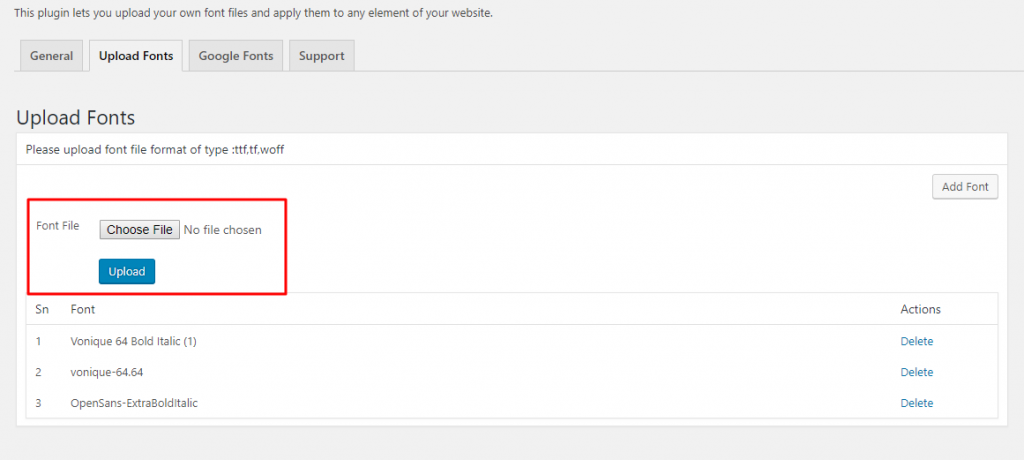
Upload Fonts: Go to Dahsboard>>plugins>>Font Uploader>>Upload Fonts. This setting allows you to upload the fonts. Click on Add Fonts. Here you can upload or drag and drop the font that you have downloaded. Just Choose the file and upload the font. The font will be added to the list in this section.
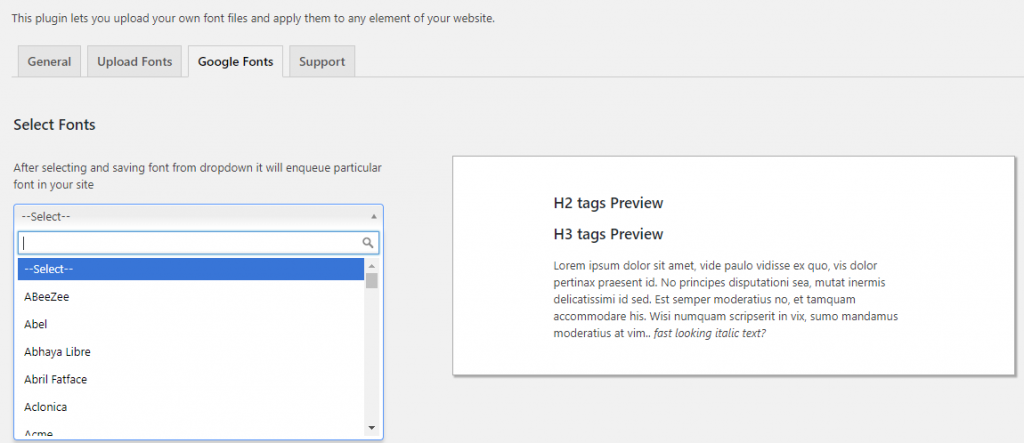
Google Fonts: Go to Dahsboard>>plugins>>Font Uploader>>Google Fonts. This setting enqueues particular Google Font on your website. After selecting and saving font from dropdown it will enqueue particular font on your site. Once enqueued the font will be shown on the list.
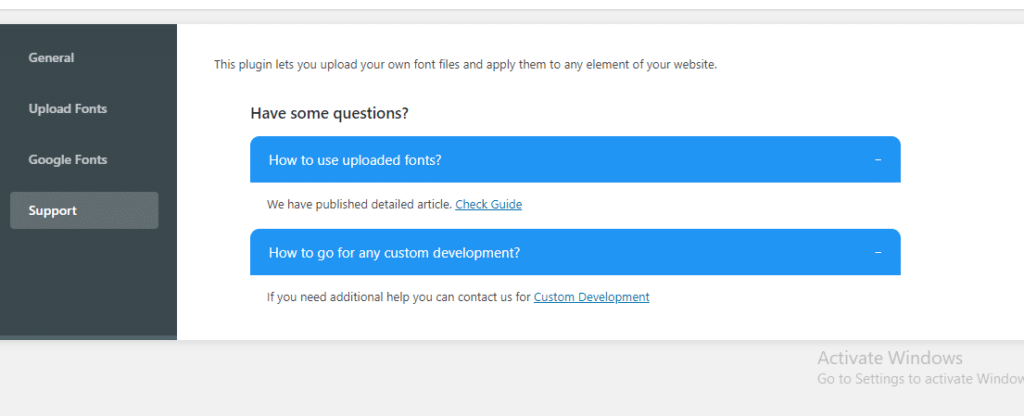
Support: Go to Dahsboard>>plugins>>Font Uploader>>support. If you have any issues regarding how to use uploaded fonts or need any other support then there is complete guide available for this. You simply need to click on check guide.
Displaying your Custom Font on Frontend
Now we will see how you can display this font on the front-end of your website. Firstly let us test if this is working or not.
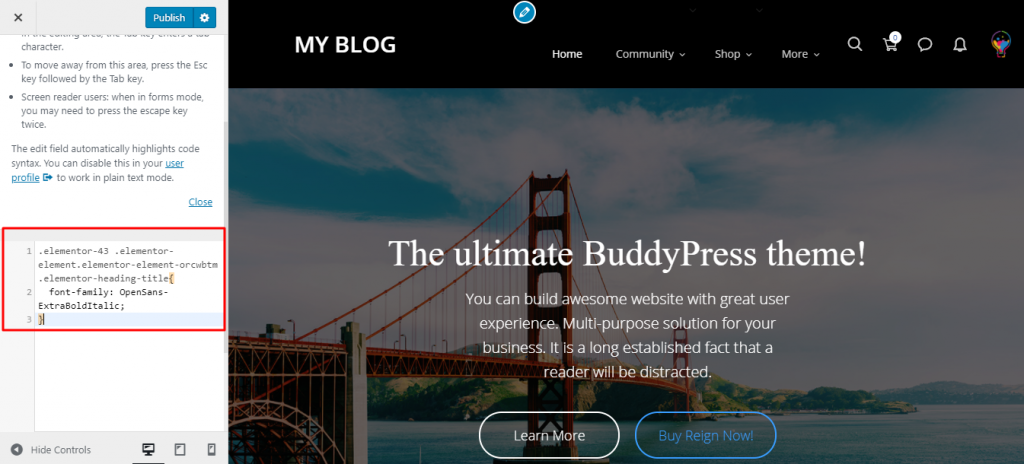
Step 1: Go to My Site on the front-end. Inspect the element by right-clicking on the font you want to change and Inspect. I am inspecting the Heading, “The ultimate BuddyPress Theme“. Before this copy the code of the font you have uploaded from the back-end. Now add an element called Font Family and add the code. As soon as you will add the code you will see that the original font style has been changed to the newer font.

Step 2: Now in order to make the changes permanent, copy the CSS code from the inspect part. You will copy only the CSS part.

Step 3: Once you have copied the CSS, Go to your theme options and add CSS in the Additional CSS section. Inside the curly brackets add the Code of the font and Publish the changes. Here we have used Reign- The Ultimate BuddyPress theme.
Step 4: Your font will be published in the Front-end.

There you Go! You have published your own font on your website. This is free and you can download it from here. You can also check out this video of Custom Font Uploader.
Interested Reads:
Understand Major Differences Between UI and UX
Related reading