In our last blog post, we told you how to create an intranet website for your business or organization using Reign BuddyPress Theme and BuddyPress plugin. We covered the basics of creating an intranet website which includes:
- Identifying Your Host Requirement
- Installing An Intranet Theme
- Installing and Configuring BuddyPress
- Configuring BuddyPress Pages And Menu Navigation
- Adding Forum Functionality To Your Intranet
- Extended Functionalities For Your Intranet Website
The last tutorial helped you set up everything at the place, but an intranet website will be incomplete unless you will not add additional features to it and manage it properly. Therefore in today’s post, we are going to tell you how to add and manage features to your BuddyPress intranet website as well as adding extended functionality to make your intranet more flexible.
We will cover,
- Adding Users
- Creating Groups and Group Type
- Search Capability
- Uploading and sharing documents
- Creating Sitewide notices
- Employee profiles
In the last blog, we created an intranet website but it did not have any member or user to use your intranet website. As you can see in the activity stream page below, there is no activity found and it is pretty empty.
So let us begin our tutorial by creating users for our intranet website.
Adding Users
If you are starting with a staff intranet or an intranet that is confined to some users, it’s likely you will be adding users manually instead of asking them or expecting them to register on your website. It is not a difficult task and similar to creating users for your WordPress website.

To add users, Simply navigate to Dashboard >> Users>> Add New and one by one add each user as a subscriber to your site.
You can walk through this process to create each user. If you have a lot of users, you can import their details via a CSV file. Just install a free CSV importer plugin such as Import Users from CSV. https://wordpress.org/plugins/import-users-from-csv/
This plugin will add users with basic information, meta fields, and user roles.
Here, I have used the BuddyPress Default Data plugin to create dummy users for my intranet website. So, here is how my member’s page looks now.

Once you have set up users at the place, we will move forward with adding groups.
Adding Groups To Your Intranet Site
Groups play a very important role in your intranet website. Groups are a great way to allow your staff members to communicate with each other on different team activities and help them find what they need on a daily basis. Other than creating groups for your formal team, you can also create groups for clubs and societies in your organization.
These groups can be used for internal communication, sharing ideas, files, as well as creating events and sharing progress.
Let’s start by creating groups for an intranet website.
Groups can be created from the backend as well as frontend. Here I have created a group named sales team from the frontend.
Head to the Groups page and Select Create Group Option. This will take you to Group Creation where you will find 6 to 7 steps. If you have installed bbPress plugin as I did, you will find a forum section added otherwise there will be no forum section. I will explain each step here:
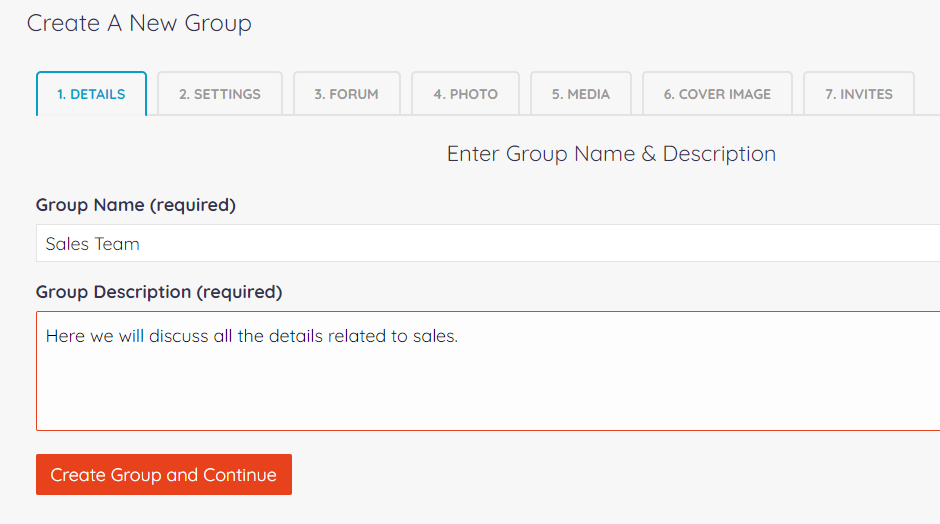
1. Details:
Here you will add a group name and group description.
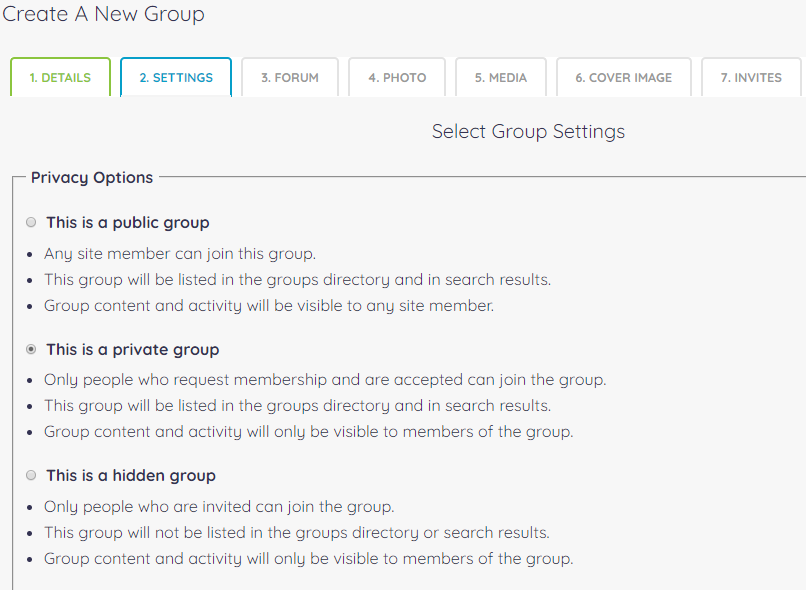
2. Settings: Here you will have to choose what privacy level the group has. You can read each description first and then decide which privacy level will be most suitable for your organization. I have selected a private group. You will also need to specify which members of the group are allowed to invite others.
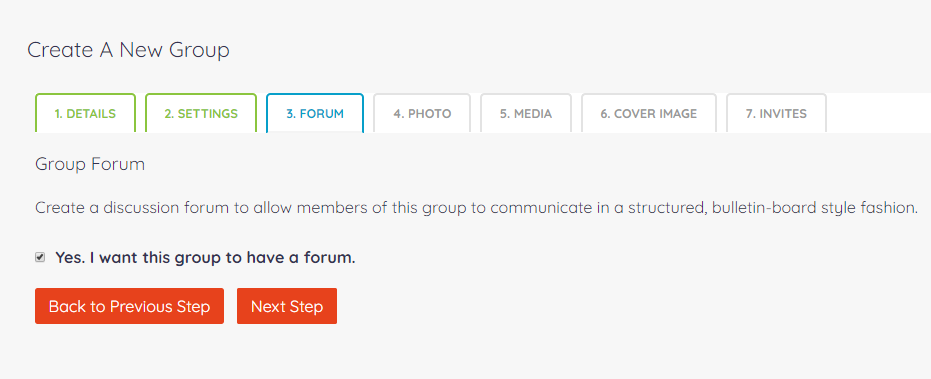
3. Forum: This will only appear if you have installed the bbPress forum plugin. Here you can checkmark if you want the group to have a forum or not.
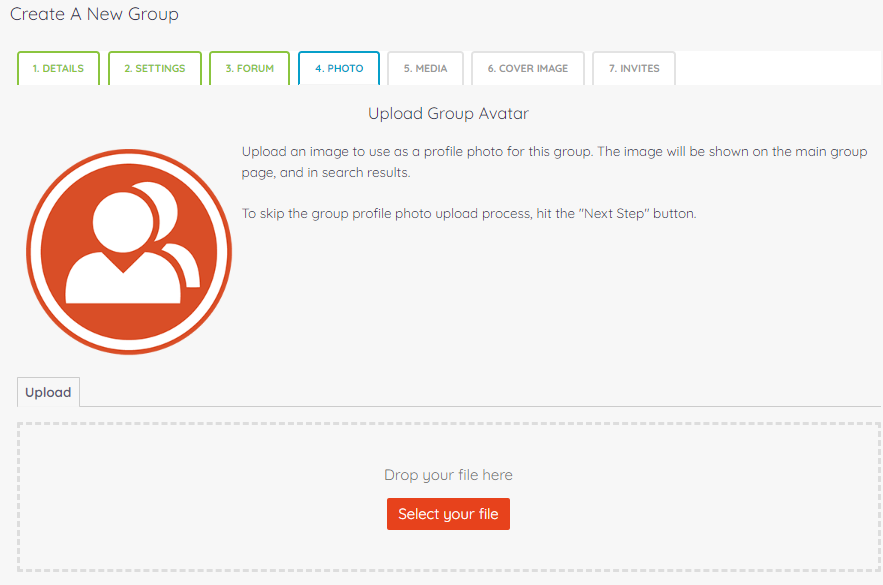
4. Photo:
Here you can upload a custom profile picture for your group. Simply select your file, crop it in the desired ratio and upload.
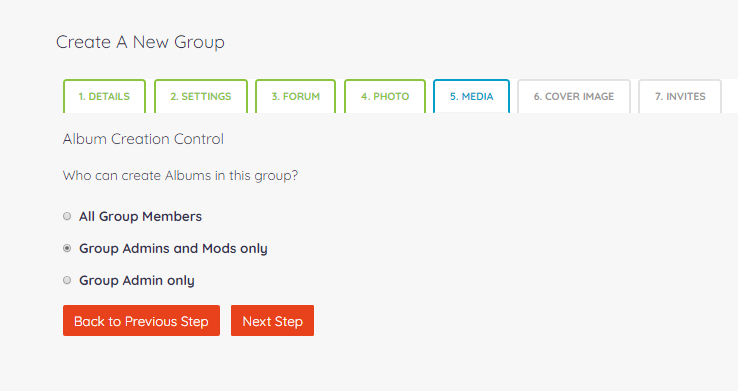
5. Media:
Here you can specify who can create Albums in this group which means upload any media. Whether all the members can upload media, or group admins and mods only or Group admins only. Usually, BuddyPress by default does not provide this feature as it is coming from a plugin called rtMedia. The theme I have used offers this plugin with its package thus providing media uploading functionality. So, please note if you are using the default WordPress theme, you will not get this feature and will require a plugin for it.
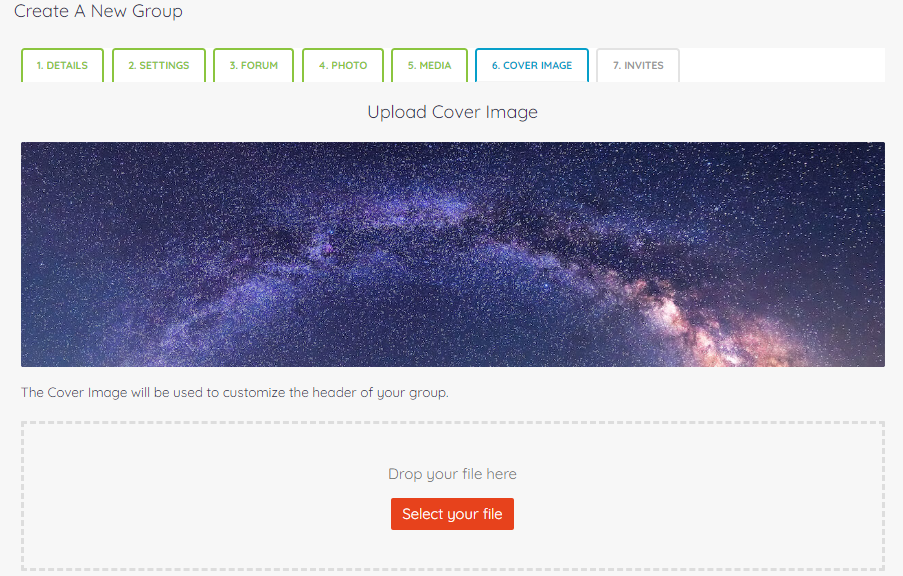
6. Cover Image:
Cover Image allows you to upload a cover image for your group. You can simply add a custom image for the cover. If you are using the Reign BuddyPress theme, you will get an extended feature in this section. Here you can upload one picture from backend which you wish to display as the cover picture for all the groups as you can see in the screenshot.
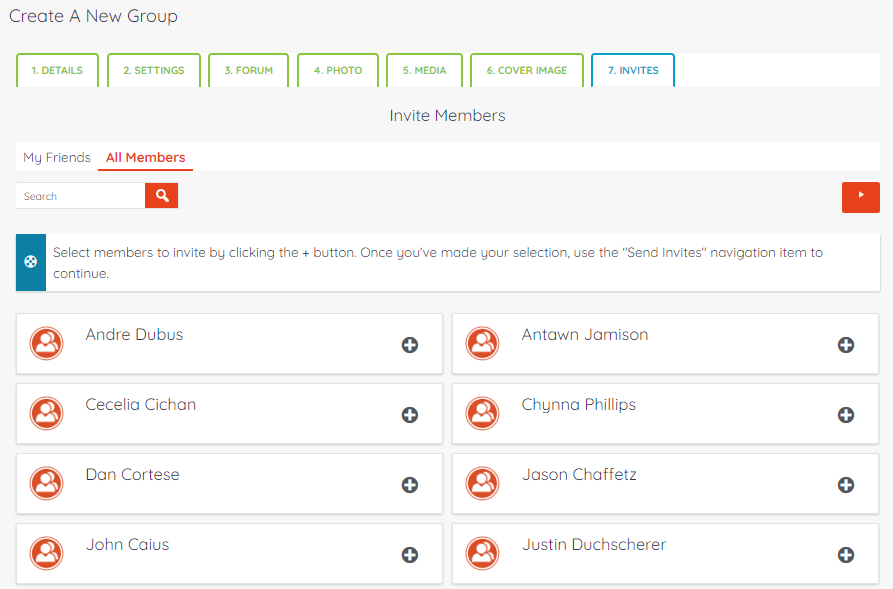
7. Invites:
Lastly, we have invited an option. Using this option you can invite members to join the group. You can also add a message that will go with the group invite.
Finally, click Finish and your Group is created as shown above. You will be able to see this group on the front end of your site.
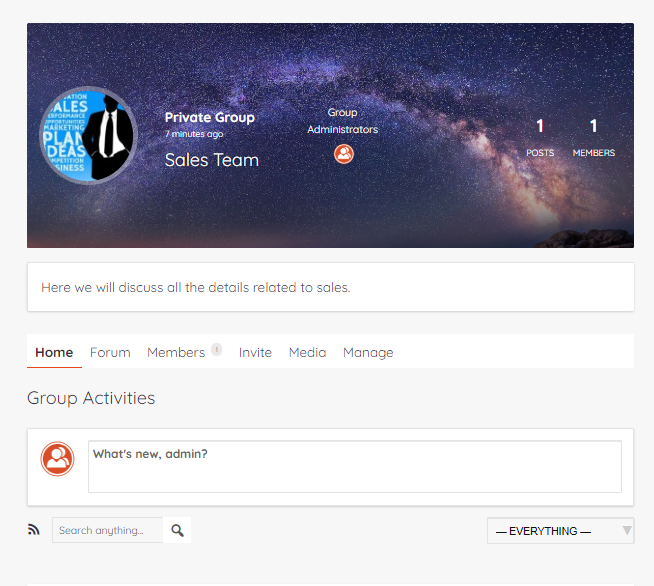
This is the group page that will be displayed to the group creator. You can easily manage the group from this page only. You can:
- Create updates in the group
- Manage forum
- Search and Manage Members
- Manage Invites
- Mange Media
- Edit Group details, group privacy settings photo and cover photo.
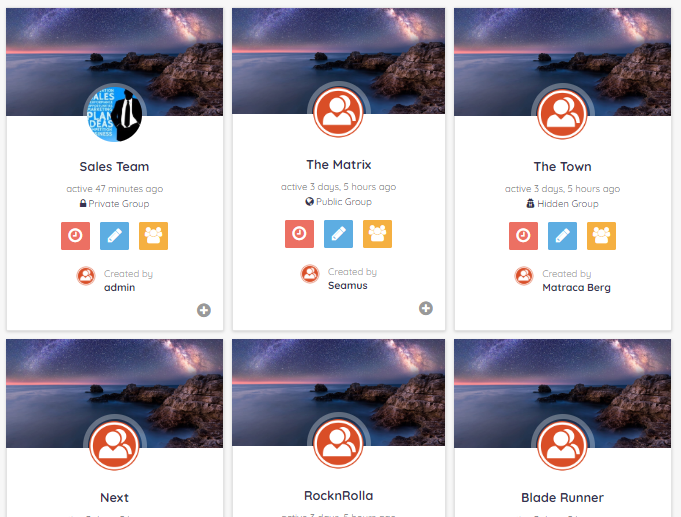
You can create as many groups as you want for your organization. I have imported dummy groups via default data plugin. Here, with the Reign theme, I have an option to display my group directory in 4 different layouts. With the default theme, you will just get one layout but with Reign, I can change a group as well as members directory layouts. Furthermore, I can also customize member header and group header layouts from different dedicated BuddyPress settings provided in the theme.
Search Capability
A good intranet website is only complete when you provide a search feature. This feature provides employees the option to pull information related to any content such as documents, policies, etc by searching using specific keywords, phrases, categories, etc. Providing a good search functionality will enable your employees to find items that are stored on the intranet which they cannot find otherwise.
When you have a WordPress website, it becomes very easy to add a search bar to your website.
Head to Appearance from your Dashboard and there you will spot a Search widget that you can simply add anywhere on your website if your theme doesn’t offer you this feature.

Here the theme I am using is providing me with a search bar on my website’s header so I do not have to add anymore search bar until needed.
Uploading and sharing documents, Media Uploads
Documents upload is another important functionality that is required in an intranet website. In fact, this feature can be considered as one of the major features of any intranet system. An intranet website may store and manage company documents in different formats. This helps employees to get knowledge of any info they require. Files, pdfs, spreadsheets, etc, act as effective documents to manage all the content of the website.
For this purpose, we will install the BuddyPress Docs plugin on our intranet website. We discussed this plugin in our last blog as well.
This plugin adds a collaborative workspace to your intranet community. It is a free plugin that offers multiple privacy levels different privacy levels where docs can be linked to groups or users. It offers support for uploading a fully-private document. Docs can also be linked to groups and forums. It also provides features to upload attachments such as pdf, word, doc, etc. Simply install this free plugin and apply settings. You can see in the screenshot below that I now have a doc tab in my profile. I can simply create or upload any doc, change its privacy settings as to who can access the doc.

For media uploads, you can install the RT media plugin. This plugin allows you to upload media anywhere on your site.
The theme I am using already offers this plugin and dedicated support for rt Media plugin, so I can easily upload media in my intranet.
Creating Sitewide notices

Site-wide notices are essential in an intranet website as they allow you to broadcast any important info to a set of members or to all users of your intranet. It is a very useful tool for sharing any urgent news or update.
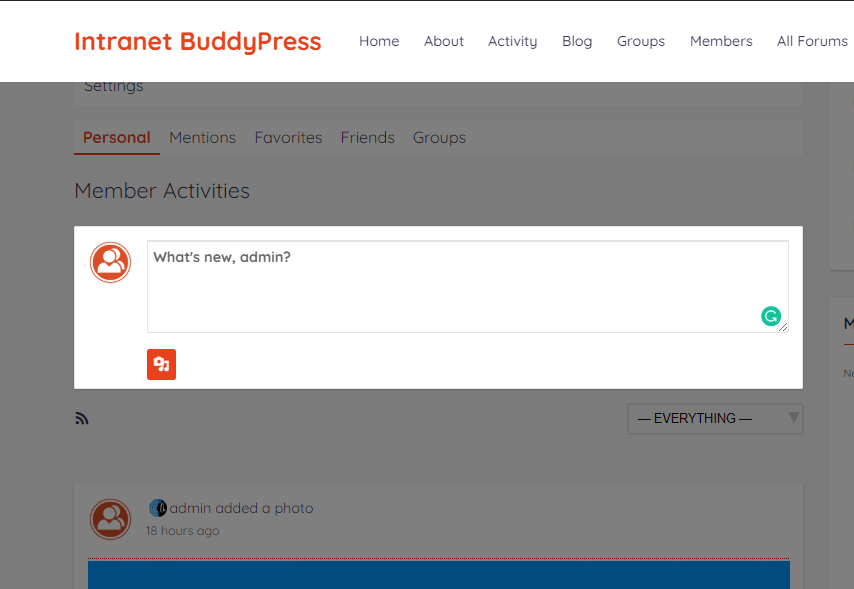
You can simply upload your notice as your status via your profile section or activity page and it can be seen in the sitewide activity widget by all the members of your intranet site. You can also add a site-wide notice widget to your sidebar by heading to Appearance>>Widget and the notice will show up in this widget to all the users.
Employee profiles
For an intranet to be flexible it is important for a company intranet to make it easy and quick for a company to learn as much as possible about the skills, working experience and other details of the employees.
Therefore, each employee of the company should be given an opportunity to set up their profiles, listing their work experience, a short bio, their qualifications, what content they have created within the intranet, discussions, and groups they are part of and more.
BuddyPress provides a feature of creating a profile where users can share their details. It provides an admin with the flexibility to create different types of profile fields as well. Each member can upload an avatar, edit his profile info, and customize his personal account settings.

If you are giving your users to add their educational details, work history and any other detail that require repeater fields, we would suggest you try BuddyPress Profile Pro plugin. This plugin extends the functionality of BuddyPress by giving you the ability to add repeater fields or groups of fields dynamically to the front-end. Moreover, these fields do not have a pre-defined number so a user can repeat it many times as well.
Repeater fields can be used for multiple phone numbers, multiple skillsets, work history, educational details, etc. Downloads BuddyPress profile pro
Also Read: Advanced Tricks To Generate Revenue Through Your Blogs
Enjoy your new intranet!
Your organization’s intranet should act as a digital medium for conversations, information, and workflow in your company. Giving a platform for your employees to share their knowledge, their skills, interests with others along with full privacy can take your company to new heights.
There are many features that can be included in a BuddyPress intranet and it all depends on your requirements. By creating groups, adding notices, allowing members to communicate, uploading and sharing important documents, giving each employee their own profile to showcase their skills, you can make your intranet even more useful for your team.
We hope this article helped you. If you have any suggestions for us, let us know in the comment section below.

