12 min read
WordPress Ad Scheduling: Show the Right Ad at the Right Time

The Problem with Always-On Advertising
Most WordPress sites treat advertising like a light switch: ads are either on or off. A banner goes live, and it runs 24 hours a day, 7 days a week, until someone remembers to take it down or the contract expires. This approach feels simple, but it is quietly destroying your ad performance.
Here is what happens when ads run without any scheduling logic:
- Ad fatigue sets in fast. A visitor who sees the same banner 15 times in a week stops noticing it entirely. Studies from Nielsen Norman Group show that banner blindness kicks in after just 3-5 exposures to the same creative.
- Irrelevant timing kills conversions. A lunch delivery ad showing at 11 PM is wasted inventory. A B2B software ad displayed on Saturday morning reaches nobody who can make a purchase decision.
- Budget burns without results. Advertisers who pay for impressions during low-engagement hours are getting poor value. When they review their campaign reports and see mediocre CTR, they do not renew.
- User experience degrades. The same rotating banners on every page visit make your site feel stale and overly commercialized, increasing bounce rates.
- Seasonal mismatches cost revenue. Running a summer sale ad in October or a Christmas promotion in February is not just wasteful, it signals to visitors that nobody is paying attention.
The fix is not fewer ads. It is smarter ads. And smarter ads start with scheduling.
How Ad Scheduling Increases Click-Through Rates
Ad scheduling, also called dayparting or time-based targeting, is the practice of controlling exactly when specific ads appear on your site. Instead of blasting every ad to every visitor at all times, you serve the right creative to the right person at the right moment.
The impact is measurable and significant:
- Google’s own data shows that advertisers using dayparting see 15-25% higher conversion rates compared to always-on campaigns.
- WordStream research found that restricting ads to peak engagement hours improved CTR by an average of 20%.
- E-commerce studies consistently show that purchase intent peaks between 8-10 PM on weekdays and 10 AM-2 PM on weekends, outside those windows, display ad performance drops dramatically.
For WordPress site owners managing their own ads, scheduling creates a competitive advantage that network-served ads simply cannot match. You know your audience. You know when they visit, what they are looking for, and when they are most likely to engage. Scheduling lets you act on that knowledge. If you are still relying on third-party networks, consider switching to a self-hosted ad server to unlock these capabilities.

Day-Parting: Matching Ads to Your Audience’s Daily Rhythm
Day-parting divides the day into segments and assigns different ads (or different ad weights) to each segment. The concept is borrowed from broadcast advertising, where TV commercials have always been sold by time slot. The same principle applies to display advertising on your website.
Understanding Your Traffic Patterns
Before you set up day-parting, you need to know when your audience is most active and most engaged. Open your analytics and look at:
- Hourly traffic distribution, When do your pageviews peak? Most content sites see spikes at morning commute (7-9 AM), lunch (12-1 PM), and evening (7-10 PM).
- Engagement by hour, High traffic is not always high engagement. Compare average session duration and pages per session across different hours.
- Conversion patterns, If you track goal completions (newsletter signups, downloads, purchases), when do these peak? That is your money hour.
- Day-of-week variance, B2B sites typically see Monday-Thursday peaks. Lifestyle and entertainment sites often perform best on weekends.
Setting Up Day-Parts in WB Ad Manager Pro
WB Ad Manager Pro lets you assign specific time windows to each ad campaign. Here is how to configure day-parting effectively:
- Navigate to the campaign settings for the ad you want to schedule.
- Enable time-based targeting in the scheduling section.
- Set your active hours, For example, a restaurant ad might run only from 10 AM to 2 PM (lunch) and 5 PM to 9 PM (dinner).
- Choose active days, A weekend event ad should only display Thursday through Sunday.
- Set timezone, Critical for sites with international audiences. Serve ads based on the viewer’s local time, not your server time.
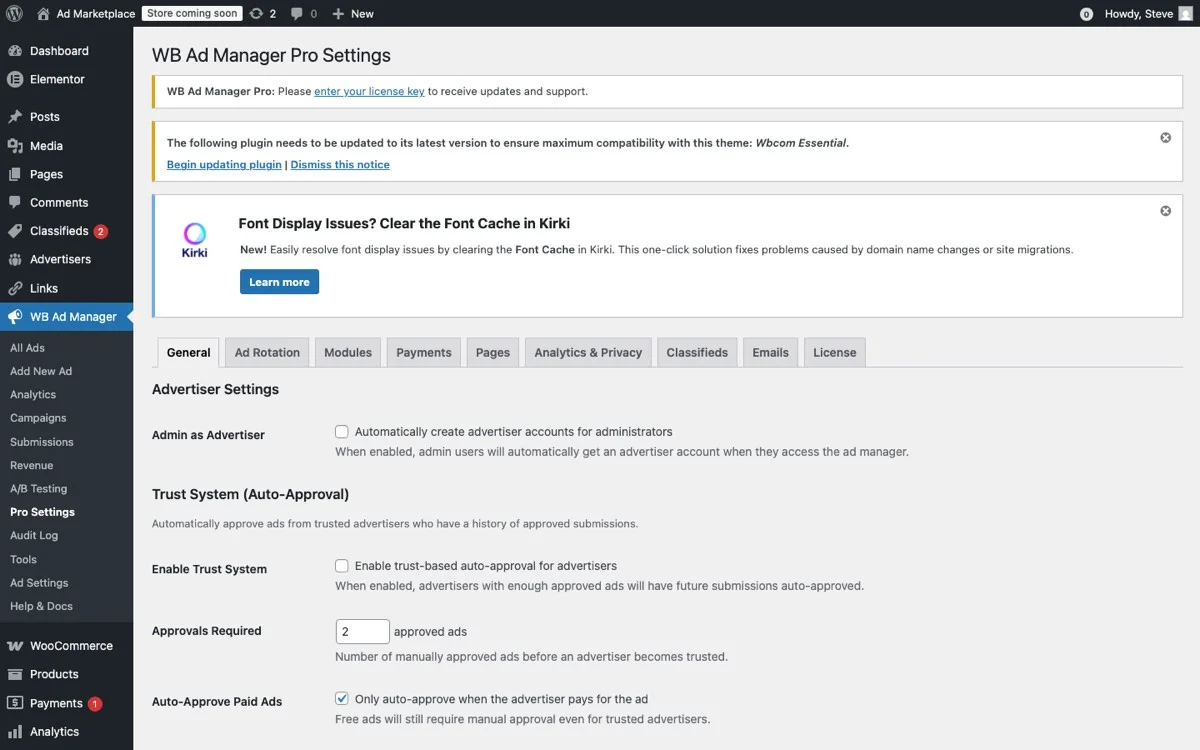
WB Ad Manager Pro Settings, configure ad rotation, scheduling, modules, and targeting from one dashboard
Day-Parting Strategies by Niche
Different types of sites benefit from different scheduling approaches:
- E-commerce and product review sites: Schedule product ads for evening hours (7-10 PM) when purchase intent is highest. Suppress during morning hours when visitors are research-browsing.
- B2B and SaaS blogs: Focus ad delivery on business hours (9 AM – 5 PM, Monday through Friday). Weekend impressions on B2B ads are largely wasted.
- News and media sites: Align ad scheduling with content publishing. If you publish your daily roundup at 8 AM, schedule premium ads for the 8-10 AM window when fresh content drives peak traffic.
- Community and forum sites: Activity often peaks in the evening. Schedule engagement-focused ads (events, webinars, new product launches) for the 6-11 PM window.
- Local business directories: Day-part by business type. Restaurant ads at meal times, entertainment ads on Friday and Saturday evenings, service business ads during weekday mornings.
Frequency Capping: Preventing Ad Fatigue
Frequency capping limits how many times a single user sees the same ad within a defined time period. It is one of the most impactful, and most overlooked, features in ad management.
Why Frequency Capping Matters
Without frequency caps, your most loyal visitors (the ones who visit multiple times per day) get bombarded with the same creatives. This creates several problems:
- Banner blindness accelerates. After 5-7 exposures, most users develop complete immunity to a banner. Their eyes literally skip over it, as confirmed by eye-tracking studies.
- Brand perception suffers. Seeing the same ad repeatedly shifts user perception from “interesting” to “annoying” to “desperate.” None of these help your advertiser.
- CTR drops steadily. First exposure CTR might be 0.8%. By the tenth exposure, it has dropped below 0.1%. You are burning impressions for nothing.
- Advertiser satisfaction declines. Smart advertisers will notice that their impressions are climbing but their clicks are flat. The only conclusion: your site is overexposing their ad to the same audience.
Setting Effective Frequency Caps
WB Ad Manager Pro supports frequency capping at multiple levels:
- Per session, Show an ad a maximum of X times during a single browsing session. Good for sites where users browse many pages in one sitting.
- Per day, Limit daily exposure per user. A cap of 3 impressions per day per user is a common starting point.
- Per week, For longer-running campaigns, cap weekly exposure. This is particularly useful for brand awareness campaigns where you want steady but not overwhelming visibility.
- Per campaign lifetime, Limit total exposures over the entire campaign duration. Useful for short promotional campaigns where you want broad reach rather than deep frequency.
Recommended Frequency Caps by Ad Type
Different ad types have different optimal frequency thresholds:
- Display banners (image ads): 3-5 impressions per user per day. These are passive ads that users glance at, overexposure leads to blindness fast.
- Rich media / HTML5 ads: 2-3 impressions per user per day. Animated or interactive ads are more attention-demanding, so the fatigue threshold is lower.
- Sponsored content promotions: 1-2 impressions per user per day. These look like editorial content, and repeated display quickly erodes trust.
- Retargeting ads: 5-7 impressions per user per day. Users who have already shown interest tolerate higher frequency, but cap it to avoid the “stalking” effect.
- Event or sale announcements: 2-4 impressions per user per day, with a campaign lifetime cap. Once someone has seen the announcement enough times, they have either acted on it or they will not.
Seasonal Campaigns: Capitalizing on Calendar-Driven Demand
Some of the highest-value advertising opportunities are tied to specific dates, seasons, and events. Ad scheduling lets you plan and automate these campaigns months in advance, so the right ads go live at exactly the right moment.
Planning Your Advertising Calendar
Start by mapping out the key dates and seasons relevant to your audience and your advertisers:
- Retail calendar: Black Friday, Cyber Monday, Christmas, Valentine’s Day, Back to School, Prime Day
- Industry events: Conferences, product launches, annual sales cycles
- Seasonal trends: Summer travel, winter holidays, tax season, New Year resolutions
- Local events: Festivals, sports seasons, community events
- Content-driven peaks: If you publish annual guides or roundups, schedule related ads around those publication dates
Setting Up Seasonal Campaigns in WB Ad Manager Pro
The plugin’s scheduling feature supports precise start and end dates, making seasonal campaigns effortless:
- Create the campaign with your seasonal creative (e.g., a Black Friday banner).
- Set the start date, For Black Friday, you might start showing teasers on November 20.
- Set the end date, The campaign automatically stops on November 30, no manual intervention needed.
- Layer with day-parting, Even within the seasonal window, focus delivery on peak hours for maximum impact.
- Prepare fallback ads, When the seasonal campaign ends, the zone automatically reverts to your default ad rotation.
This “set it and forget it” approach means you can plan an entire year of advertising campaigns in advance. Ads go live and expire automatically, keeping your site current without daily management.

Campaign management dashboard, set budgets, billing models, and track ad spend in real-time
Pricing Seasonal Inventory
Seasonal ad slots command premium pricing because advertisers know their audience is in buying mode. Here are pricing guidelines:
- Peak seasons (Black Friday, Christmas): 2x to 3x your standard rate
- Secondary seasons (Valentine’s Day, Back to School): 1.5x to 2x standard rate
- Industry-specific peaks: 1.5x to 2x, depending on how relevant your audience is
- Off-season: Standard rate, or offer discounts to fill inventory
Combining Scheduling with Device and Role Targeting
Ad scheduling becomes even more powerful when combined with other targeting dimensions available in WB Ad Manager Pro. Here is how to layer multiple targeting criteria for precision ad delivery.
Device-Based Targeting
Mobile and desktop users behave differently, and your ad strategy should reflect that:
- Mobile users during commute hours (7-9 AM, 5-7 PM): These visitors are scrolling quickly on small screens. Use compact, visually striking ads with clear CTAs. Avoid text-heavy banners.
- Desktop users during work hours (9 AM – 5 PM): These visitors have larger screens and more time. Wider banner formats and detailed offers perform well.
- Tablet users in the evening (7-10 PM): Often browsing from the couch with high purchase intent. Showcase product-focused ads with direct purchase links.
WB Ad Manager Pro lets you assign device targeting per ad, so you can create mobile-specific and desktop-specific versions of the same campaign, each with its own scheduling rules.
User Role Targeting
If your site has registered users (membership sites, community forums, e-commerce stores), you can schedule ads differently based on user roles:
- Logged-out visitors: Show ads promoting membership signup or lead magnets. Schedule these during high-traffic hours for maximum exposure.
- Free members: Display upgrade offers and premium feature ads. Schedule during engagement peaks when they are actively using the site.
- Premium members: Reduce or eliminate ads as a membership perk, or show exclusive partner offers. This rewards paying users and reduces churn.
- Administrators: Hide ads entirely so your team can focus on content management without visual clutter.
Role-based targeting also plays a key role in GDPR-compliant ad delivery, where different consent levels may apply to different user types.
Geographic Targeting + Scheduling
For sites with international audiences, combine geographic targeting with timezone-aware scheduling:
- Serve US-focused ads during US business hours
- Show European advertiser campaigns during CEST timezone peak hours
- Display region-specific offers (UK pricing in GBP, US pricing in USD) during each region’s active hours
Real-World Scheduling Scenarios
Let us walk through some practical examples that demonstrate how scheduling transforms ad performance.
Scenario 1: Food Blog with Restaurant Advertisers
A food blog sells ad space to local restaurants. Without scheduling, ads run all day. With scheduling:
- Breakfast restaurant ads: 6 AM to 10 AM only
- Lunch restaurant ads: 10:30 AM to 2 PM
- Dinner restaurant ads: 4 PM to 9 PM
- Late-night delivery ads: 9 PM to 1 AM
- Frequency cap: 3 impressions per user per day per restaurant
Result: Each restaurant reaches hungry visitors at exactly the right time. CTR increases 40% because the ads are contextually relevant to what the visitor wants right now.
Scenario 2: WordPress Tutorial Site with SaaS Advertisers
A WordPress tutorial blog has three SaaS advertisers: a hosting company, a page builder plugin, and a security plugin. With scheduling:
- Hosting ads: Monday to Friday, 9 AM to 6 PM (when developers are working)
- Page builder ads: All week, with higher weight on weekends (when people work on personal projects)
- Security plugin ads: Scheduled to increase by 3x after major WordPress vulnerability announcements (manually triggered)
- All ads frequency-capped at 4 impressions per user per day
Result: Each advertiser reaches users in the right mindset. The hosting company reaches developers during work. The page builder reaches hobbyists on weekends. The security plugin capitalizes on urgency.
Scenario 3: E-Commerce Review Site with Seasonal Campaigns
A product review site pre-schedules the entire Q4 advertising calendar:
- October 1-31: Halloween costume and decoration ads
- November 1-24: Early holiday shopping guides
- November 25-28: Black Friday / Cyber Monday exclusive deals (premium rate)
- November 29 – December 20: Holiday gift guide ads
- December 21-25: Last-minute gift and gift card ads
- December 26-31: New Year deals and clearance ads
Result: Ads are always relevant to what visitors are looking for that week. Advertisers see higher conversion rates, and the site owner commands premium seasonal pricing.
Measuring the Impact of Ad Scheduling
After implementing scheduling, track these metrics to quantify the improvement:
- CTR by time segment: Compare click-through rates during your scheduled windows vs. the previous always-on period.
- Effective CPM: Calculate revenue per 1,000 impressions. Scheduled ads typically deliver 20-40% higher eCPM because fewer impressions are wasted.
- Advertiser retention rate: Track how many advertisers renew after their first campaign. Better-performing campaigns lead to higher renewal rates.
- Revenue per ad zone: With scheduling, you can sell the same zone to multiple advertisers (different time slots), increasing revenue per placement.
- User engagement metrics: Monitor bounce rate and session duration. Relevant, well-timed ads should not negatively impact user behavior, and can even enhance it by promoting useful products.
Getting Started with Ad Scheduling
You do not need to implement every scheduling feature at once. Start with the highest-impact changes:
- Set frequency caps first. This single change will improve your ad performance immediately by eliminating overexposure to your most frequent visitors.
- Add basic day-parting. Restrict B2B ads to weekday business hours. Restrict consumer ads to evening and weekend hours. Even this broad segmentation makes a measurable difference.
- Plan one seasonal campaign. Pick your next relevant holiday or event and pre-schedule a campaign with start and end dates. Experience the workflow firsthand.
- Review analytics after two weeks. Compare your scheduled campaign performance against your historical always-on data. The numbers will speak for themselves.
Ad scheduling is not a nice-to-have, it is a fundamental capability that separates amateur ad management from professional advertising operations. Your advertisers expect it, your audience benefits from it, and your revenue grows because of it.
Get WB Ad Manager Pro and start delivering the right ads at the right time to the right audience.
Related reading