Online communities have become a vital part of our daily lives in today’s digital world. Whether it’s a platform for discussing our hobbies or connecting with like-minded individuals worldwide, online communities have revolutionized how we interact. With the growing demand for online communities, creating a visually appealing, user-friendly, and feature-rich site is essential. And that’s where the BuddyX theme comes in! If you want to create an online community site that stands out, the BuddyX theme is the perfect solution. In this blog post, we’ll take you through a step-by-step guide on using the BuddyX theme to create an online community site that will engage and connect your audience. So, whether you’re a blogger, business owner, or just someone looking to start a community site, this post is for you! Get ready to transform your website and take your community to the next level!
Try BuddyX Theme DemoBuy BuddyX Pro Theme and Community bundle add-onto create a highly engaging Community Platform Today!
Table of Contents
ToggleGetting Started with BuddyX Theme
Getting started with BuddyX Theme is easy, and it offers many features that can be used to create a visually appealing and engaging online community site. In this section, we’ll walk you through installing and activating the BuddyX theme and provide an overview of its features that can be leveraged to create an online community site.
How to Install and Activate the BuddyX Theme
To start with the BuddyX theme and create an online community site, you must install and activate the theme. Follow these simple steps to do so:
Go to your WordPress dashboard, and click “Appearance” in the left-hand menu. Click on “Themes.” Click on the “Add New” button at the page’s top. Search for the “BuddyX” theme in the search bar. Once you find the BuddyX theme, click the “Install” button. After the installation, click the “Activate” button to activate the theme. That’s it! Now you have the BuddyX theme installed and activated on your website.
Overview of BuddyX Theme Features
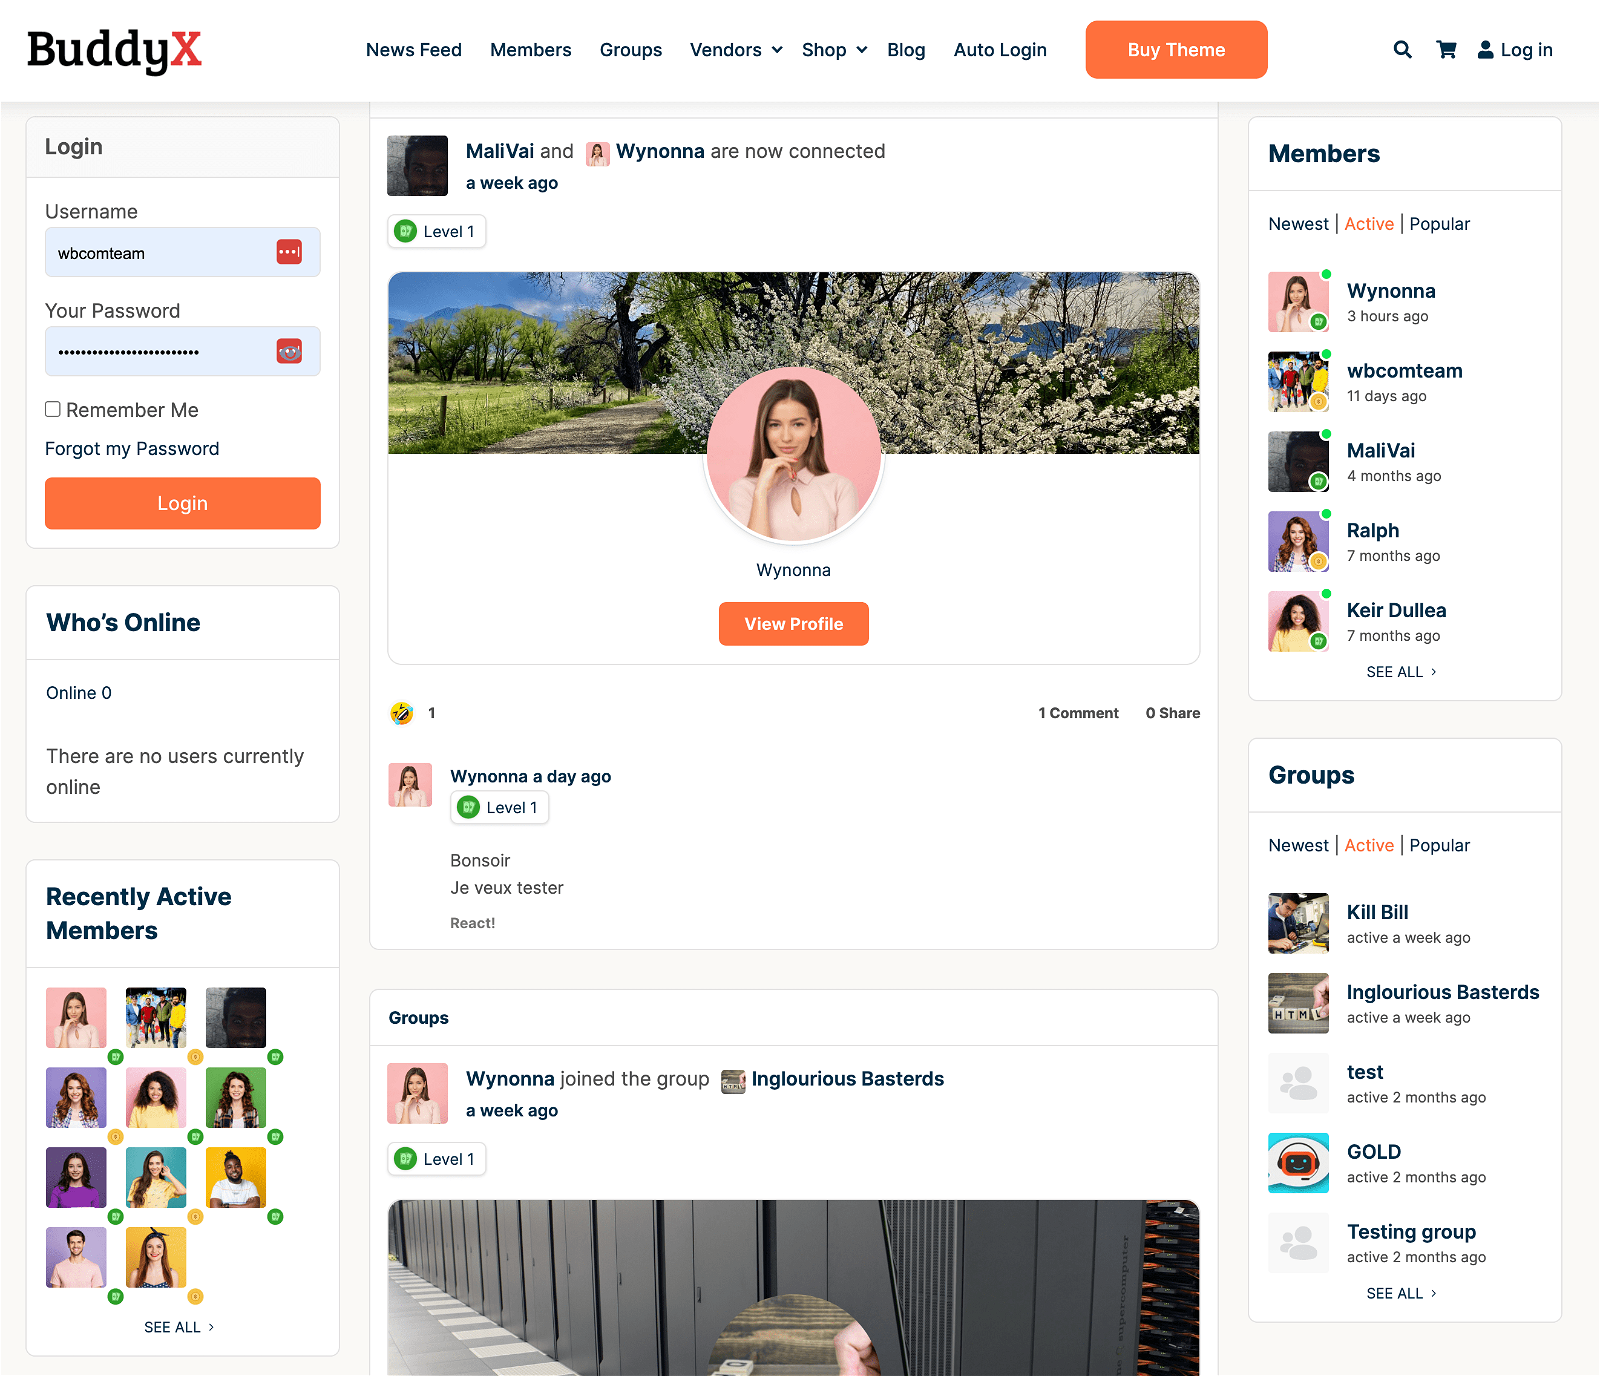
The BuddyX theme has features that make it an ideal choice for creating online community sites. Here’s an overview of some of its most notable features that can help you to create an online community site:
- Responsive Design: The BuddyX theme is designed to be mobile-friendly, ensuring that your online community site looks great on any device.
- Customizable Design: BuddyX theme offers a variety of customization options, including layout, color, and typography, allowing you to create a unique look for your community site.
- Built-in Community Features: BuddyX theme has built-in community features like user profiles, groups, forums, and messaging, making it easy for your users to connect and engage with each other.
- Social Integration: BuddyX theme is fully integrated with popular social media platforms like Facebook, Twitter, and Instagram, allowing your community to interact with your social media accounts seamlessly.
- WooCommerce Compatibility: BuddyX theme is compatible with WooCommerce, allowing you to sell products and services on your community site.
- SEO Optimization: BuddyX theme is optimized for search engines, ensuring that your community site is easily discoverable by users.
The BuddyX theme is a versatile and robust option for creating a visually appealing and user-friendly online community site. The following section will examine how to customize the BuddyX theme to suit your needs.
Configuring BuddyX Theme
After successfully installing and activating the BuddyX theme on your WordPress website, the next step is to configure it to meet the needs of your community site. This section will walk you through the steps to customize the BuddyX theme to suit your website’s unique style and functionalities.
How to Customize the BuddyX Theme to Suit Your Community Site?
The BuddyX theme offers a wide range of customization options that allow you to create a unique look and feel for your community site. Here are the steps to follow:
- Go to your WordPress dashboard and click “Appearance” in the left-hand menu.
- Click on “Customize” to access the BuddyX theme customization options.
- In the customization menu, you can modify various elements of your community site’s design, including the site identity, header, footer, blog, and widgets.
- To modify these elements, click on the corresponding section and make the desired changes using the available customization options.
- Once you’ve made all the necessary modifications, click “Publish” to apply the changes to your community site.
BuddyX Theme Settings and Options
In addition to the customization options, the BuddyX theme has various settings and options that allow you to fine-tune your community site’s functionalities. Here are some of the key BuddyX theme settings and options:
- Site Settings: Under this section, you can configure your community site’s title and tagline, logo, favicon, and other site-related settings.
- BuddyPress Settings: This section allows you to configure the BuddyPress plugin, which is essential for creating a social networking site. You can modify user profiles, groups, activity feeds, and more settings.
- WooCommerce Settings: If you’re using WooCommerce to sell products or services on your community site, this section allows you to configure various settings related to the WooCommerce plugin.
- Typography Settings: This section lets you customize the typography of your community site, including the font family, size, weight, and style.
- Color Settings: You can use this section to customize the color scheme of your community site by choosing colors for various elements such as the header, footer, menu, and more.
By customizing these settings and options, you can tailor the BuddyX theme to meet the specific needs of your community site and create a unique online space for your community to connect and engage with each other.
Creating Pages and Posts with BuddyX Theme
Once you have configured the BuddyX theme to your liking, it’s time to start creating content for your online community site. In this section, we’ll walk you through how to create pages and posts using the BuddyX theme and provide some best practices for creating engaging content that will keep your community coming back for more.
Creating Pages and Posts with BuddyX Theme Creating pages and posts with the BuddyX theme is similar to creating them with any other WordPress theme. Here’s how to create a new page or post:
- Log in to your WordPress dashboard and click “Pages” or “Posts” in the left-hand menu, depending on whether you want to create a new page or post.
- Click on the “Add New” button at the top of the screen.
- Enter a title for your page or post in the “Add title” field.
- Add your content in the main editor field. You can use the formatting options at the editor’s top to change the font, size, color, and more.
- Use the “BuddyX Theme Settings” options on the right-hand side of the editor to customize the layout, color scheme, and other features of your page or post.
- Once you’re happy with your content and settings, click the “Publish” button to make your page or post live on your site.
Best Practices for Creating Engaging Content Creating engaging content is critical to building a thriving online community. Here are some best practices to keep in mind when creating content for your BuddyX theme site:
- Be consistent: Adding new content is essential for keeping your community engaged. Try to publish new content regularly, whether once a day, once a week, or once a month.
- Keep it relevant: Ensure your content is relevant to your community and provides value to your users. Consider their interests and needs when creating new content.
- Use multimedia: Adding images, videos, and other multimedia to your content can make it more engaging and help break up long text blocks.
- Encourage interaction: Encourage your community to interact with your content by asking for feedback, hosting polls or contests, or creating discussion forums.
- Be authentic: Your community will appreciate authentic, transparent content that reflects your brand and values. Avoid generic or overly promotional content, and engage with your users genuinely and meaningfully.
By following these best practices and using the BuddyX theme’s customization options to create visually appealing pages and posts, you can build a vibrant and engaged online community that will keep users returning for more.
Wrapping Up Words | Create an online community site using the BuddyX theme
In conclusion, the BuddyX theme is an excellent choice for creating an online community site. With its user-friendly interface and customizable features, you can easily create a platform that connects people with shared interests and goals. So why wait? Start building your online community today with the BuddyX theme, and watch your network grow!


