There is an online course website for everything, from learning martial arts to learning flutes, from learning French to learning Python. You think about what you want to learn, and viola, you can find a perfect course for you online. Online courses have become very popular these days. They provide an immense opportunity to sharpen your skills and grow at a personal and professional level without much cost.
So, if you are skilled and have a niche, and are interested in teaching others, what is a better way to start your online course. It is not complicated; with the help of WordPress and a proper LMS (Learning Management System), you can put your first course online with just a few clicks. All other things that can create hassle like managing content, students, payments, etc., will be done by the LMS system and by integrating various other WordPress plugins like WooCommerce and BuddyPress.
What is LMS?
LMS or Learning Management System is a unified framework for the hosting of an online course website. It helps the user to create a secure interface for the delivery of online courses to students. It also tracks and documents the students’ performance with the creation of various examinations and quizzes. With the help of LMS, you can provide quality content and services to your students.
What to look for in an LMS plugin?

A good LMS plugin will provide you with all these services:
Building Courses
The WordPress LMS plugin you are using must have a robust structure for building and uploading courses, which comprises videos, pdfs, quizzes, reports, and so on.
Student Management
This feature will help with the details of students, the courses they are enrolled in, their membership status, payments, etc.
Progress Reporting
It helps in the motivating of the students by showing the level of their progress, course status. It is an important feature to keep students engaged.
Quizzes and examinations
Quizzes and examinations are the ways for evaluation; they let the students know their actual progress, set various future benchmarks, and improve their current mistakes.
Digital Marketing tools
A good LMS will provide a digital marketing tool for marketing your courses so that your reach can maximize along with profits.
Also Read: Benefits of Building an Open-Source Knowledge Base
Different plugin integrations
Plugins like bbPress and BuddyPress are essential in a WordPress site focusing on selling an online course website. They help in forming discussion forums and communities within the website and create a proper social learning environment.
Badges and Certificates
Badges and certificates boost the students’ morale whenever they finish up with an activity or complete a task assigned. These are very helpful in an online course website to make it fun and lively.
Some of the best LMS plugins available on WordPress
- LearnDash
- LearnPress
- SenseiLMS
- TutorLMS
What do you need to sell courses online?
- A niche for which you can develop a course.
- A domain name for the website.
- A WordPress hosting account with an SSL certificate.
- An LMS plugin.
- A good WordPress theme.
- Addons Integration to add more features to your platform.
Now to the steps for creating an online course website using WordPress and LMS plugin

- The domain name and web hosting
- Installing WordPress
- Selecting a Learning Management System (LMS)
- Choosing an e-learning theme
- Importing demo and customization
- Creating an immersing network
- Setting up payment gateways and e-marketing
- Forming student groups and discussion forums
- Adding Gamification Feature to Engage Students
- Adding useful and fun features with Addons
Step 1: Domain Name and web hosting
Domain Name: Choose a domain name that is easy to read, unique, and showcases you properly. It will be representing you on the internet.
Web Hosting: Here, all your courses and databases will be maintained. There are many options available for web hosting, such as:
- Blue Host
- Hostinger
- HostGator
- DreamHost
You have to choose from one. Each of the hosting platforms comes with its benefits. You have to get an SSL certificate for setting up Payment Gateway.
Step 2: Installing WordPress
Many hosting websites have their own specific WordPress hosting plans at a reliable cost. Using WordPress is itself free, but you have to pay for the hosting services. You can also set up WordPress on your own by following simple steps.
Now, after setting up WordPress, we can move forwards to Step 3.
Step 3: Selecting an LMS
We have already talked about the LMS plugins earlier, and you have to choose one from the many options. Here, we will use LearnDash for further developments as it is one of the top-rated plugins and easily compatible with other WordPress plugins and themes.
Step 4: Choosing an e-learning theme

Themes are essential for looks and smooth User Interface (UI). For developing a beautiful website like Udemy or Coursera, we must choose a proper theme. A good WordPress theme will provide us with a great design, speed, navigation, user-friendly functions, sidebar layouts, widgets, header styles, and many more.
In WordPress, there are thousands of e-learning themes you can choose from. Some of the best themes are:
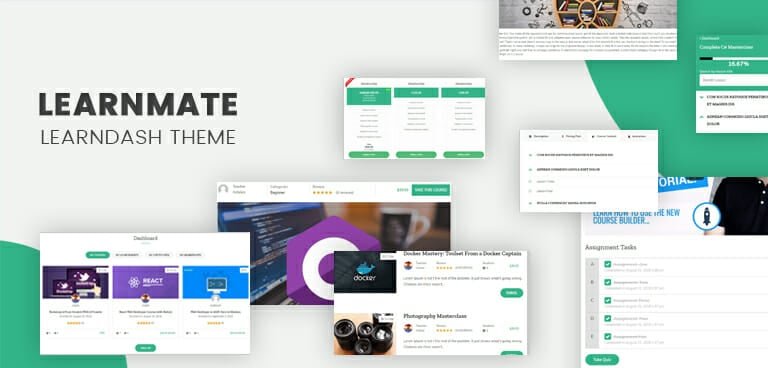
- LearnMate LearnDash
- LearnMate LifterLMS
- BuddyX theme (Free and Pro)
If you have chosen the LearnDash LMS plugin, the LearnMate LearnDash theme is the best option available on WordPress. You can also select the BuddyX theme as an alternative. LearnMate LearnDash provides very easy and innovative solutions when it comes to e-learning website building. It can take any form you want and make it work as you want with just a few simple clicks. If you want a free theme, you can go for the BuddyX Theme.
Also Read: What is WordPress? An Overview of the World’s most popular CMS
Step 5: Importing demo and customization
When you have selected a theme, it is time to move forward and start designing and customizing the websites, dropping widgets, setting up the home page, configuring menus, etc.
But if you have chosen the LearnMate LearnDash theme or BuddyX theme, you can jumpstart by importing the Demo Installer, and you will get all the theme options, widgets, pages, and more with a single click. You have just to perform the basic edit formalities. You can also use the advanced customization option to input your creativity.
Step 6: Include an immersing Community With BuddyPress
Learning is best when like-minded people come together and share their knowledge and experience. So, to make a course successful online, the instructor should be connected with its students personally and work with them to resolve their problems regarding the course.
With the support of the BuddyPress plugin, you can create multiple micro-communities within your websites along with profiles, groups, and private messaging services, and much more. You can create an integrated network of teachers and students and your courses to make them more successful.
Step 7: Setting up payment gateways and e-marketing

Setting up payment gateways is the easiest way to do transactions online. LearnDash supports WooCommerce plugins for setting up payment gateways and providing various e-marketing tools for advertising. You can also create subscription courses, membership courses, provide different coupled course bundles, and provide bulk access if providing courses to corporate offices or firms.
Step 8: Forming student groups and discussion forums
Students need to interact with each other so that they can derive the most benefits from the courses. This can be quickly done by creating various student groups and discussion forums on different topics. With the help of the bbPress plugin or LearnDash wpForo, you can easily create forums and manage and monitor them for unwanted comments, content, etc.
Step 9: Adding Gamification Feature to Engage Students
You can also add the GamiPress plugin for the gamification of activities and badges. It creates a fun environment during quizzes and tests, which increases the suitability of your course among students. Our LearnMate LearnDash and BuddyX both themes support GamiPress plugin.
Step 10: Adding useful and fun features with Addons
Now, your website is complete, and you are ready to be online. But you can add some more features to it by integrating several other WordPress plugin support for evolving your website to the next level. Some of the other plugins you can integrate into your website that is which is specifically built for a LearnDash website are:
- LearnDash Notes: This addon helps create real-time notes for various topics, displayed to different profiles and pages using shortcodes. It also provides custom settings for admins and many other useful features.
- LearnDash Dashboard: This LearnDash add-on provides a dashboard to students, admin which helps them manage their courses and lessons and helps them contact others.
- Reign LearnDash Add-on: It is one of the must-have addons as it is great for marketing your courses. It comes with LearnDash BuddyPress integration, extra widget options, Engaging 3 different Course Layouts, and many more.
Also Read: 7 Steps to Building an Online Community
Building an e-learning website is an excellent idea for anyone who wants to share their knowledge with the world. It is one of the fastest-growing industries in the world. So, what are you waiting for? Create your e-learning website, create your student network and become a part of this multi-billion industry.
Interesting Reads:


