5 min read
Getting Started with BuddyPress: Install Demo Data and Build Your Community
If you’ve ever wanted to create your online community, whether it’s a private group for your brand, a student portal, or a membership-based network, BuddyPress is the go-to WordPress plugin. It transforms a standard WordPress site into a fully functional social networking platform with user profiles, groups, private messaging, activity feeds, and more.
But if you’re new to BuddyPress, you might wonder: How do I set it up? Where do I start? That’s where this step-by-step guide comes in. In this tutorial, you’ll learn how to install BuddyPress, configure its components, and even load demo data to see how a live community would look before you invite your real users.
We’ll walk you through everything from installing the plugin on a fresh WordPress installation to setting up menus, mapping pages, and installing the BuddyX theme to make your site look professional. By the end of this guide, you’ll have a complete demo community site ready to customize for your needs.

WordPress Health Check Plan
Why Start with Demo Data in BuddyPress?
When building a new community, starting with a blank canvas can be overwhelming. You won’t see user profiles, group activities, or any real interactions until people join and engage. That’s why BuddyPress Default Data is so helpful - it populates your site with sample content like demo members, groups, and activity streams.
With demo data, you can:
- Preview layouts and test how your community will look with real activity.
- Experiment with features such as private messaging, profile settings, and group forums.
- Customize theme styles while seeing how they apply to a live social network.
- Train your team on moderation tools without using actual user data.
Now, let’s dive into the actual steps of setting up BuddyPress with demo data.
Setup Guide for BuddyPress Installation with Demo Data
Step 1: Install the BuddyPress Plugin
The first step in building your social community is to install BuddyPress on your fresh WordPress setup.
- Log in to your WordPress Dashboard.
- Go to Plugins > Add New.
- Search for BuddyPress.

- Click Install Now and then Activate.
Once activated, BuddyPress begins transforming your WordPress site into a social hub. However, out of the box, WordPress disables new user registrations, so you’ll need to tweak some settings before people can sign up.
Step 2: Enable Member Registration
By default, WordPress disables user registration to prevent spam sign-ups. Since BuddyPress is all about building a community, you’ll want to allow people to join.
Here’s how to enable it:
- Go to Settings > General in your WordPress dashboard.
- Find the option “Membership - Anyone can register”.

- Check the box and save changes.
Pro Tip: If you’re concerned about spam sign-ups, install a plugin like reCAPTCHA or enable email verification to secure your registration process.
Step 3: Enable All BuddyPress Components
BuddyPress comes with multiple features, or “components,” that you can enable or disable depending on your community’s needs. For a demo site, it’s best to enable them all so you can test each one.
To enable components:
- Go to Settings > BuddyPress > Components.
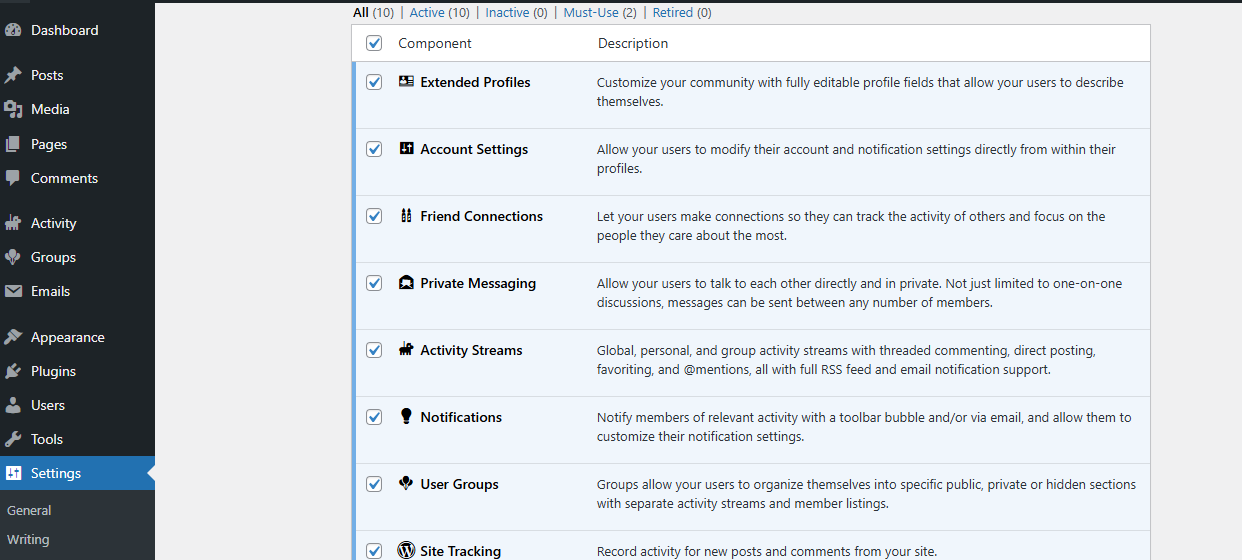
- Check all the options, such as:
- Extended Profiles
- Account Settings
- Friend Connections
- Private Messaging
- Activity Streams
- Notifications
- User Groups
Click Save Settings to activate them.
Note: You can always disable unnecessary components later if your community doesn’t require them.
Step 4: Install the BuddyX Pro Theme
Now that BuddyPress is installed, it’s time to give your community a professional design with BuddyX Pro. Unlike the free version, BuddyX Pro is a premium theme that comes packed with advanced layouts, premium demos, and customization options tailored for online communities.
To install BuddyX Pro:
- Purchase and download the BuddyX Pro theme from Wbcom Designs.
- Go to Appearance > Themes > Add New in your WordPress dashboard.
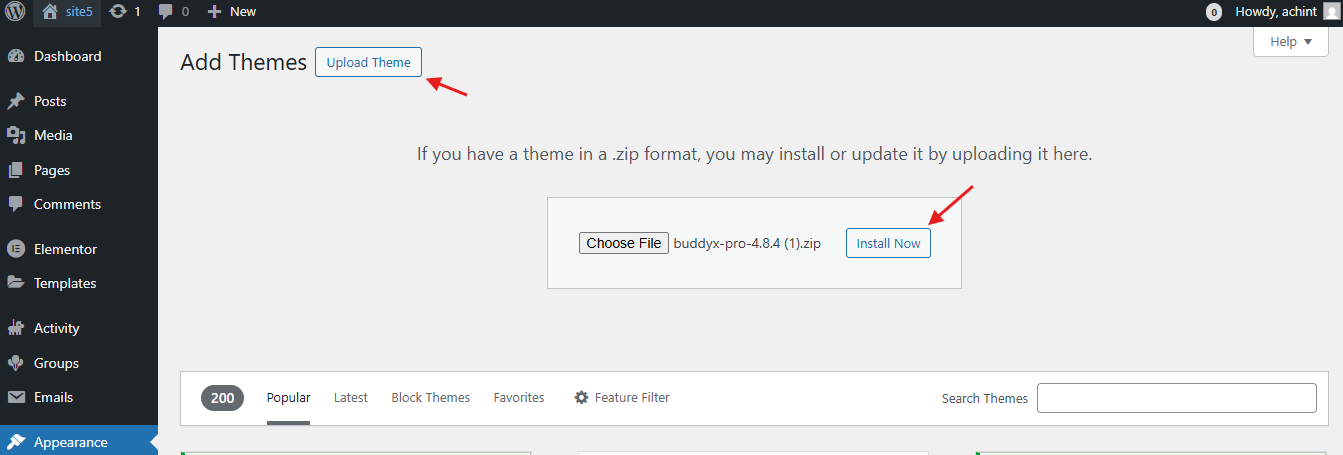
- Click Upload Theme, choose the BuddyX Pro ZIP file, and hit Install Now.
- Activate the theme.
With BuddyX Pro, your community site gets:
- Premium demo designs for different community niches.
- Advanced customization options with Elementor and Gutenberg.
- Enhanced performance with speed and SEO optimization.
- Exclusive integrations with BuddyPress add-ons and community tools.
This ensures your BuddyPress-powered community not only works smoothly but also looks modern, engaging, and future-ready.
Step 5: Install BuddyX Demo Content
Now comes the fun part - adding demo content to see your site in action. Instead of manually generating dummy data with the BuddyPress Default Data plugin, BuddyX comes with a built-in demo installation feature. This allows you to import a full demo site, including layouts, pages, members, groups, and activity streams - all in one click.
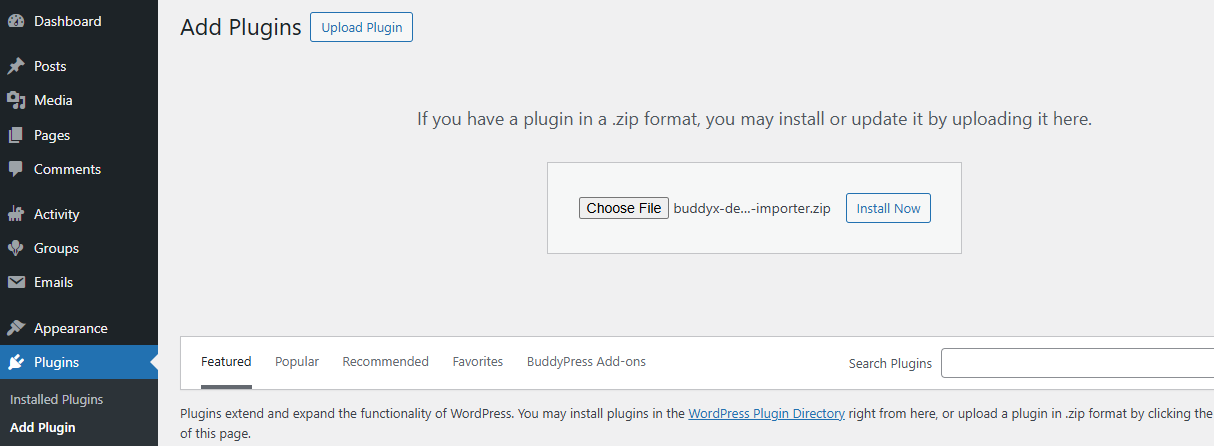
To install BuddyX demo content:
- Go to
Appearance → Demo Installation.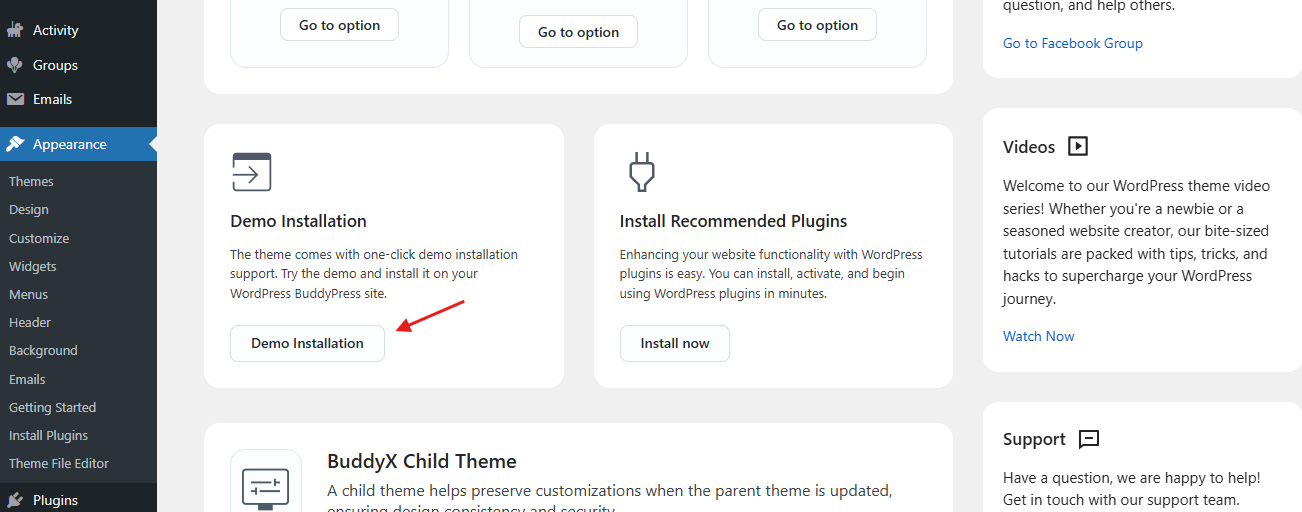
- Click on “BuddyX Demo Importer” to get the ZIP file for import.
- Upload the ZIP file if prompted and wait for the import to complete.
- After installing the ZIP file, a new section will appear under Appearance. From here, you can import demo data and choose from a variety of demos tailored to different community types, then click on Import demo.
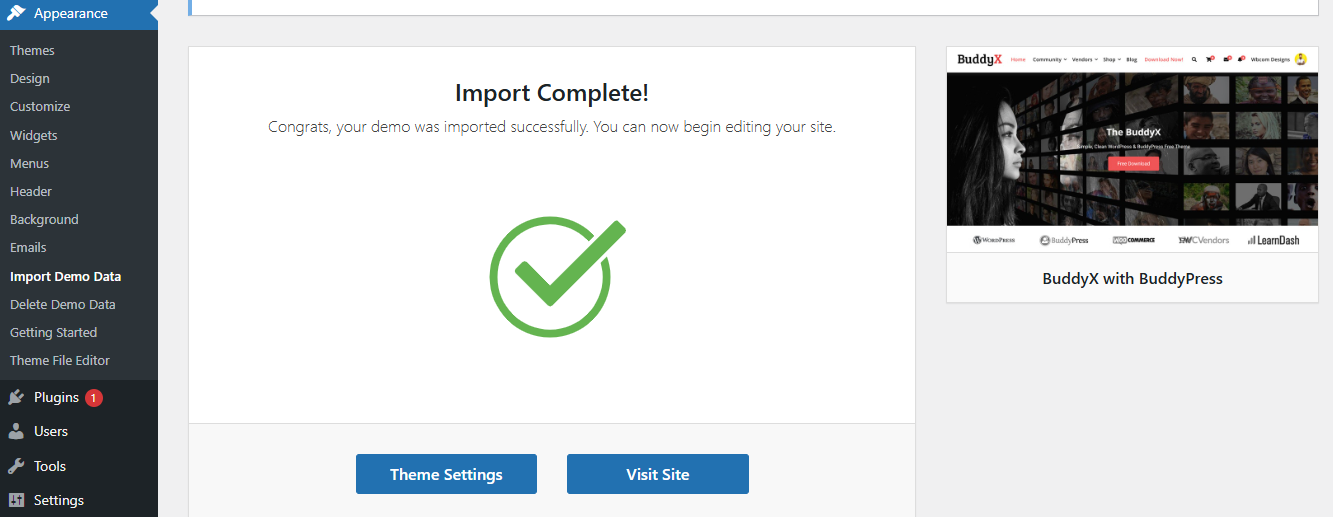
- BuddyX will automatically install the required plugins, and then your demo will start importing.
After the demo import, your site will include:
- Pre-built pages and layouts.
- Demo members with profile photos.
- Groups with sample discussions.
- Activity streams filled with updates.
This allows you to preview exactly how your community site will look and gives you a starting point for customization.
Step 6: You’re All Done!
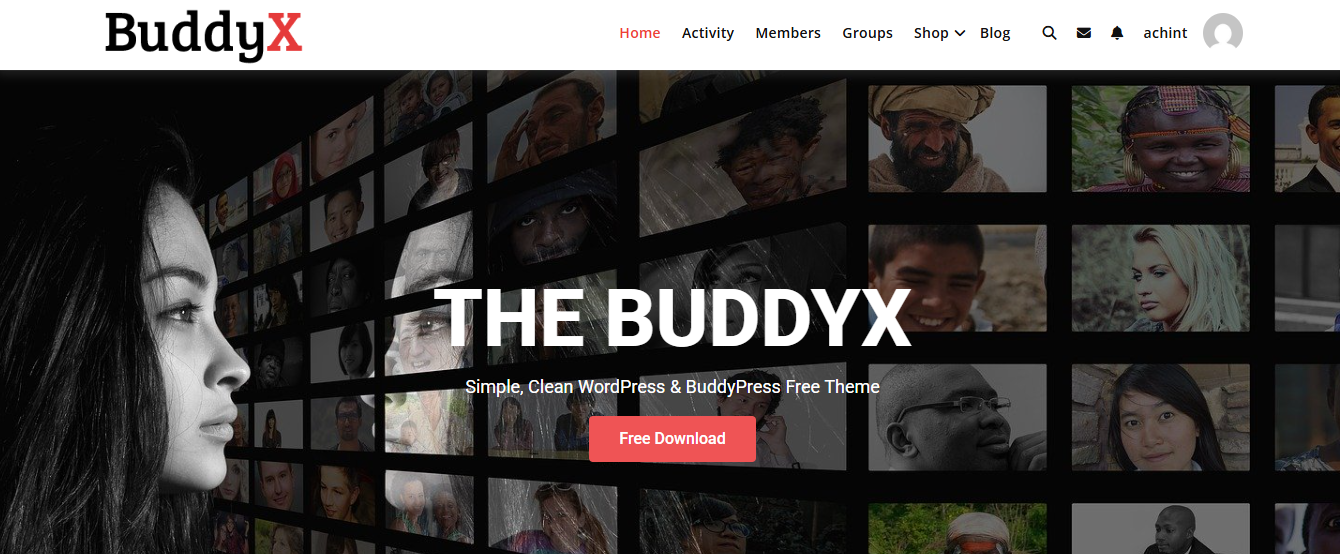
Congratulations, your BuddyPress site is now fully functional with BuddyX and pre-loaded demo content. Your community looks polished and ready for testing or customization.
From here, you can:
- Adjust design elements using the WordPress Customizer.
- Add extra functionality with plugins like bbPress for forums or rtMedia for media uploads.
- Replace demo data with real users once your community goes live.
By using BuddyX’s demo import, setting up a professional-looking BuddyPress community has never been easier - you can start building and customizing immediately.
Watch the Full Tutorial Video
See the complete BuddyPress setup in action! Click below to watch the full step-by-step video guide and bring your community to life.
https://youtu.be/lV8SyNJ_SAo?si=ny13c2JkxUfApyAd
Or, if you’d like to explore pre-built community layouts, you can check out our detailed BuddyPress Demo Guide or browse the official BuddyPress demos.

Final Thoughts
Setting up a BuddyPress community doesn’t have to be overwhelming. By starting with demo data and using the BuddyX theme, you can instantly see your site come alive with members, groups, and activity streams. Demo content helps you test features, customize layouts, and train your team - all before real users join.
With these steps, your WordPress site is ready to grow into a vibrant online community. Explore the features, tweak the design, and when you’re ready, replace the demo content with real members. Your journey from a blank site to a thriving social hub starts now - so dive in, experiment, and enjoy building your community!
Interesting Reads
Reign Theme - Demo Setup Create Social Community Website in Minutes
Create a Social Network with BuddyX WordPress Community Theme
Related reading