The eCommerce landscape is booming, and the demand for online marketplaces is at an all-time high. If you’re an entrepreneur looking to capitalize on this trend and create your own multi-vendor eCommerce marketplace, you’re in the right place. In this blog, we will guide you through the process of launching your eCommerce marketplace using StoreMate, WC Vendors, and a WordPress theme compatible with both plugins. StoreMate is a powerful eCommerce solution that seamlessly integrates with WC Vendors, enabling you to build a feature-rich marketplace where multiple vendors can showcase and sell their products.
Table of Contents
ToggleLaunch Your eCommerce Marketplace
Let’s get started with the simple steps to bring your marketplace dream to life.
Step 1: Install WordPress and Set Up Your Site
The foundation of your marketplace lies in having a WordPress site up and running. If you haven’t done this already, secure your domain, hosting, and install WordPress.
- Download the WordPress package from the official website at wordpress.org/download/.
- If you plan to upload WordPress to a remote web server, download the package to your computer using a web browser, and then unzip the downloaded package.
- If you intend to use FTP to upload WordPress to your web server, you can skip the previous step as the uploading process will be covered later.
- Alternatively, if you have shell access to your web server and are comfortable using console-based tools, you can download WordPress directly to your web server using commands like wget or lynx to avoid FTPing.
Step 2: Install and Configure WC Vendors Plugin
WC Vendors Pro is an advanced version that extends the functionality of our free plugin, WC Vendors Marketplace. Before installing WC Vendors Pro, make sure you have the following plugins installed and configured.
- WordPress 5.0 and above
- WooCommerce 4.0 and above
- WC Vendors Marketplace 2.0 and above
Installation
- After purchasing WC Vendors Pro, access your WC Vendors account at https://www.wcvendors.com/my-account/downloads/ to download the WC Vendors Pro .zip file.
- In your WordPress admin panel, go to “Plugins” > “Add New.”
- Choose “Upload Plugin,” find the unzipped WC Vendors .zip file, and click on “Install Now.”
FTP Upload
- After purchasing WC Vendors Pro, Download the WC Vendors Pro .zip file by downloading it from your WC Vendors account: https://www.wcvendors.com/my-account/downloads/.
- Using your FTP program, upload the contents of the unzipped plugin folder into the /wp-content/plugins/ directory of your WordPress installation.
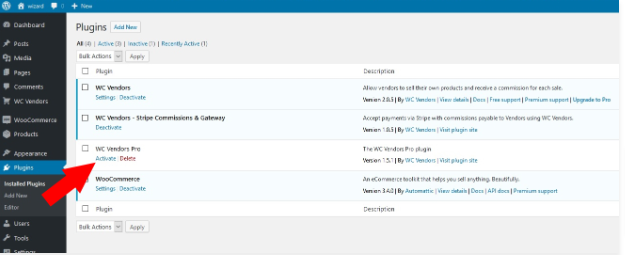
- Once the plugin has been successfully installed, you must activate it. Navigate to “WP Admin” > “Plugins” > “Installed Plugins,” and then activate the WC Vendors plugin.
Step 3: Install StoreMate Theme
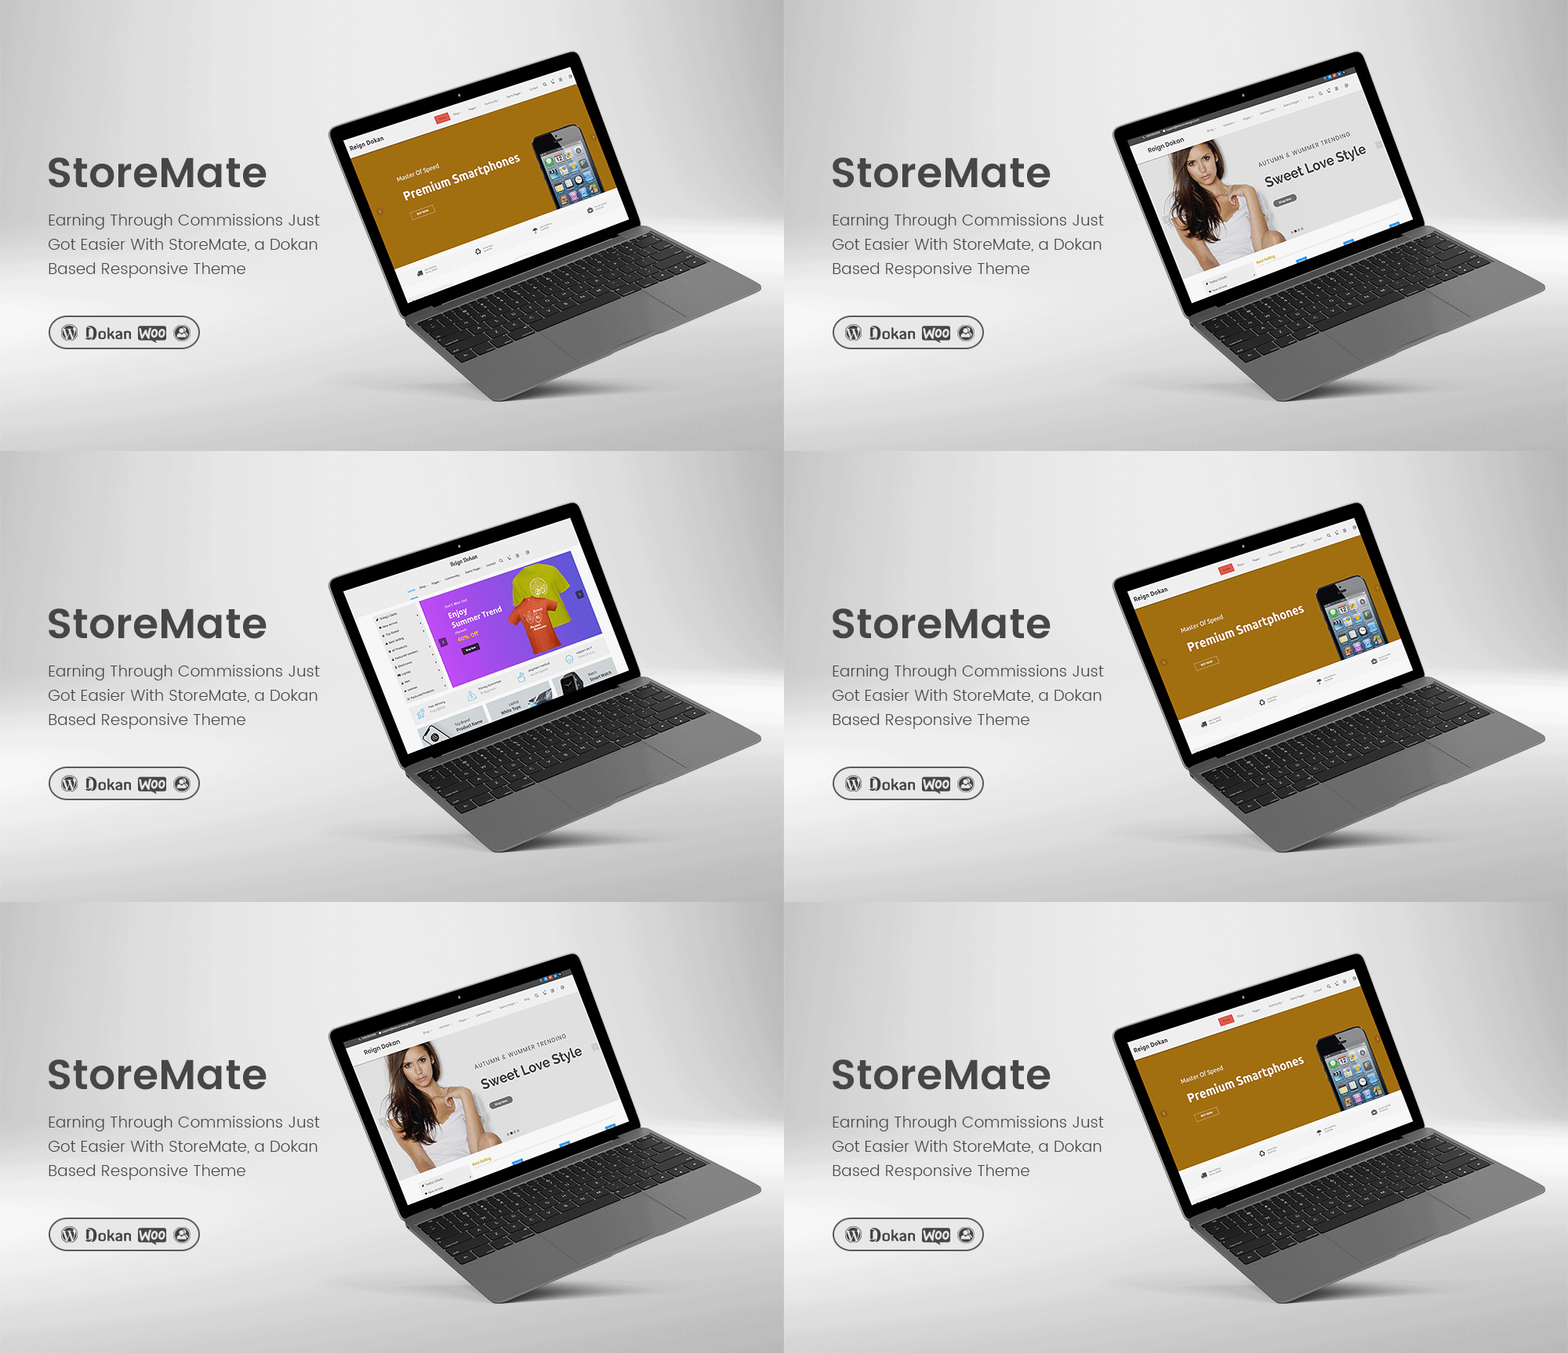
Install StoreMate Dokan WordPress theme that allows you to create a multi-vendor marketplace. It comes with a complete toolkit for designing and managing your marketplace, including a one-click demo import tool and a number of in-built pages. You will also be provided with Dokan extra widgets that can be added to your website.
StoreMate Dokan is a theme that makes it easy to create and manage a multi-vendor marketplace. It includes a demo import tool, in-built pages, and Dokan extra widgets.
Features:
- Fully Supported
1. The StoreMate theme is fully compatible with the most popular e-commerce software, so you can easily convert your WordPress site into an online shop.
2. You can start selling right away, without having to worry about compatibility issues. - Customize as per your brand
1. The StoreMate theme gives you complete control over the look and feel of your website.
2. You can customize the color scheme, typography, and layout to match your brand.
3. You can also add interactive course layouts, reviews, discussions, and suggestions. - Monetize for profits
1. The StoreMate theme makes it easy to monetize your website.
2. You can sell courses as membership plans or subscriptions.
3. You can also sell courses as a bundle.
4. The theme supports numerous payment gateways, so you can accept payments from customers all over the world.
Step 4: Customize Your Marketplace with StoreMate and Theme Options

Now that you have both WC Vendors and StoreMate activated, it’s time to customize your marketplace to reflect your brand’s identity. Utilize the customization options provided by your chosen theme and StoreMate settings to adjust the appearance and layout. Personalize your marketplace by adding your logo, color scheme, and other branding elements to make it stand out.
Step 5: Create a Vendor Registration Page
To onboard vendors into your marketplace, create a dedicated “Vendor Registration” page. Go to “Pages” > “Add New” and give the page a relevant title, like “Become a Vendor” or “Start Selling.” Use the WC Vendors shortcode [wcv_vendor_registration] on this page to display the vendor registration form. After setting up the page, publish it to make it accessible to potential vendors.
-
Enable user registration
To access this feature, it is necessary to have user registration enabled within the WooCommerce settings. Kindly refer to our WordPress and WooCommerce settings guidelines for specific requirements. Just to emphasize, make sure that the following option is activated to proceed.
It is not recommended to enable the “Generate account username” option, as doing so may result in permalink issues in certain installations.
-
Vendor Registration
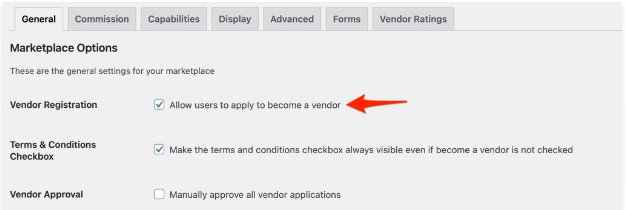
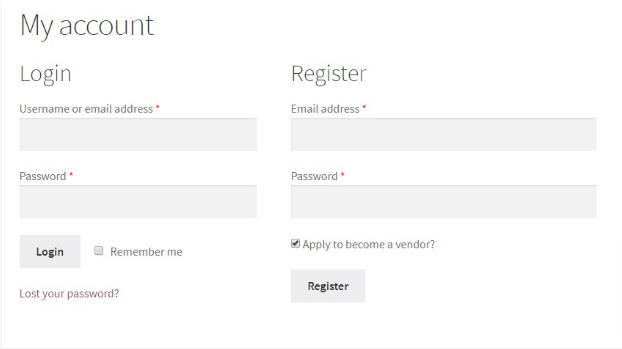
After activating the WooCommerce registration system, the next step is to enable vendor registration in WC Vendors Settings. This will unlock the self-service options for vendors to register themselves.
-
Automatic or manual vendor approval
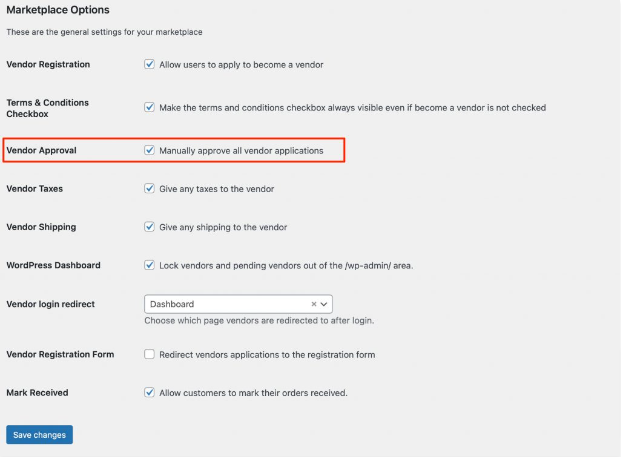
When it comes to vendor registration on your marketplace, you have two options: automatic or manual approval.
- Automatic approval: With automatic approval, vendors can register on your marketplace, list products, and start selling right away. This is the fastest method to onboard vendors.
- Manual approval: On the other hand, manual approval entails the marketplace administrator reviewing and approving vendor applications. This option is beneficial when you have specific requirements for joining your marketplace. Upon application, the user’s role will be designated as “pending vendor,” and you can grant approval once they have provided all the necessary information.
Also Read: WC Vendors- The Best Multi Vendor plugin for Market Place
Step 6: Set Up Vendor Dashboard Page
The vendor dashboard serves as the central hub for managing your marketplace settings, products, orders, and more. This brief overview will acquaint you with the different features of the vendor dashboard. It’s worth noting that some or all of these options may be disabled by the marketplace, depending on its configuration.
-
Dashboard
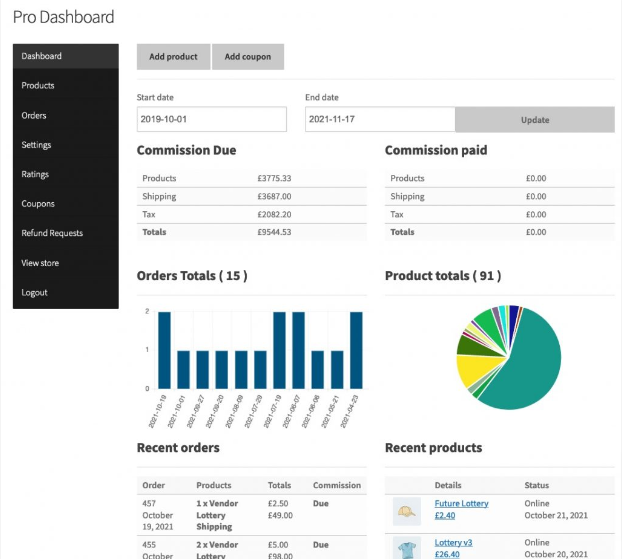
The main dashboard overview provides a comprehensive, date-based summary of your store’s status. This includes details such as commissions due and paid, the total number of orders, and the total number of products available in your store. It serves as a quick snapshot of your store’s current state, allowing you to easily view recent orders and products as well.
-
Products
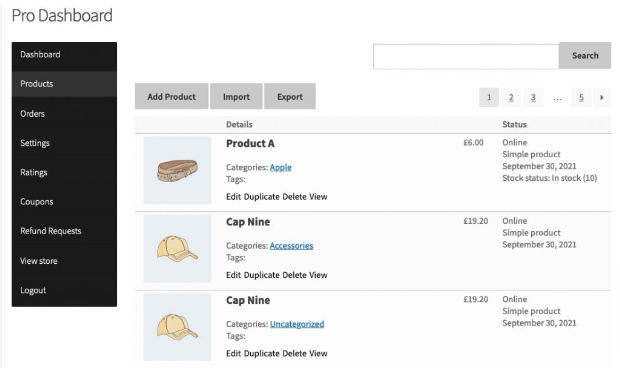
Within this section, you have full control over managing your products. You’ll find options to add new products, duplicate existing ones, edit product details, or remove products from your store. When you choose to edit a product, you will be presented with all the available options that the marketplace has configured for you. These options allow you to customize and publish your products according to your preferences and requirements.
-
Orders
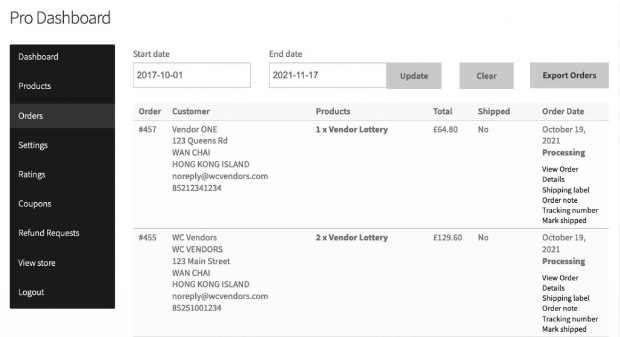
When you click on “Orders,” you will be directed to the orders view, which displays a comprehensive list of all the orders placed by customers for your items. Within this view, you have various options at your disposal. You can add notes that will be sent via email to the customer, input tracking numbers for shipments, mark orders as shipped, and even print packing slips for easy fulfillment.
-
Settings
The settings page is your central hub for configuring all the various options for your store. The following settings are available for configuration.
- General store settings
- Payment options
- Branding
- Shipping
- Social
- Policies
- SEO
 Tax
Tax
-
Ratings

Customers can leave 1 to 5-star ratings for your products by visiting the My Account page and clicking on “Leave Feedback.” They also have the flexibility to edit or update their feedback at any time. This allows you to address any poor reviews and collaborate with the customer to enhance their experience or improve the product accordingly.
-
Coupons
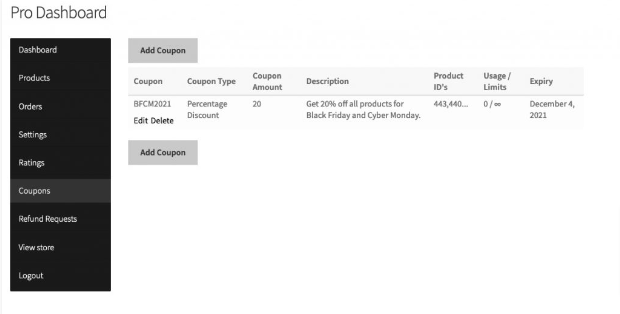
As a vendor, you have the ability to generate coupons exclusively for your products. These coupons are designed to work solely on the items within your store and won’t be applicable to products from other vendors. You have the flexibility to configure the coupons in various ways, such as including only specific products, all of your products, or a combination of both while excluding others. Additionally, you can set the discount type as a percentage or a fixed price, providing different promotional options for your customers.
You can utilize the store notice in Settings to advertise your coupons on your storefront.
Also Read: MultiVendorX Plugin- Review
Step 8: Test Your Marketplace- Launch Your eCommerce Marketplace
Before launching your marketplace to the public, conduct thorough testing of all its features and functionalities. Register as a vendor using the “Vendor Registration” page and ensure the vendor onboarding process works seamlessly. Test the product listing, order processing, and vendor dashboard functionalities. Additionally, make sure the payment and shipping processes function flawlessly.
Step 9: Launch Your Marketplace
With your marketplace tested and optimized, it’s time to officially launch it to the public. Promote your marketplace through various channels, including social media, email marketing, and paid advertising, to attract both vendors and customers. Be responsive to feedback and continuously improve your marketplace to provide the best possible experience for all users.

Conclusion on Launch Your eCommerce Marketplace
Building a successful eCommerce marketplace using StoreMate, WC Vendors, and a compatible WordPress theme is an exciting and rewarding endeavor. By following the steps outlined in this blog, you can create a feature-rich multi-vendor marketplace that offers seamless shopping experiences for customers and user-friendly selling options for vendors. Remember to prioritize user satisfaction, maintain a visually appealing storefront, and consistently update and improve your marketplace to stay competitive in the dynamic eCommerce landscape. With dedication and the right tools at your disposal, your eCommerce marketplace is bound to flourish. Happy launching!
Interesting Reads:


