Looking to make your site more engaging, attractive, and unique? Adding a parallax effect can help achieve that. If you’re using the Gutenberg editor and want to add a parallax effect to your site or pages, stay tuned for a quick solution. We’ll show you how to easily incorporate the parallax effect without causing any issues.
The parallax effect is a web design trend where the background image scrolls slower than the foreground content, adding depth and interactivity to the site. It’s a great way to make your website stand out and highlight different sections on a page, whether it’s a landing page, long-form content, sales page, or homepage. Plus, it makes your articles and content more visually appealing.
With the new block editor, some tasks have changed, and users often find it confusing to add a parallax effect. If you’re one of them, this tutorial will walk you through adding a parallax effect to your site, making it more vibrant and engaging. Let’s get started!
What Is a Parallax Effect?
The parallax effect is a modern web design technique where the background scrolls at a different speed than the foreground content, creating a sense of depth and immersion.
This effect is commonly used on landing pages, long-form content, sales pages, or the homepage of a business website to enhance visual appeal and engage users.
It can be a powerful tool for highlighting key sections of a page, conveying messages effectively, and telling compelling stories on a blog.
While many premium WordPress themes come with built-in parallax effects, not all themes offer this feature. Additionally, some users may prefer not to use a page builder plugin to achieve the parallax effect.
In this guide, we’ll show you how to add a parallax background effect to any WordPress theme.
Also Read: 8 Free AI Background Removal Tools
Add Parallax Effect to WordPress Theme Using Plugin
This method allows you to add a parallax background effect to your WordPress theme without the need to write any code, making it an easy and recommended option for most users.
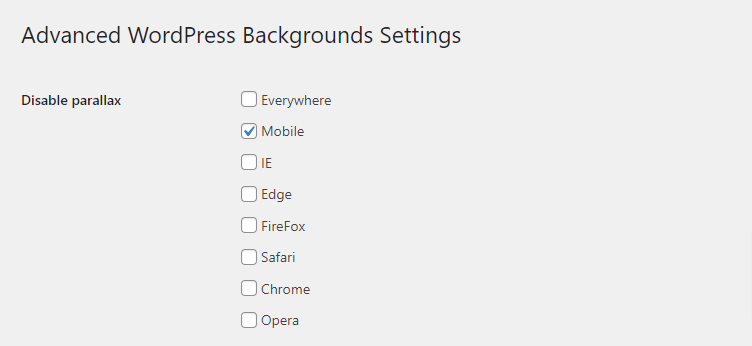
To get started, install and activate the Advanced WordPress Backgrounds plugin. Once activated, go to the Settings » AWB page in your WordPress dashboard. Here, you can configure the plugin settings and choose where the parallax effect should be displayed.
For example, if you don’t want the parallax effect to be shown on mobile devices, you can check the corresponding box in the plugin settings.
After saving your settings, proceed to open a page or post in the Gutenberg block editor.
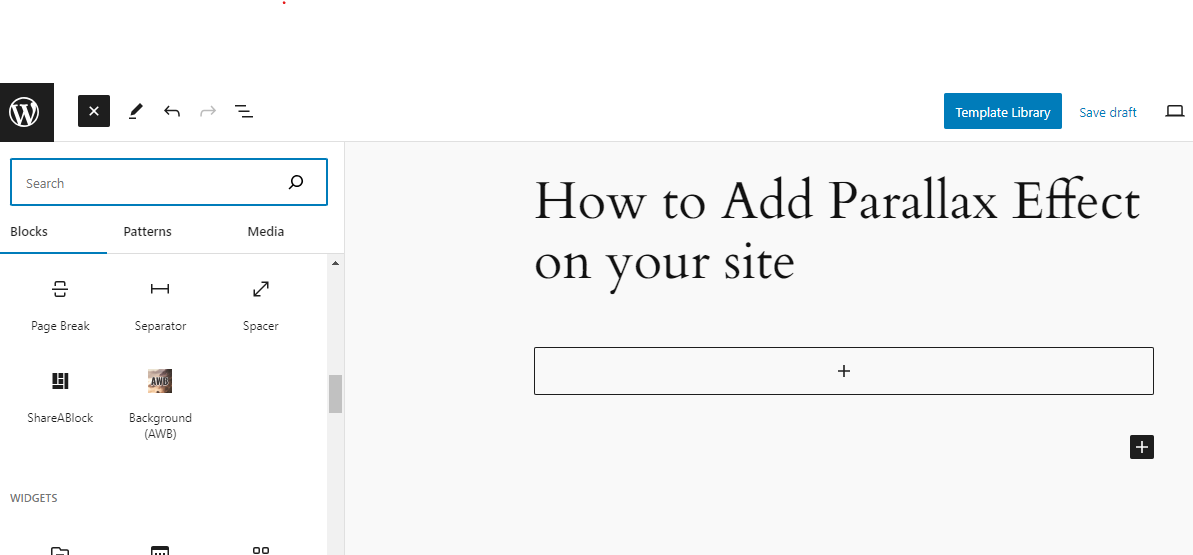
Once you’ve opened the editor, click the add block ‘+’ button located in the top left corner of the screen to open the block menu.
From the block menu, locate and add the Background (AWB) block to your post.
Next, open the block panel located on the right side of the screen and switch to the ‘Image’ tab if you intend to use an image as the parallax background.
Then, click the ‘Select Image’ button to access the media library. Alternatively, you can click the ‘Use featured image’ button to automatically set the featured image as the background.
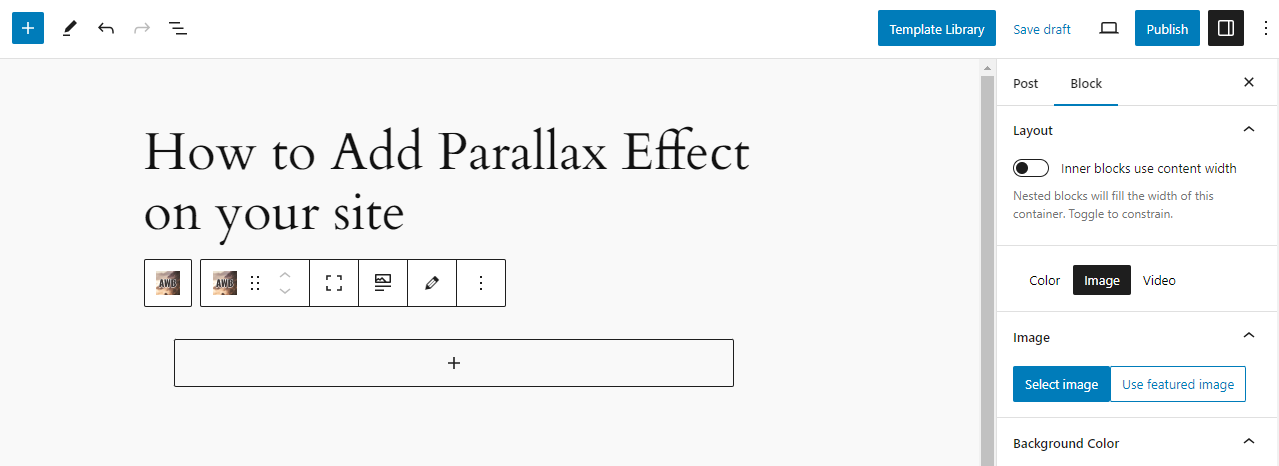
You also have the option to add a background color or video for the parallax effect by switching to the corresponding tabs.
After adding an image, you can adjust its focal point from the block panel and configure the background size. It is recommended to leave the background-size as ‘Cover’ for optimal results.
Additionally, you can use the slider to adjust the image’s opacity.
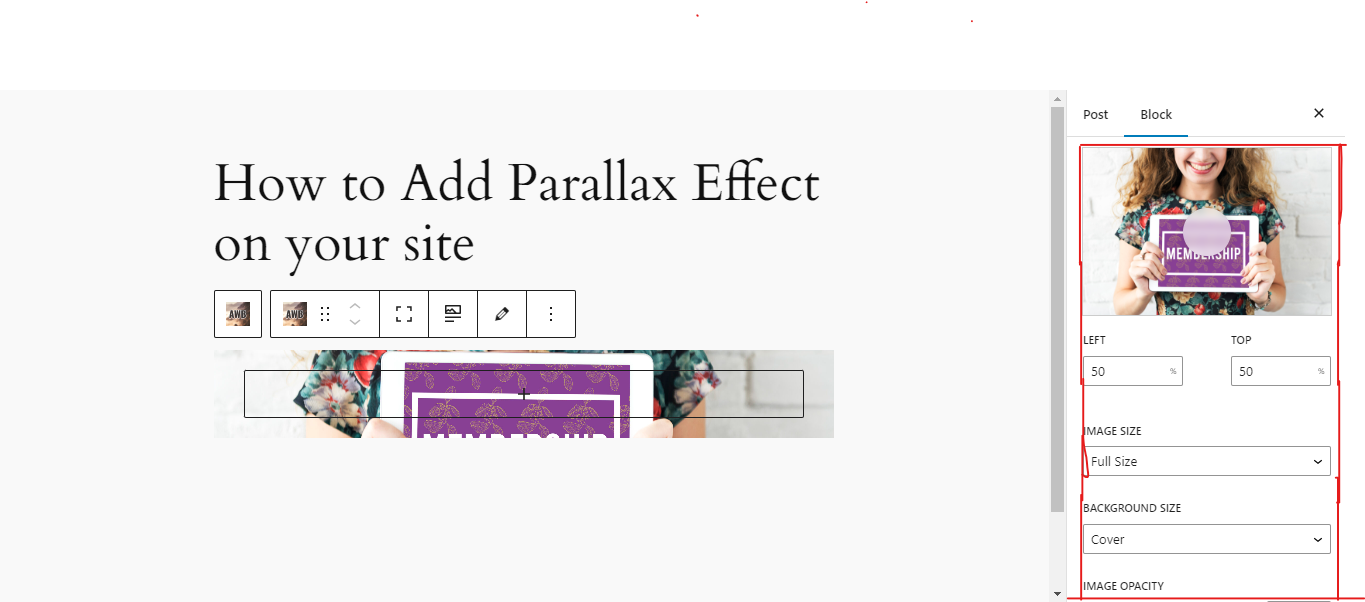
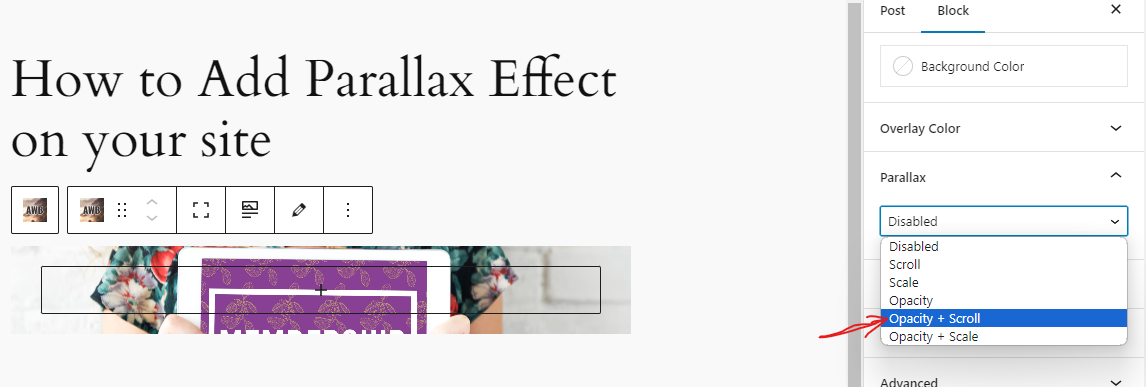
Scroll down to the ‘Parallax’ tab and expand it to reveal additional options.
From this tab, you can select your preferred parallax type from the dropdown menu. The changes you make here will be applied automatically in the block editor, allowing you to preview the effect.
For instance, in our example, we are using the ‘Opacity + Scroll’ parallax type.
Once you have added the parallax effect, click the ‘+’ button within the AWB block to open the block menu.
From here, you can add any block you desire, such as a paragraph, image, video, quotation, or any other block. This block will then be displayed with the parallax effect you’ve configured.
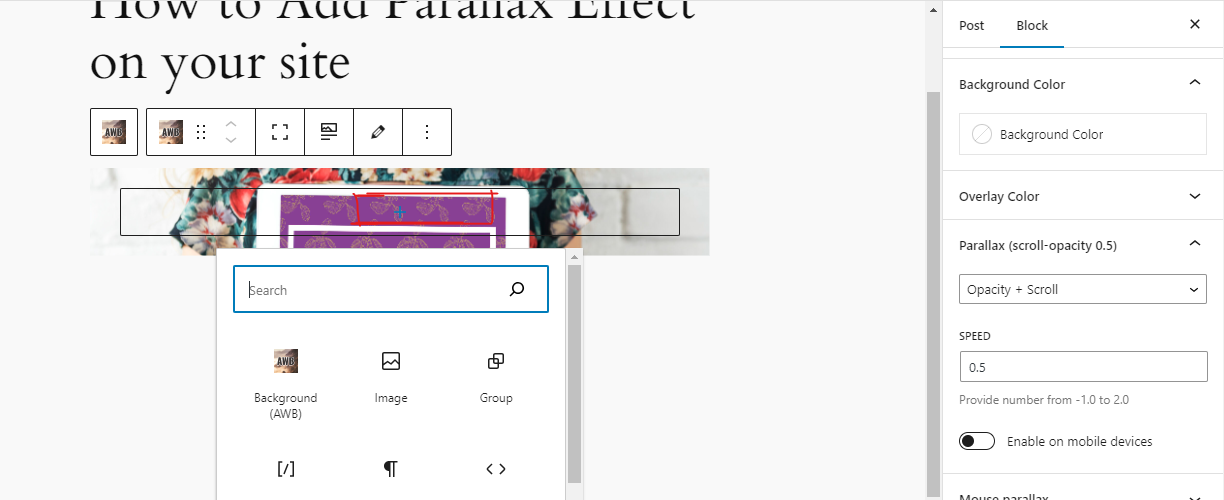
Finally, click the ‘Update’ or ‘Publish’ button at the top of the page to save your settings.
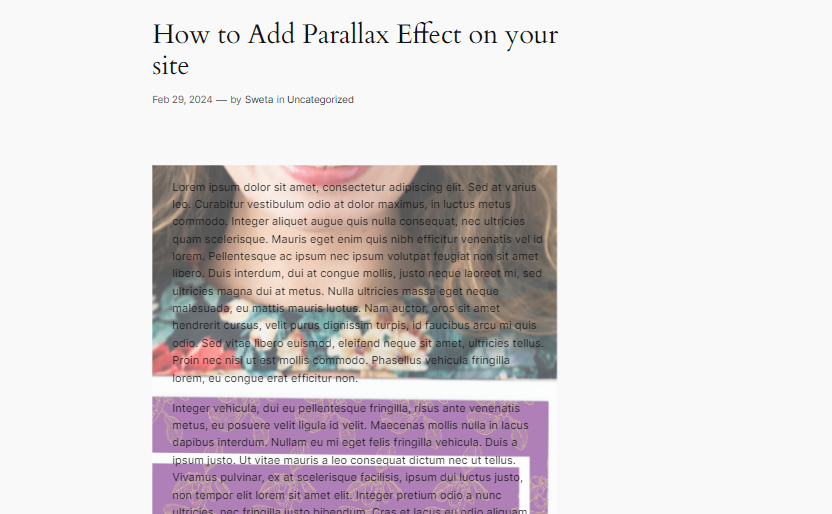
Now, you can visit your WordPress site to see the parallax effect in action.
Conclusion
Parallax effects offer more than just visual appeal; they can significantly enhance user engagement and create a memorable browsing experience. By implementing parallax scrolling in your website, you can effectively guide users through your content, highlight important information, and create a sense of depth and interactivity.
This dynamic effect is particularly effective for storytelling, product showcases, or showcasing your portfolio. It adds a layer of sophistication to your website design, making it stand out from the crowd and leaving a lasting impression on your visitors.
Interesting Reads:
Top 5+Video Background WordPress Plugins

