To customize the sale text in WooCommerce, you can enhance your store using the free Merchant plugin. This powerful tool not only allows you to modify the default sale text on discounted products but also aims to boost conversion rates and enhance the overall shopping experience. By installing Merchant, you gain the flexibility to tailor your sale messages, encouraging customers to make purchases while effectively managing your inventory.
Merchant WordPress Plugin
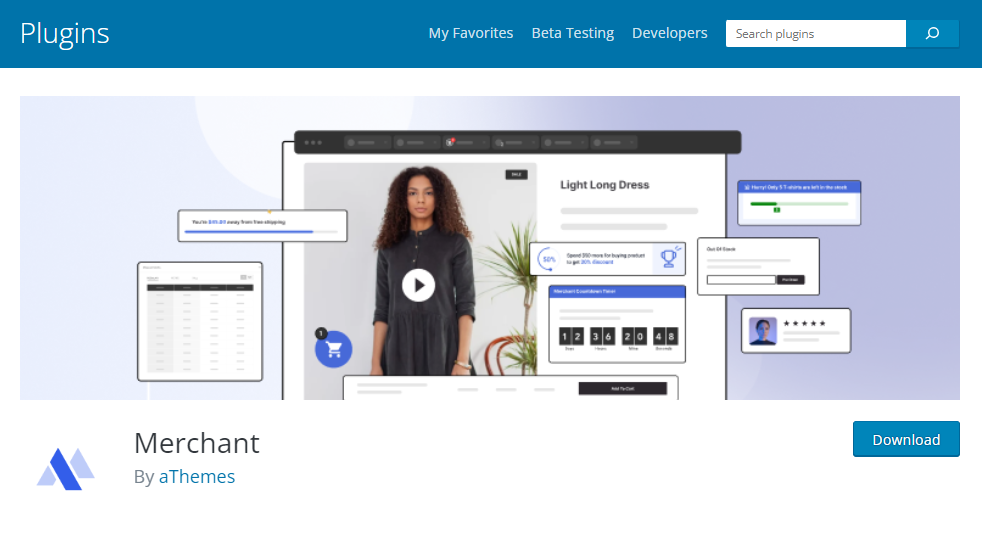
Merchant is a comprehensive WooCommerce toolkit with a modular approach, specifically designed to boost conversion rates. Its key features encompass Buy Now buttons, Product Labels, Trust Badges, and additional tools aimed at optimizing and enhancing the overall online shopping experience.
Now, let’s delve into the tutorial.
1. Install and Activate the Free Merchant Plugin
Follow these steps to install and activate the free Merchant plugin:
Access your WordPress Dashboard:
Log in to your WordPress admin panel.
Navigate to Plugins:
Go to the “Plugins” section in the left-hand menu.
Add New Plugin:
Click on “Add New” at the top of the Plugins page.
Search for Merchant:
In the search bar, type “Merchant” and press Enter.
Install the Plugin:
Find the Merchant plugin in the search results, and click the “Install Now” button next to it.
Activate the Plugin:
Once the installation is complete, click the “Activate” button to activate the Merchant plugin.
Now, the Merchant plugin is installed and active on your WooCommerce store. You can proceed to customize the sale text and explore other features offered by the plugin to enhance your online store.
2. Open the Product Labels Module
To open the Product Labels module in the Merchant plugin, follow these steps:
Access your WordPress Dashboard:
Log in to your WordPress admin panel.
Navigate to WooCommerce Settings:
In the left-hand menu, click on “WooCommerce” and then select “Settings.”
Open the Merchant Plugin Settings:
Look for the “Merchant” option in the WooCommerce Settings menu and click on it.
Locate the Product Labels Module:
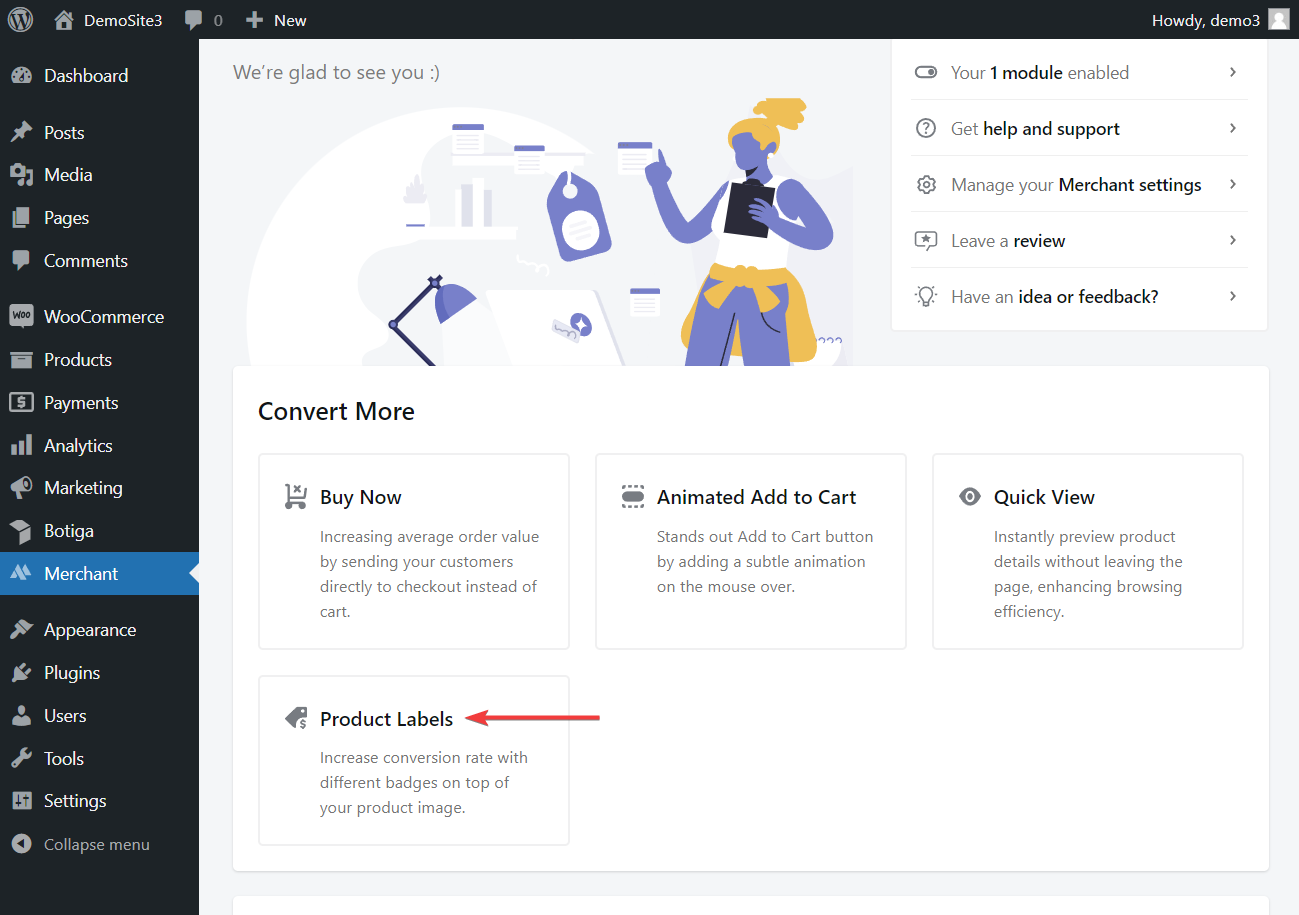
Within the Merchant plugin settings, find the “Product Labels” module. This is where you can customize and manage the labels, including the sale text, for your products.
Explore Customization Options:
Click on the “Product Labels” module to open it. Here, you’ll find various customization options, including the ability to modify sale text, set label positions, and configure other label-related settings.
Save Changes:
After making the desired changes, remember to save your settings to apply the new sale text to your WooCommerce products.
By following these steps, you can easily open the Product Labels module in the Merchant plugin and begin customizing the sale text for your products.
3. Change the Sale Text and Configure the Style Settings
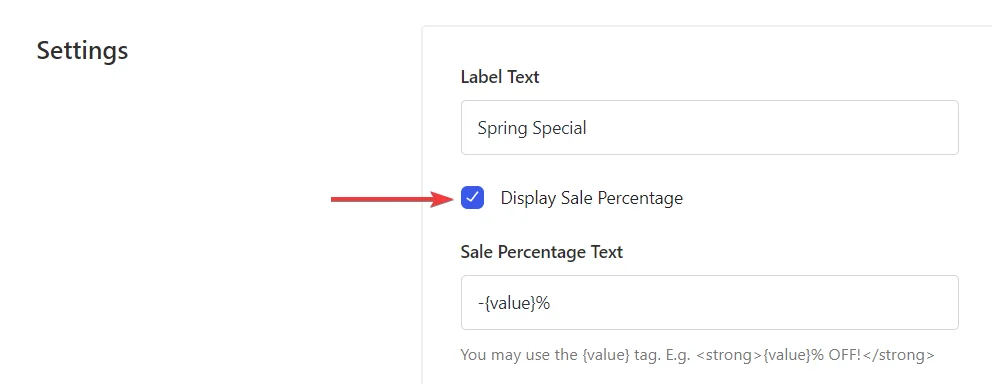
To change the sale text and configure the style settings in the Merchant plugin, follow these steps:
Access the Merchant Plugin Settings:
Log in to your WordPress admin panel.
Navigate to WooCommerce Settings.
Click on the “Merchant” option in the menu.
Open the Product Labels Module:
Within the Merchant settings, locate and click on the “Product Labels” module.
Modify Sale Text:
Look for the option related to sale text or label text.
Enter your desired sale text in the provided field. This is the text that will be displayed on products when they are on sale.
Configure Style Settings:
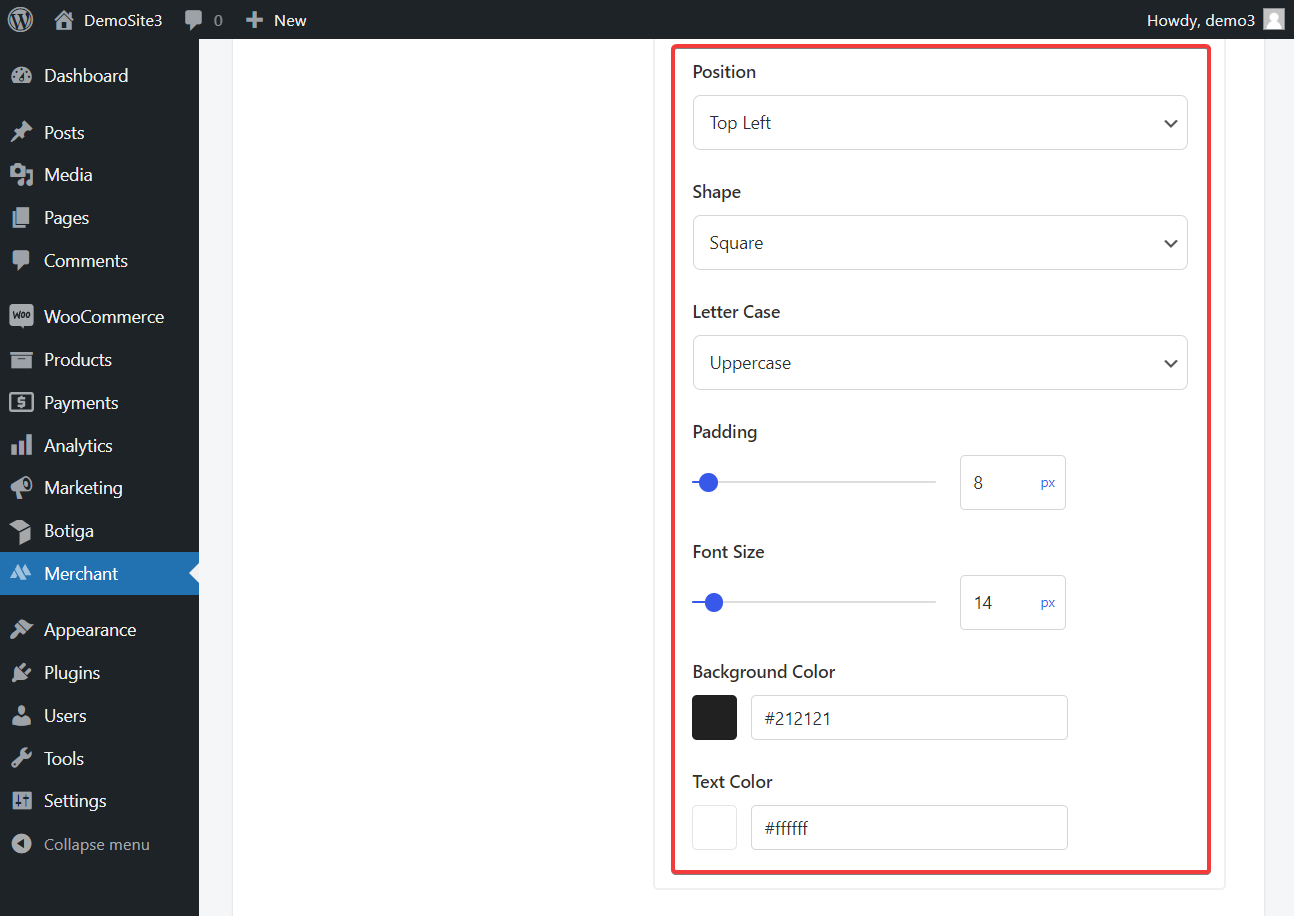
Explore the style settings section within the Product Labels module.
Adjust parameters such as font, color, size, and other styling options to match your store’s design and branding.
Save Changes:
After making modifications to the sale text and style settings, be sure to save your changes to apply them to your WooCommerce products.
Check on a Product Page:
Visit a product page on your website to confirm that the sale text has been successfully changed and styled according to your preferences.
4. Enable the Product Labels Module

To enable the Product Labels module in the Merchant plugin:
Access Merchant Settings:
Log in to your WordPress admin panel.
Go to WooCommerce Settings and click on “Merchant.”
Find Product Labels Module:
Look for the “Product Labels” module within the Merchant settings.
Enable the Module:
Locate a toggle switch or checkbox associated with the Product Labels module.
Turn it on to enable the module.
Save Changes:
Save your settings to activate the Product Labels module.
Final Thought On How to Change the Sale Text in WooCommerce
In conclusion, utilizing the free Merchant plugin simplifies the process of enhancing your WooCommerce store by enabling you to customize product labels, including the sale text. By accessing the Product Labels module in the Merchant settings, you can easily modify the sale text and fine-tune style settings to create a more appealing and personalized shopping experience for your customers. Don’t forget to save your changes and explore additional features offered by the Merchant plugin to further optimize your online store.
Interesting Reads:


