4 min read
How To Create a social networking site with BuddyPress

If you have a niche WordPress site with a community of users and you want to add social media features to your site, then BuddyPress is the way to go. Social networks provide a flow of communication amongst its members, thus forming a community around the website. This might be useful for certain sites, especially if you have a site on a niche topic. BuddyPress plugin is a suite of components that help you to run a social network complete with member profiles, activity streams, user groups, messaging and more. It helps you set up a private social network. Today we are going to discuss how to create a social networking site in BuddyPress-
How to create a Social networking site in BuddyPress
Today in our tutorial will educate readers on how to install BuddyPress, setting it up along with a BuddyPress compatible theme, aiming to build a simple social website.
Installation of BuddyPress
To create a social network site it is necessary for you to install the first BuddyPress plugin. Installation is simple and very similar to any other plugin.
From your WordPress admin panel
- Navigate to the Plugins Tab, then
- Click on the Add new Tab
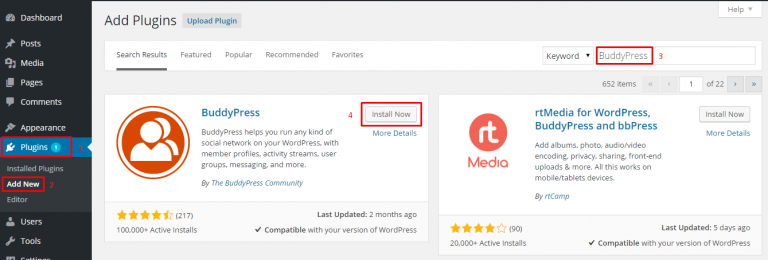
3. Search for BuddyPress in the Search Box on the top right.
4. Once you have found the Plugin, click Install and let the wizard do the rest.
Now click on Activate Plugin,
BuddyPress should be installed and ready to go.
We will now configure BuddyPress plugin to use it with the JShop theme.
Step 3: Configuring BuddyPress.
 To proceed configuring BuddyPress, Navigate to Plugins > Installed Plugins > Under BuddyPress > Select Settings.
You will notice three navigation bars.
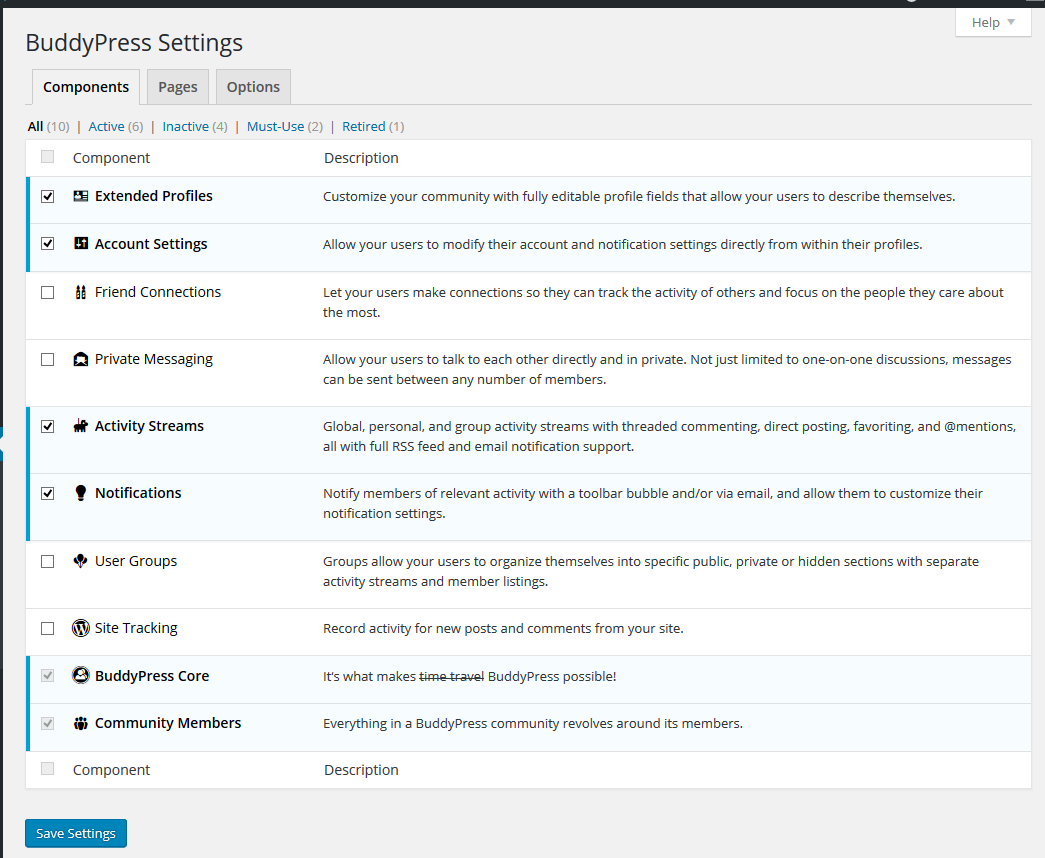
- Components: You can configure BuddyPress according to your needs.
Activity streams: This option enables users to see activities of their friends on the social website. Click to Enable this option.
Notifications: This option allows users to receive instant notification of friends’ activities, including friend requests, private messages etc. Click to Enable it.
To configure components according to your needs, read through their descriptions listed below and manage them as per your requirement.
-
Pages:

This is the most important section of your social site, and you need to pay extra attention when reading it. Although pages are straightforward, most BuddyPress users get confused about it. Let me clear it up in an easy language. In the image below, you can see 3 labels:
- Members
- Activity streams
- User groups
Leave them as they are.
We will have to create Registration and Activation pages.
Register:
In BuddyPress, this is the default Registration form. BuddyPress needs a page to assign its sign up form. That’s why we need to add a new page from our WordPress admin panel. So, that page can be assigned to BuddyPress to display the contents of its default Sign Up form.
Activate:
As I have explained above about registration form, this is also a default account activation process of BuddyPress. For this, we have to create a new page again by going to WordPress admin panel and adding a new page.
Create Registration & Account-Activate Pages:
Create “Registration” page by navigating to Pages > Add New.
Setting Registration and Account Activate pages.
Navigate to Settings > BuddyPress > Pages
- Settings:
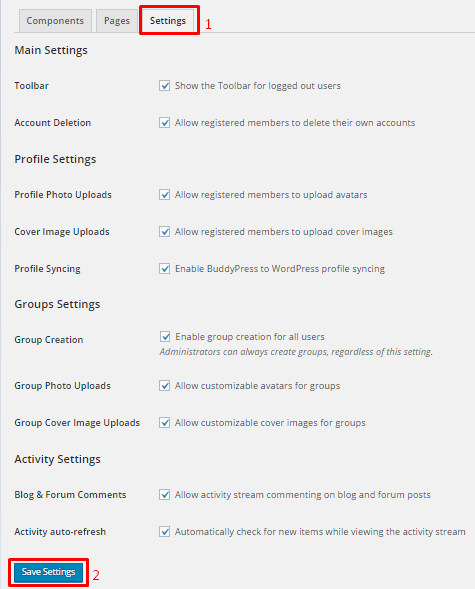
Set changes according to your needs.
Step 4: Configuring BuddyPress for use with our theme.
From the WordPress admin panel. Go to Appearance > Menus.
Open Screen Options from the top right corner.
Step 5: Create a menu for our nav bar.
If you already have a menu bar. Delete it.
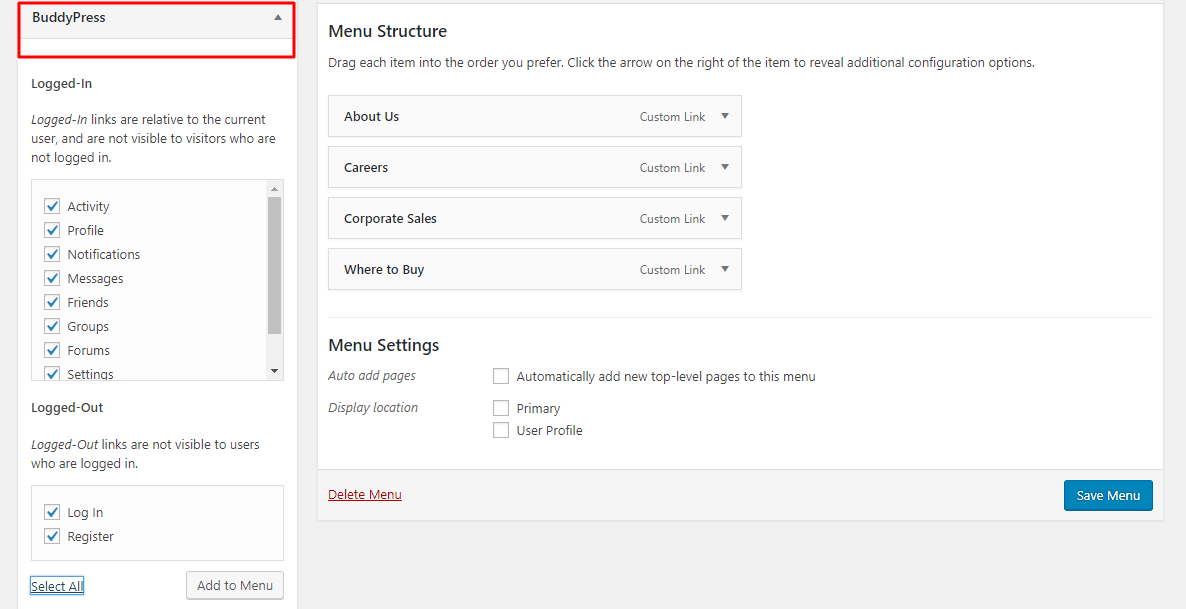
To create a new menu bat follow the steps
Remove theme default widgets and configure them according to your need.
Step 6: Enable Registrations on website.
It is preferable that you enable registrations for anyone if you are deciding to go with a public social network. You can disable registrations for a private social network. For registrations setting, navigate to Settings > General > Mark Anyone can register.
To know more about the plugin check out the video. You can check out the activity, forum, friends, groups page of BuddyPress in the video.
Go to Settings > Reading
Now click on save changes. Your very own social website using BuddyPress plugin is now ready for connecting people.
All set to go
Now you are all set to enjoy the benefits of BuddyPress. This amazing social networking site plugin provides you amazing features. It is very simple to create a social networking site with BuddyPress. Happy connecting with you.
Read more Interested Articles :
Essential BuddyPress plugins For a Community Website
Related reading