
If you want to increase sales without spending more on traffic, start by improving the path customers take to pay you. When you customize WooCommerce Checkout Field thoughtfully, you remove friction, surface relevant offers, and collect only the information you truly need. The default WooCommerce checkout does a good job for many stores, but it isn’t optimised for every business or product type.
That’s where plugins like Checkout Add-Ons for WooCommerce come in: they let store owners add, remove, and rearrange fields quickly — often without writing a single line of code — so the checkout fits the customer journey and drives higher conversions.

Why Checkout Field Customization Impacts Conversions
Checkout fields aren’t just form elements — they shape the final moments of the buying experience. Here’s why they matter:
- Reduced friction: Fewer, clearer fields mean less hesitation and quicker completion.
- More relevant data: Custom fields help you gather information that improves fulfilment, personalization, and follow-up without overwhelming the buyer.
- Personalised experiences: Conditional fields (shown only when relevant) make the checkout feel smarter and tailored to the customer.
For example, a bakery that adds a “delivery date” field and an “allergy notes” field will reduce customer calls and order errors, improving trust and repeat purchases. A B2B store that collects a VAT number only when the buyer selects “Business” reduces clutter for individual customers while capturing essential tax details for corporations.
Understanding WooCommerce Checkout Fields
Before you start to customize WooCommerce Checkout Field, it helps to know what you’re working with:
Default fields
WooCommerce typically includes billing and shipping fields, plus order notes. These cover essentials like name, address, email, phone, and shipping method.
Types of fields
Common field types you’ll use include:
- Text inputs (single-line)
- Text areas (multi-line)
- Dropdown/select lists
- Radio buttons and checkboxes
- Date pickers
- File upload fields
Required vs optional
Marking a field required should be reserved for information you cannot fulfill or invoice without. The more required fields you add, the higher the chance of abandonment, so be sparing and strategic.
Methods to Customize WooCommerce Checkout Fields
There are two common approaches to changing checkout fields: coding it yourself or using a plugin. Both have their place.
1. Using Code (For Developers)
Developers can hook into woocommerce_checkout_fields and other WooCommerce filters to add, remove, or tweak fields. This approach offers complete control and keeps your site lightweight.
Pros: Full control, no extra plugin dependency, minimal overhead if coded well.
Cons: Requires PHP skills, can introduce errors, and needs maintenance when WooCommerce updates are released.
2. Using a Plugin (No Coding Needed)

Most store owners benefit from plugin-based customization. Plugins provide a user interface for creating fields, setting rules, and reordering elements without touching code.
Recommended plugin: Checkout Add-Ons for WooCommerce. It’s beginner-friendly, flexible, and includes field types like select lists, checkboxes, date pickers, and file uploads — plus conditional logic on some plans.
Using a plugin reduces development time and risk, and many plugins also play nicely with analytics and export tools.
Step-by-Step Guide
The following steps assume you’re using the plugin mentioned above. If you prefer code, skip to the developer section above.
Step 1: Install and Activate the Plugin
- Go to Plugins > Add New in your WordPress dashboard.
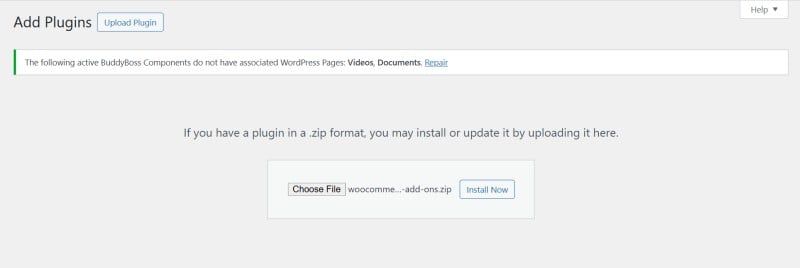
- Search for “Checkout Add-Ons for WooCommerce” or upload the ZIP file.
- Click Activate.
Step 2: Access Checkout Add-Ons Settings

Navigate to WooCommerce > Checkout Add-Ons. You’ll see an easy-to-use interface for adding and editing checkout fields.
Step 3: Add a New Field
- Select the field type (text, dropdown, checkbox, radio, file upload, etc.).
- Enter a clear label and helpful description.
- Choose whether it’s required or optional.
Step 4: Organise and Arrange Fields
Drag and drop fields to match the logical flow of the customer journey. For example, keep address details together and optional extras toward the end.
Step 5: Save and Test
Always preview the checkout page and test it on both desktop and mobile to ensure a smooth experience.
Best Practices for Checkout Field Optimization
Optimising the checkout is both art and science. Follow these rules to keep things customer-friendly and conversion-focused:
- Keep it short: Ask the minimum necessary to process and fulfil the order.
- Use clear labels: Avoid jargon — labels should explain what you need and why.
- Only request essential information: Collect extras only when they add clear value to fulfilment or the experience.
- Mobile first: Ensure fields and inputs are easy to use on small screens.
- Conditional logic: Show fields only when relevant (e.g., show “company name” only if “business” is selected).
- Reduce typing: Use drop-downs or pre-filled options where it speeds up the process (but don’t overuse select lists).
- Privacy and trust: If you ask for sensitive info, explain why and how you’ll protect it.
- Upsells with care: If you use fields for optional upsells (gift wrap, warranties), present them as low-friction choices, not distractions.
Tracking the Impact on Conversions
Making changes is only half the job — you must measure impact to know what works. Use WooCommerce analytics to monitor checkout completion, average order value, and checkout conversion rate; run A/B tests to try different field placements, wording, and which fields are required.
Keep a close eye on cart abandonment rates for any spikes after changes, since those often signal added friction, and collect customer feedback through quick post-order surveys or by monitoring support tickets for field-related issues so you can iterate based on real user experience.
Common Mistakes to Avoid
- Too many required fields: Every required field raises the cognitive cost to complete the order.
- No device testing: Failing to test on mobile and tablet can kill conversion for the majority of shoppers.
- Ignoring plugin compatibility: Check that your theme and other plugins play nicely with Checkout Add-Ons.
- Poor field labels: Vague or silent labels cause hesitation and mistakes.
- Not validating data: Accepting bad phone numbers or addresses increases manual follow-up work and delivery errors.

Why Smart Checkout Field Customization Boosts Conversions
Customizing checkout fields is one of the highest-leverage changes you can make to improve conversions. When you customize WooCommerce Checkout Field intelligently — focusing on necessary data, clear labels, and mobile usability — you lower friction and increase the chance a shopper finishes the order.
If you want a straightforward way to start, try Checkout Add-Ons for WooCommerce to add fields, reorder them, and test variations without code. Small, measured changes to your checkout can yield outsized results in revenue and customer satisfaction.
Interesting Reads
How Vidnoz AI Can Help Boost Your Business Efficiency in 2025?
