
Screenshots have become a staple in our daily routines, whether we’re working on a project, teaching a class, or simply sharing something interesting with friends. Snipping tools make it easy to capture, edit, and share what’s on our screens, turning a quick snapshot into something informative or creative. With the rise of remote work, online learning, and content creation, the demand for reliable, easy-to-use snipping tools has grown significantly. Whether you’re explaining a process, providing feedback, or saving a moment from your screen, having the right snipping tool can make a big difference. This post will walk you through the best free snipping tools available in 2025, helping you find the perfect fit for your needs.

What is a Snipping Tool?
A snipping tool is a simple yet powerful software application that allows you to capture screenshots of whatever is displayed on your screen. Whether you need to grab an entire webpage, a specific window, or just a portion of your screen, snipping tools make it easy to capture and save these images. Once captured, these images can be annotated with text, arrows, or highlights, making them useful for explaining concepts, giving feedback, or simply sharing something interesting with others.
Snipping tools come in various forms. Some are built directly into operating systems, like the Snipping Tool in Windows or the Screenshot utility in macOS, offering basic functionality that’s often enough for everyday tasks. Third-party snipping tools, on the other hand, usually provide more advanced features, such as customizable capture options, better editing tools, and easier ways to share your images. There are also browser extensions that let you capture screenshots directly from your web browser, which is particularly handy for saving online content or sharing parts of a webpage.
Whether you’re documenting a technical issue, saving a recipe, or creating a tutorial, snipping tools are invaluable for capturing and sharing visual information quickly and effectively.
Criteria for Choosing the Best Snipping Tool
When choosing the best snipping tool, there are several important factors to consider. Here’s a breakdown to help you make an informed decision:
-
User Interface and Ease of Use
The snipping tool should be intuitive, with a user-friendly interface that’s easy to navigate. Look for tools that allow you to capture screenshots quickly without needing to dig through complex menus or settings. A simple, clean design can make your experience smoother, especially if you’re using the tool frequently.
-
Features
Different snipping tools offer varying features, so it’s important to choose one that meets your needs. Key features to look for include multiple capture modes (such as full-screen, window, and custom region captures), the ability to annotate screenshots with text, arrows, and highlights, and easy sharing options to quickly send your images via email, cloud services, or social media. Some tools may also offer additional editing features like cropping, resizing, and adding shapes.
-
Compatibility with Different Operating Systems
Make sure the snipping tool you choose is compatible with your operating system. Whether you’re using Windows, macOS, Linux, or even a mobile device, you’ll want a tool that works seamlessly with your system. Some tools are cross-platform, which can be a bonus if you switch between different devices or operating systems.
-
Performance and Reliability
The tool should perform well without slowing down your computer or crashing frequently. Reliability is key, especially if you’re using the tool for work or important projects. Look for tools that have a good reputation for stability and speed, ensuring that you can capture screenshots without any hiccups.
-
Customer Support and Community Forums
Even the best tools can run into issues, so having access to good customer support can be a lifesaver. Check if the tool offers responsive customer service, whether through email, chat, or phone. Additionally, active community forums can be a valuable resource, offering tips, troubleshooting advice, and user-created content that can help you get the most out of the tool.
15 Best Snipping Tools in 2025
1. ScreenshotOne- Snipping Tools
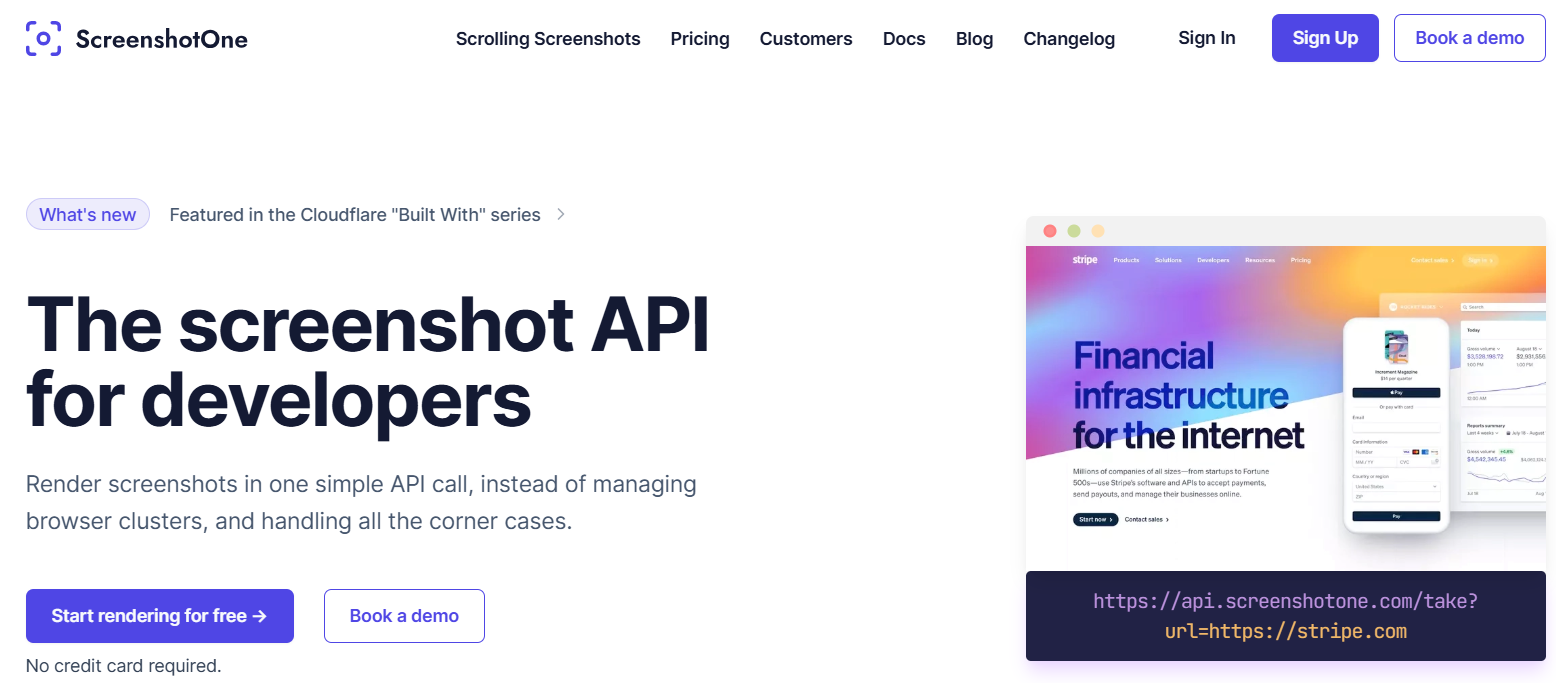
ScreenshotOne is a sleek, intuitive, and user-friendly snipping tool designed to simplify the entire process of capturing, editing, and sharing screenshots. Whether you’re working on a presentation, providing feedback, or documenting a technical issue, ScreenshotOne makes it easy to capture high-quality screenshots in just a few clicks. The tool offers a clean interface, ensuring that even beginners can use it with ease. Beyond simple screen captures, it includes powerful annotation features—such as drawing tools, text insertion, arrows, and highlights—that help you mark up images for clarity and better communication. Ideal for professionals, educators, designers, and everyday users, ScreenshotOne streamlines the workflow and enhances productivity when working with visual content.
Key Features
- Multiple capture modes include full screen, window, and custom region.
- Built-in editing tools for annotations, text, arrows, and shapes.
- Easy sharing options via email or cloud services.
Pros
- Intuitive interface suitable for beginners.
- Quick capture and editing processes.
Cons
- Limited advanced features compared to paid tools.
- Basic sharing options.
2. LightShot
LightShot is a lightweight, fast, and highly efficient snipping tool renowned for its simplicity and ease of use. Designed with user convenience in mind, LightShot allows you to quickly capture any part of your screen with just a few clicks. Its minimal interface ensures that even beginners can navigate and use it effortlessly. Beyond basic screen capturing, LightShot offers built-in editing tools that let you annotate, highlight, or add text to your screenshots instantly.
Key Features
- Easy selection of any area of your screen.
- Built-in editor for adding text, shapes, and highlights.
- Direct upload to cloud and social media integration.
Pros
- Simple and fast to use.
- Good cloud sharing options.
Cons
- Lacks advanced editing features.
- Limited to basic screenshot functions.
3. Greenshot- Snipping Tools
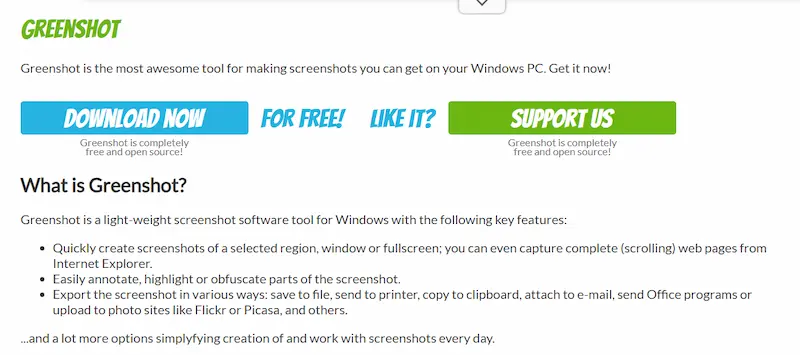
is a powerful, open-source snipping tool that offers a comprehensive set of features for capturing, editing, and sharing screenshots with ease. Ideal for both casual users and professionals, Greenshot allows you to quickly capture the entire screen, a selected window, or a custom region. What sets Greenshot apart is its built-in image editor, which enables users to annotate, highlight, blur sensitive information, and add text or shapes directly to their screenshots. The tool also supports seamless integration with external image editors and productivity tools like Microsoft Office, as well as direct uploads to cloud platforms or image-hosting services. Lightweight and highly customizable, Greenshot is a feature-rich solution for anyone looking to streamline their screenshot workflow on Windows.
Key Features
- Various capture modes include region, window, and full screen.
- Editing options such as arrows, text, and highlights.
- Ability to save directly to file or clipboard.
Pros
- Robust feature set for a free tool.
- Open-source with active community support.
Cons
- The interface may seem dated.
- Limited cloud sharing options.
4. Snagit
Snagit is a highly popular and feature-rich tool renowned for its advanced screenshot capturing and screen recording capabilities. Designed for professionals and content creators alike, Snagit allows users to capture anything on their screen—from full-page scrolling screenshots to specific regions or windows—with precision and ease. Beyond basic snipping, it includes robust editing tools that enable you to annotate, highlight, blur, crop, and even add callouts or text. One of Snagit’s standout features is its screen recording functionality, which supports video capture with audio and webcam integration, making it ideal for tutorials, presentations, and product demonstrations. With seamless sharing options to platforms like email, cloud storage, and collaboration tools, Snagit streamlines the entire content creation and communication process.
Key Features
- Multiple capture options, including scrolling capture.
- Advanced editing tools for images and videos.
- Cloud storage integration.
Pros
- Powerful and versatile tool.
- Extensive editing features.
Cons
The free version is limited; the full version requires payment.
Can be overwhelming for new users.
5. PicPick- Snipping Tools
PicPick is a versatile and free snipping tool that combines ease of use with a comprehensive set of editing features, making it a great choice for both casual users and professionals. It allows you to capture full screens, active windows, specific regions, or even scrolling windows with just a few clicks. Once captured, you can enhance your screenshots using PicPick’s built-in image editor, which includes tools for drawing shapes, adding text, highlighting areas, blurring sensitive information, and applying various effects. The software also includes advanced features like a pixel ruler, protractor, colour picker, and whiteboard, which are particularly useful for designers and developers.
Key Features
- Capture full screen, active window, or custom areas.
- Built-in image editor with effects, text, and shapes.
- Colour picker and pixel ruler tools.
Pros
- Comprehensive editing capabilities.
- Additional tools like a colour picker and a ruler.
Cons
- The interface can be cluttered.
- Some features are limited in the free version.
6. ShareX
ShareX is a powerful open-source screen capture and productivity tool that goes far beyond basic screenshot functionality. It allows users to capture full screen, specific windows, regions, or even scrolling web pages with precision and ease. What sets ShareX apart is its wide array of advanced features, including screen recording (with or without audio), GIF creation, customizable workflows, and automated upload options to various cloud and hosting services. The built-in image editor, annotation tools, and effects give users complete control over their captures, while the customizable hotkeys and workflow settings streamline repetitive tasks. Ideal for developers, content creators, and tech-savvy users, ShareX also includes tools like a colour picker, ruler, QR code generator, and even OCR for extracting text from images. Despite its rich feature set, ShareX remains lightweight and completely free, making it one of the most robust snipping tools available for power users.
Key Features
- Multiple capture modes, including scrolling and region capture.
- Advanced editing tools and image effects.
- Automation features for uploading and sharing.
Pros
- Highly customizable and feature-rich.
- Supports various file formats and destinations.
Cons
- Steeper learning curve.
- The interface may be overwhelming for beginners.
7. Snipping Tool- Snipping Tools
Snipping Tool is a built-in screenshot utility for Windows users that offers a simple and convenient way to capture screen content. It allows users to take quick snapshots of the entire screen, a specific window, or a custom rectangular or free-form area. With its straightforward interface, the Snipping Tool is ideal for users who need basic screenshot functionality without the need for third-party software. Once a screenshot is captured, users can annotate it using the built-in pen, highlighter, and eraser tools. Although it lacks advanced features like screen recording or cloud integration, it remains a reliable and easy-to-access tool for everyday screenshot tasks, especially for users who prefer a no-frills, native solution.
Key Features
- Capture full screen, window, or free-form snips.
- Basic annotation options with a pen tool.
- Easy access and use within Windows.
Pros
- No additional installation needed.
- Simple and straightforward to use.
Cons
- Limited features compared to third-party tools.
- Basic editing options.
8. ScreenRec
ScreenRec is a versatile and user-friendly tool that combines both screenshot and screen recording capabilities in one streamlined package. Ideal for professionals, educators, and everyday users, ScreenRec allows you to quickly capture high-quality images of your screen or record video with audio in just a few clicks. One of its standout features is the ability to instantly generate private sharing links, making it easy to collaborate or distribute content securely. Despite being free, ScreenRec doesn’t compromise on functionality—it includes annotation tools, cloud storage, and analytics to track views. Its intuitive interface and lightweight design make it a go-to solution for those who want a hassle-free experience without the learning curve of more complex software.
Key Features
- Capture screenshots and record screen activity.
- Instant sharing with secure cloud storage.
- Simple annotation tools.
Pros
- Combines screenshot and screen recording functions.
- Secure and easy sharing options.
Cons
- Limited advanced editing features.
- Free storage space can be restricted.
9. Droplr- Snipping Tools
Droplr is a powerful cloud-based tool designed to simplify the process of capturing, annotating, and sharing screenshots and screen recordings. Ideal for teams, remote workers, and creatives, Droplr allows users to quickly capture visual content and instantly generate a short link for easy sharing. Its intuitive interface supports both still image and video capture, complete with annotation tools for highlighting key points. What sets Droplr apart is its seamless cloud integration, enabling users to store, organise, and access their captures from anywhere. With features like password-protected links, custom branding, and detailed analytics, Droplr offers a professional and efficient solution for visual communication and collaboration.
Key Features
- Quick capture and automatic upload to cloud storage.
- Built-in editing tools for annotations and highlights.
- Easy sharing with a short link.
Pros
- Fast and efficient cloud-based sharing.
- User-friendly interface.
Cons
- The free version has limited features.
- Requires an internet connection for cloud sharing.
10. FastStone Capture
FastStone Capture is a lightweight yet feature-rich snipping tool that offers robust capabilities for capturing and editing screenshots with ease. Despite its small footprint, it includes a wide array of tools such as screen recording, scrolling window capture, freehand region selection, and multiple output formats. FastStone Capture also features a built-in editor that allows users to annotate, highlight, crop, resize, and add effects to screenshots, making it ideal for both quick tasks and detailed image documentation. With customizable hotkeys, automatic file naming, and direct sharing options, it’s a highly efficient tool suited for professionals, educators, and everyday users who need reliable screen capture functionality without the bulk.
Key Features
- Capture screenshots, scrolling windows, and screen activity.
- Editing tools for annotations, text, and effects.
- Ability to save in various formats.
Pros
- Reliable and quick.
- Robust editing features for a free tool.
Cons
- The interface may be less modern.
- Some features are restricted to the paid version.
11. TinyTake- Snipping Tools
TinyTake is a straightforward and user-friendly tool that provides both screenshot and video capture functionalities, making it a versatile solution for everyday screen recording needs. Designed with simplicity in mind, TinyTake allows users to quickly capture images or videos of their screen, annotate them with text, arrows, and highlights, and easily share them via cloud storage or direct links. It supports capturing specific regions, full screens, or webcam input, and even lets you create short instructional videos or presentations. With its clean interface and efficient performance, TinyTake is an excellent choice for professionals, educators, and casual users seeking a no-fuss screen capture solution.
Key Features
- Capture screenshots, annotate them, and record videos.
- Cloud storage for easy sharing.
- Basic editing tools for annotations.
Pros
- Combines screenshots and video recording.
- Easy cloud sharing options.
Cons
- The free version has limited cloud storage.
- Basic editing capabilities.
12. Aiseesoft Screen Recorder
Aiseesoft Screen Recorder is a versatile and feature-rich tool that excels at capturing both high-quality screenshots and screen recordings. Designed with a focus on precision and clarity, it allows users to record their entire screen, a specific window, or custom-sized regions with ease. Video recording, Aiseesoft supports audio capture from system sound, microphone, or both simultaneously, making it ideal for creating tutorials, gameplay videos, and video calls. Its screenshot functionality is equally robust, offering options for real-time annotation and editing. With intuitive controls, scheduled recordings, and output customisation, Aiseesoft Screen Recorder stands out as a reliable solution for professionals and content creators alike.
Key Features
- High-quality screen capture and recording.
- Editing tools for adding annotations.
- Supports multiple file formats.
Pros
- High-quality recordings and captures.
- Flexible file format support.
Cons
- Limited features in the free version.
- May require an upgrade for advanced features.
13. Awesome Screenshot

Awesome Screenshot is a powerful and user-friendly browser extension that enables quick and effortless screenshot capture, annotation, and sharing directly from your web browser. It supports full-page, visible part, and selected area captures, making it ideal for a variety of tasks such as reporting bugs, saving web content, or collaborating on web design. In addition to screenshots, the tool also allows screen recording with voice narration, making it versatile for tutorials and presentations. With built-in annotation tools like arrows, shapes, text, and blur effects, users can mark up images instantly. Its seamless cloud integration and sharing options make Awesome Screenshot a go-to solution for professionals, educators, and everyday users who need efficient visual communication.
Key Features
- Capture full page, visible area, or selected region.
- Annotate screenshots with text, shapes, and arrows.
- Directly save or share screenshots from the browser.
Pros
- Convenient browser integration.
- Easy-to-use annotation tools.
Cons
- Limited to browser-based use.
- May not offer advanced features found in standalone apps.
14. Monosnap
Monosnap is a versatile and feature-rich tool designed for capturing, editing, and sharing screenshots and screen recordings with ease. It offers a clean, intuitive interface that supports both full-screen and selective area captures, making it suitable for everything from quick snapshots to detailed documentation. Monosnap comes with a powerful annotation toolkit, allowing users to add arrows, shapes, text, highlights, and blur sensitive information. One of its standout features is its seamless integration with cloud storage platforms, enabling instant uploads and effortless sharing through direct links. Additionally, it supports screen recording with webcam overlay, making it ideal for tutorials, feedback sessions, and presentations. Whether you’re a developer, designer, educator, or support professional, Monosnap provides a reliable and flexible solution for visual communication.
Key Features
- Capture screenshots and record video.
- Annotate with text, shapes, and highlights.
- Cloud storage integration for quick sharing.
Pros
- Combines screenshot and screen recording.
- Easy cloud sharing and storage.
Cons
- The free version has some feature restrictions.
- Cloud storage limits may apply.
15. Skitch- Snipping Tools
Skitch, developed by Evernote, is a user-friendly screenshot and annotation tool designed to make visual communication fast and easy. It allows users to capture their entire screen or specific sections with just a few clicks. Skitch’s intuitive interface makes annotating screenshots effortless—you can quickly add arrows, shapes, text, highlights, and even pixelate sensitive information. Ideal for professionals, educators, and everyday users alike, Skitch excels in helping you convey feedback, mark up images, or explain ideas visually. Seamless integration with Evernote allows you to save and organise your captures efficiently, making Skitch a handy productivity tool for both personal and professional use.
Key Features
- Capture, edit, and share screenshots with ease.
- Annotation tools include text, shapes, and arrows.
- Integration with Evernote for easy access and sharing.
Pros
- User-friendly and straightforward.
- Integrates with Evernote for seamless use.
Cons
- Limited features compared to other tools.
- Requires an Evernote account for full functionality.
These free snipping tools offer a range of features to suit different needs, whether you’re capturing screenshots for personal use, professional projects, or educational purposes. Each tool has its own strengths, so consider what features matter most to you and choose accordingly.
How to Use a Snipping Tool: A Step-by-Step Guide
Snipping tools are handy for capturing screenshots and annotating them quickly. Whether you’re using a built-in tool or a third-party application, the basic steps are usually similar. Here’s a straightforward guide on how to use a typical snipping tool effectively:
1. Open the Snipping Tool
Windows Snipping Tool:
Click on the Start menu or press the Windows key on your keyboard.
Type “Snipping Tool” into the search bar and select the app from the results.
Third-Party Tools:
Locate the tool on your desktop or in the applications menu. For browser extensions, open your browser and click on the extension icon.
2. Choose Your Snip Type
Most snipping tools offer several capture modes:
- Rectangular Snip: Drag to select a rectangular area.
- Free-form Snip: Draw a freehand shape around the area you want to capture.
- Window Snip: Click on a specific window to capture it.
- Full-screen Snip: Capture the entire screen.
Select the mode that suits your needs from the tool’s interface.
3. Capture the Screenshot
- For Rectangular or Free-form Snips: Click and drag your cursor to select the area.
- For Window Snip: Click on the window you want to capture.
- For Full-screen Snip: Simply click the capture button, and the entire screen will be captured.
4. Annotate Your Screenshot
- Once you’ve captured the screenshot, most tools will allow you to annotate it with text, arrows, shapes, or highlights.
- Use the text tool to add comments or explanations.
- Use shapes like rectangles or circles to highlight areas.
- Add arrows to point out specific elements.
- These options are typically found in the editing toolbar within the tool.
5. Save or Share Your Screenshot
After annotating, you can save your screenshot:
- Click the File menu and select Save As.
- Choose the file format (e.g., PNG, JPEG) and location on your computer.
Alternatively, many tools offer sharing options:
- Use the Share button to email or upload your screenshot directly to cloud storage or social media.
6. Tips and Tricks for Using Snipping Tools
- Keyboard Shortcuts: Learn the shortcuts for faster access. For example, in Windows 10, pressing Windows + Shift + S opens the snipping tool directly.
- Quick Access: Pin your snipping tool to the taskbar for easy access.
- Editing Features: Explore advanced features like blurring sensitive information or adding callouts.
- Custom Settings: Adjust settings in the tool’s options to suit your preferences, such as default save locations or capture delay.
Visual Aids
To make this process even clearer, consider using screenshots or creating a video tutorial. For example, a series of images could show the step-by-step process of capturing, annotating, and saving a screenshot. Videos can demonstrate how to use keyboard shortcuts or navigate advanced features effectively.
By following these steps and utilising the tips, you can make the most out of your snipping tool, whether for professional tasks, educational purposes, or personal use.

Conclusion
Snipping tools are incredibly useful for capturing and sharing information quickly and efficiently. From taking simple screenshots to annotating and sharing detailed images, these tools can make everyday tasks much easier. We’ve covered a variety of free snipping tools, each with its unique features and benefits. Whether you’re looking for a basic capture tool or something with advanced editing capabilities, there’s likely a tool here that fits your needs.
Take some time to explore these options and find the one that works best for you. Everyone has different preferences, and what suits one person might not be ideal for another. Experiment with a few tools, and see which one aligns with your workflow and requirements.
If you found this guide helpful, please consider sharing it with others who might benefit from it. Also, we’d love to hear about your experiences! Drop a comment below and let us know which snipping tool you prefer and why. Your feedback could help others make a better choice.
Interesting Reads:
Best WordPress Schema Markup Plugins
