Learning how to create social community WordPress website is an ideal way to getting socially interacted with people across the world. At Wbcom Designs we’ve been making community theme for last year. As you all know creating social community WordPress website mean you can easily communicate, chat, share and create forums exactly like Facebook does.
Many people must be thinking Facebook is the one and only social media platform. But nowadays technology has reached so high thanks to WordPress because of it you can get numerous plugins and themes which let you do many amazing works.
Social community WordPress website
When it comes to creating a community website in WordPress there is only coming in every user WordPress user mind i.e BuddyPress with the help of this amazing plugin you can easily create a robust community website. WordPress + BuddyPress allow you to build a beautiful website with key social networking features such as user profiles, groups, mentions, activity feeds and more.
We’re going to cover all the steps needed to create social community WordPress website: from choosing a website name to getting hosting, installing WordPress, Installing BuddyPress, getting BuddyPress compatible with community theme and then getting your community site up and running.
Step 1: Hosting & Installing WordPress
The first and foremost step is getting a domain name (an address for your site) and a hosting account (a server where your website will live) with WordPress installed on that server. You can buy any domain that is available from popular companies like known host etc. The known host provides high quality managed host servers with the best uptime in the industry, giving you the great performance you can depend on.
You will need to spent very limited $ for per year to host a single domain. This cost covers both domain and hosting for your social networking site. Your choice of domain name provider doesn’t matter directly as much as hosting. After choosing the hosting name for you now, you will need to install WordPress on your website. WordPress is an open source and free CMS that you can use for almost anything.
As mentioned before, WordPress is easily manageable and can prepare a social networking site within few minutes thanks to BuddyPress. After installing WordPress now its turn to install BuddyPress that we will discuss in step 2.
Also Read: How To Create A Social Network Site Like LinkedIn On WordPress
Step 2: Installing BuddyPress
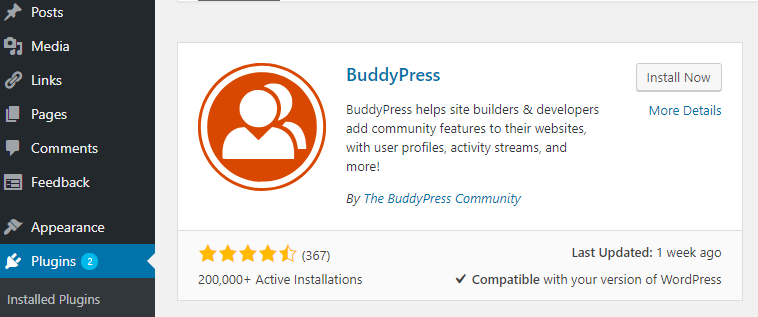
In this step, we will learn how to install BuddyPress. First of all, you can simply install BuddyPress just like any other WordPress plugin. Login to your WordPress site’s Admin Dashboard and navigate to Plugins. Click on the Add New and search for BuddyPress. Click Install and Activate.
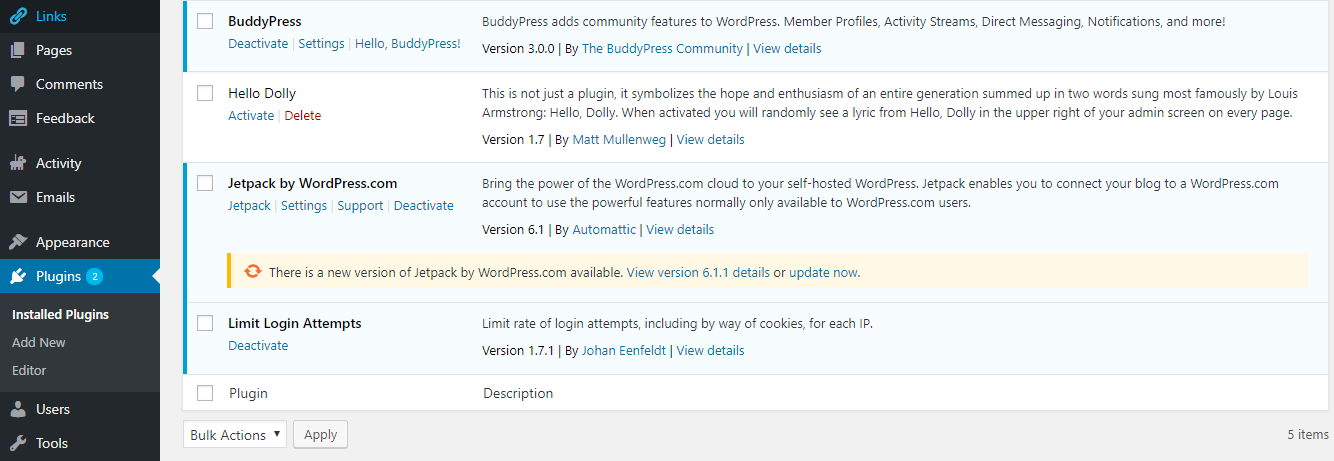
After successful installation, you will get the following welcome screen.
You can easily configure BuddyPress from the Settings tab. Navigate to WordPress Dashboard → Settings → BuddyPress. You will find many components for your site. Enable or disable the components you want.
What exactly do you want your members to be able to do? It’s one thing to “be like Facebook” or “be like Twitter” but in reality, their core features have been around since the dawn of the web – peer to peer communication, organization into groups, links, profiles, etc.
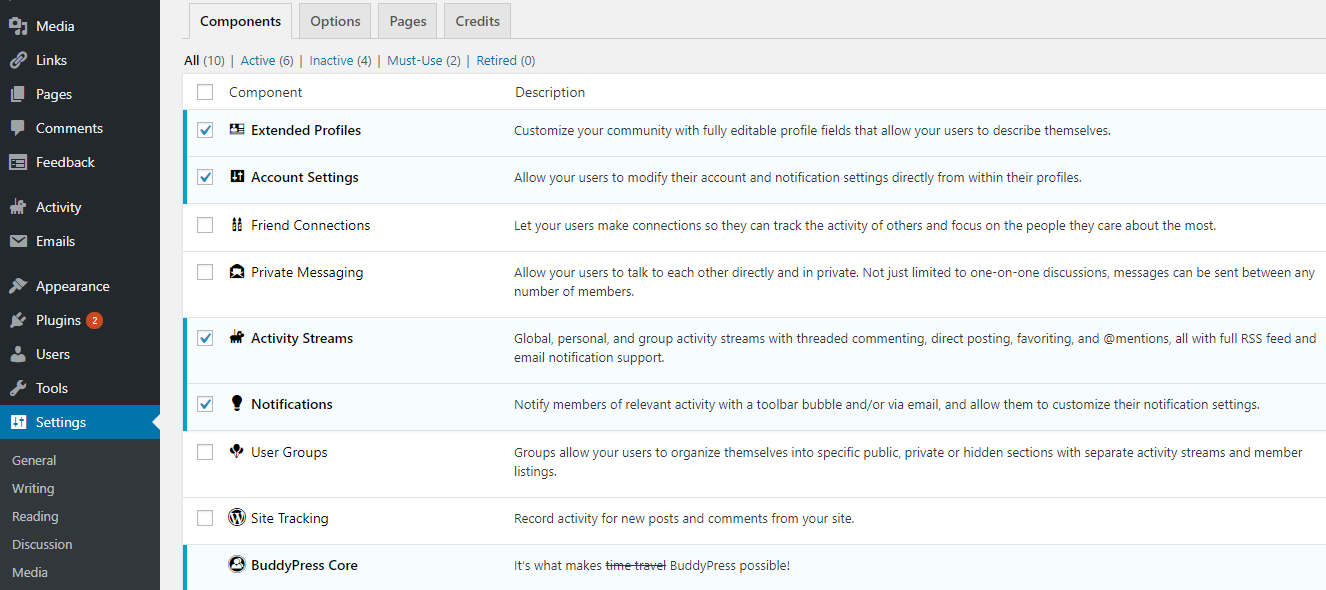
The settings page is divided into different sections. You’ll first see the components page which shows you currently active BuddyPress components on your site.
The default components would work for most websites. However, you can activate or deactivate a component by simply checking and unchecking the box next to it.
Don’t forget to click on the save settings button to store your changes.
Next, you need to click on the Pages tab. Here you can select the pages you would like to use for different BuddyPress sections on your site.
Automatically Create Pages
By default, the plugin will automatically create pages for you. You can change them and use a different page if you want.
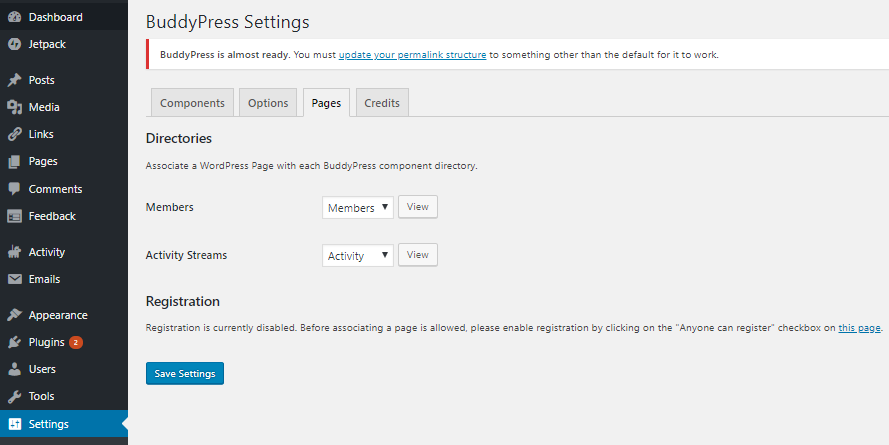
If you don’t see the option to select registration and activation pages, then you need to enable user registration on your WordPress site.
Options Tab
Now, you will need to switch to the ‘Options’ tab.
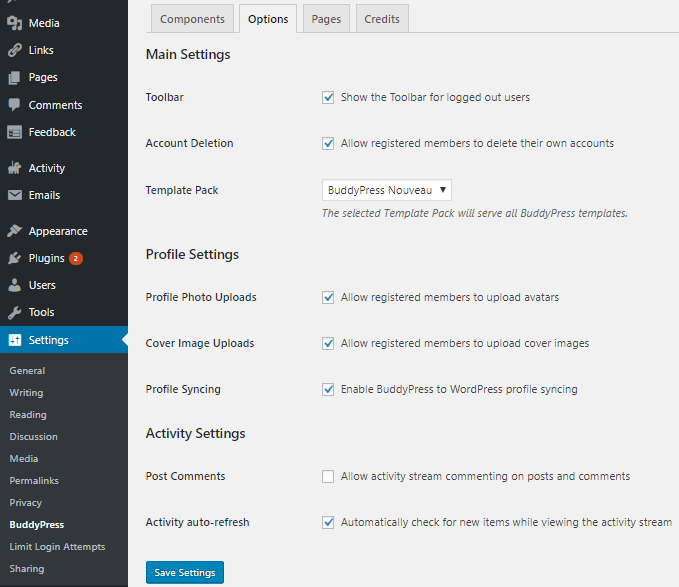
Here you will find different settings that you can turn on/off in BuddyPress. The default settings will work for most websites, but you can review and change them as needed.
Also Read: Points To Consider While Installing WordPress Plugins On Your Website
Step 3: Getting BuddyPress compatible with the community theme
Now when it comes to getting BuddyPress compatible with the community theme the one and only theme come in mid i.e Reign BuddyPress theme.
Wbcom Designs have designed Reign is a BuddyPress WordPress theme that has been created to help you build a community or networking website. Thanks to the capabilities of BuddyPress, you can easily use a range of popular social networking features on your WordPress website.
With the help of this theme, you can build a social network for your company, school, sports team, or niche community all based on the power and flexibility of WordPress. Reign combines our love for great design and content optimization options into one theme with community and eCommerce features. It is a well-programmed WordPress theme based on extensive research to help you, community owners, store owners, to deliver remarkable experiences to your members/customers in the best possible way.
-
Customization-Social Community
Reign comes with unlimited template customization options, page builder option using which you can customize every section of your website as per your choice. The theme has inbuilt support for BuddyPress and WooCommerce and lots new shortcodes which will allow you to customize any part of the template as per your choice.
It comes with multiple predefined header/footer options and also let you build your header/footer style with the help of various elements using simple drag and drop options.
You will also have inbuilt dedicated support for BuddyPress template files and compatibility with coming nouveau template updates.
-
Social Networking Platform
We have also enhanced members and group directory pages including single profile page as well. it comes with full BuddyPress support. As Reign is a BuddyPress WordPress theme, it should come as no surprise to learn that it includes full support for this plugin. After activating Reign and the BuddyPress plugin on your website, you’ll have everything needed to create your social networking platform.
Through the Reign page templates and the BuddyPress functionality, you can give your visitors the ability to create profiles on your site. They can then set up community areas. Profile walls and activity streams similar to those found on sites like Facebook can also be enabled too.
Also Read: 5 Essential BuddyPress plugins For a Community Website
Step 4: Getting started with Reign theme
Easy Installation and Setup
Getting started with Reign couldn’t be easier. Once you’ve downloaded the theme files, log into your WordPress dashboard and upload them to your website. After activating the theme, you’ll be prompted to install the required plugins. Thankfully, this only takes a few clicks.

With all these extra powerful tools now active on your site, you’ll be well on your way to creating your new website. Now you have the option of installing one of the two Reign website demos.

You can also preview the demos from the Theme Installer section of your WordPress Dashboard. If you decide to import one of the demos, it only takes a few clicks and the process should run smoothly. Then it’s up to you to use the Customizer and Elementor tools mentioned earlier in this Reign theme review. These two tools will enable you to personalize your website as much as or as little as you want.
You have learned how to create a Social Community website
Congratulations now, you are all set to go live on your social community WordPress website. We’ve covered how to choose your domain name, purchase hosting, get WordPress set up, Install Buddypress, Getting BuddyPress compatible with Reign theme. For your convenience, here are the links and resources we mentioned:
- Known Host for WordPress hosting.
- Installing BuddyPress
- Reign BuddyPress theme – A excellent community theme by Wbcom Designs.
Conclusion of Social Community
Now, you are all set to run your own community WordPress website. Thanks for reading! We hope this guide has been useful for you. You can ask any questions you have in the comments, and we’ll endeavor to get back to you as soon as we can. Happy socializing.
Interesting reads: